bacon tomato grilled cheese

Bacon Tomato Grilled Cheese

Posted on
Follow Me on PinterestPin It

bacon tomato grilled cheese
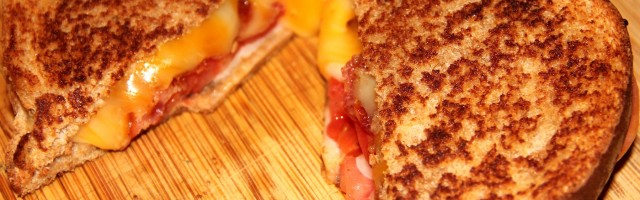
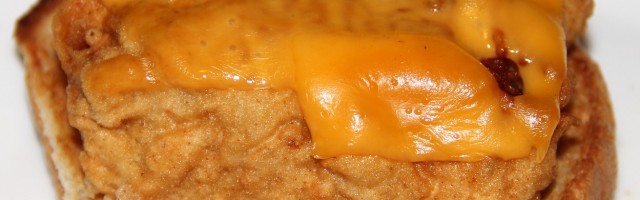
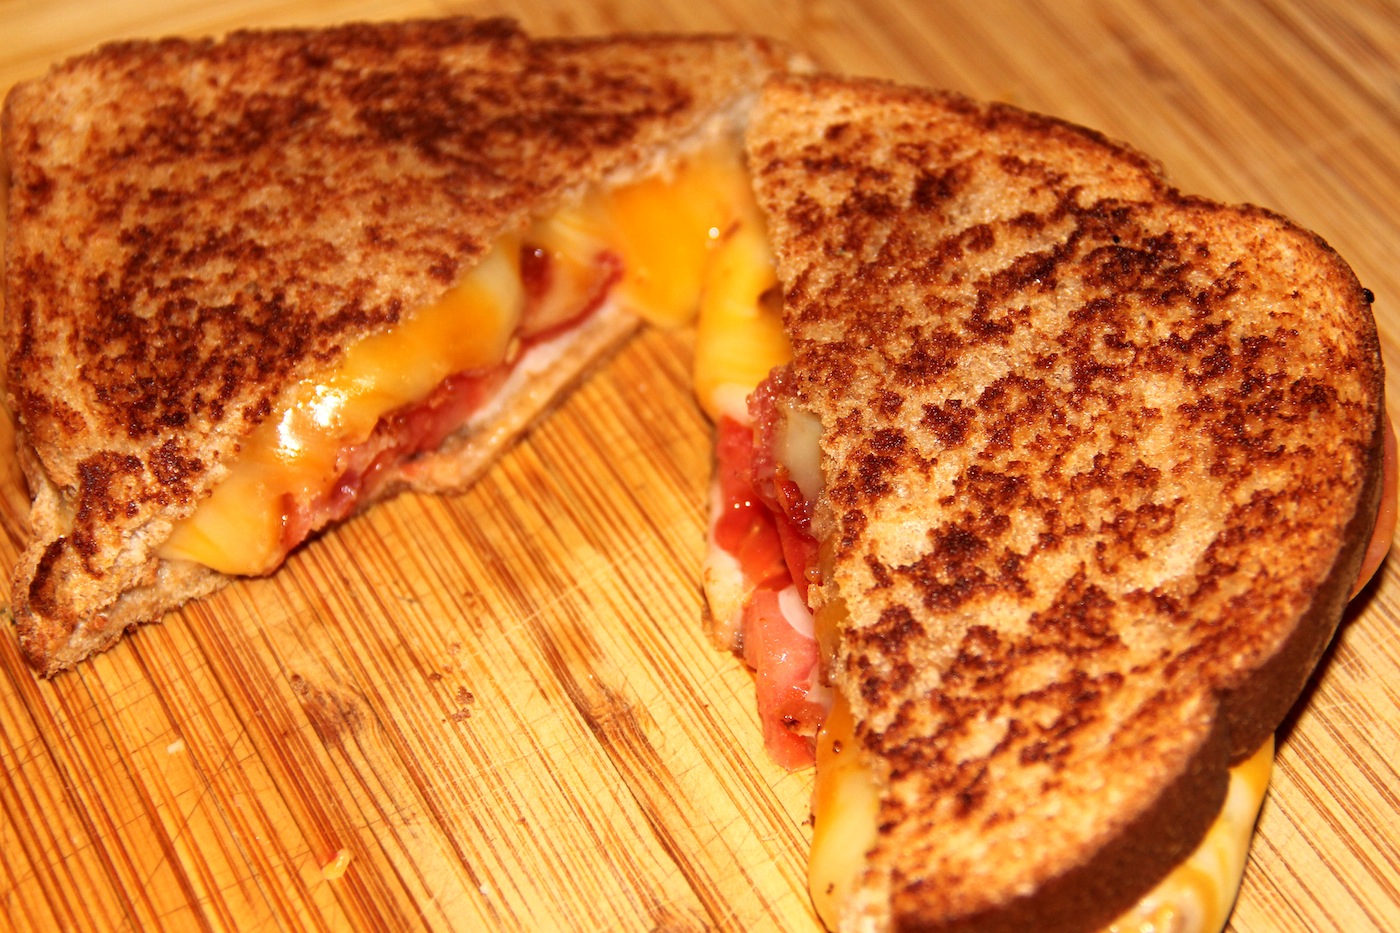
It’s no secret by now that I LOVE grilled cheese sandwiches. I probably should have a category just for all the grilled cheeses I have made. I made a bacon, tomato grilled cheese and ate with tomato soup and it was delicious. But how can you go wrong with melted cheese and bacon?

Ingredients:

  • 2 slices of bread
  • 1 slice Muenster cheese
  • 1 slice Colby Jack cheese
  • 2 pieces of bacon cut in half
  • 2 slices of tomato
  • butter

Directions:

  1. Fry up the bacon, I like to get it out of the pan something between limp but still cooked and so crispy that it crumbles easily. 
  2. Heat up the pan to medium heat
  3. Butter one side of each piece of bread
  4. Place one slice of bread butter side down onto the hot pan
  5. Put one slice of cheese followed by the bacon, then the tomatoes and then the other slice of cheese on the bread
  6. Put the other piece of bread on your sandwich, butter side up
  7. Flip the sandwich over, after the bread is a nice brown color on the bottom and the cheese closest to the pan is melted
  8. Remove the sandwich from the pan after the other side is brown and cheese is melted
  9. Enjoy!
*If it seems like your bread is browning before the cheese has melted, try turning down the heat and placing a lid over the pan for a minute to help the cheese melt faster. 

knit belt pattern

Slip Stitch Knit Belt Pattern for Kids

Posted on
Follow Me on PinterestPin It

knit belt pattern

I decided to make slip stitch knit belts for nieces because I loved mine so much! But the problem was the pattern is for an adult and too wide for 4 and 6-year-old girls. I needed to come up with a new knit belt pattern. You can find the adult version in Chick with Sticks. I decided to use the leftover yarn from when I knitted wash cloths. It’s 100% cotton and I think worsted weight? Actually, I’m making the weight of the yarn up because I no longer have the labels for them. I’ll have to remember to keep them from now on.

Using US size 4 needles (3.50mm), I cast on 6 stitches.

Knit stitch the first 4 stitches

Bring the yarn forward

Slip stitch the last 2 stitches

Repeat until desired length, I usually go about 4-6 inches longer than waist size

Cast off.

I hope my nieces love them!

knit belt pattern

knit belt pattern


hem shorts

How to Hem Shorts and Pants

Posted on
Follow Me on PinterestPin It

My husband needed his shorts hemmed. They were about an inch too long and it’s almost summer, well it’s May we just aren’t having summer weather yet, his shorts needed to be completed. The measuring and pressing part of hemming them is the most important part of this process. It is with most but usually I don’t pay too close attention but with it I needed to be precise.

Step 1. I needed to figure out what the desired length was and then turn the shorts right side in.

hem shorts

Step 2. Seam rip the bottom of both legs

Step 3. Press the bottom of the shorts and measure and mark desired length.

Step 4. Measure about an inch and a half below your desired finished length and cut off excess fabric.

Step 5. Fold over about 1/4 of an inch and press

hem shorts

Step 6. Fold over about 1.5 inches and press

shorts, pants, hem, shorten

Step 7. Sew your new seam as close to the edge as possible, I moved my needle over to the left and used the foot edge as my guide.

Step 8. Press again, flip right side out and press again.

Step 9. Repeat for the other leg.

hem shorts

inside finished seam

hem shorts

ready to wear close up

hem shorts

ready to wear


Margarita Recipe

Posted on
Follow Me on PinterestPin It

Happy Cinco De Mayo!

I hope everyone is having a great Sunday. Enjoy a cucumber margarita or if you prefer a regular one try this margarita recipe, it’s for an individual drink:

Ingredients:

  • 2oz tequila
  • 2oz simple syrup, the recipe for this can be found on my cucumber margarita page
  • 2oz lime juice
  • ice
  • lime wedge for garnish

Frozen:

1. Combine all ingredients plus around 4 ice cubes and blend.

2. Pour into salted rim cup and garnish with lime wedge

On the rocks:

1. Pour all ingredients over 3 ice cubes in a salted rim glass

2. Stir to mixture

3. Enjoy!


Oven Baked Salmon Recipe

Posted on
Follow Me on PinterestPin It

As a kid I use to hate all types of fish. I’m still not a huge fan of it but I do like oven baked salmon. Here’s how I do it:

Ingredients:

  • salmon fillet
  • olive oil
  • lemon juice
  • salt and pepper
  • dill

Directions:

1. Pre-heat the oven to 450°

2. Lightly coat the bottom of the baking dish in olive oil, I like to use my Misto

3. Place the salmon in the dish, scale side down

4. Squirt a couple of lemon wedges or pour a couple of tablespoons of lemon juice over the salmon

5. Salt and pepper the salmon to taste

6. Put a heavy coating of dill on the salmon

oven baked salmon

7. Place in oven and bake for 9-15 minutes. You always want to make sure it’s cooked all the way, should flake easily, but at around 9 minutes it’s done and tastes more like fish but at around 13-15 minutes it’s more of a steak consistency for me which I prefer.

8. Enjoy!

– If using a convection oven, it will cook a little faster.

– If using a regular oven, the salmon should be baked on the top rack! Otherwise, it will take a lot longer to bake.


Fried Caprese Salad Recipe

Posted on
Follow Me on PinterestPin It

fried caprese salad

Oh yes, this is another fried recipe and another caprese salad recipe combined into one, fried caprese salad. I wanted something fried and greasy but I also wanted to feel like I was attempting to be healthy. :/ So I made caprese salad and fried it. It was pretty good and satisfied my cravings but it’s not something I would make very often, just when I’m feeling the need for healthy and fattening at the same time. Does that make sense to anyone but me?

Ingredients:

  • tomato slices
  • mozzarella slices
  • fresh basil leaves
  • balsamic dressing
  • olive oil
  • bread crumbs
  • egg wash (1 egg 1/2  milk, whisked together)

Directions:

  1. In a small skillet, heat up about a tablespoon of olive oil on medium heat.
  2.  Stack the basil then mozzarella on top of a tomato slice.
  3.  Carefully pick the stack up and dunk in the egg wash.
  4. Coat in breadcrumbs.
  5.  Place in heated skillet, fry until bottom side is a golden to dark brown and flip to other side and fry.
  6. Place on plate and drizzle with balsamic dressing.
  7. Enjoy!


drawstring backpack

How to Make a DrawString Backpack

Posted on
Follow Me on PinterestPin It

drawstring backpack

I needed something lightweight and easy to carry on my long walks with Rusty. I decided to go with a drawstring backpack. It’s big enough to hold everything I need and keeps my hands free. I am using leftover material from my tree skirt and had dyed awhile ago.

Materials:

  • (2) 17″ X 15″ rectangles of fabric
  • (2) 60″ pieces of ribbon, or cording would work great as well
  • safety-pin
  • sewing machine
  • matching thread
  • iron and board

drawstring backpack

Instructions:

1. After you have measured and cut your fabric, I think mine is a cotton/polyester blend, figure out which end of each piece you want to be the top or opening of your bag. Fold over and press a tiny bit of fabric, ~¼”, and sew. Repeat with the other piece. This is to take care of the raw edge at the opening of your bag.

drawstring backpack

2. Next, take what you have just sewn and fold over about an 1½” and press. Then sew on top of the stitch line in Step 1. This will create a tube for your ribbon to go through.

3. With right sides together, pin the rectangles and stitch with a 5/8″ seam all along the three unstitched sides, starting and stopping where the tube begins. Back stitch at the beginning and end.

4. Attach a safety-pin to an end of your ribbon, and thread the ribbon through the tube on one side of the bag. Repeat for the other side. The safety-pin just makes this process easier.

drawstring backpack

5. Make sure that both pieces of ribbon are of equal length on each side of the bag. With right sides still together, seam rip up the bottom corners of the bag about an inch. Place the ribbon, inside the bag and through the hole you just ripped open. Stitch the hole closed, securing the ribbon to the bag.drawstring backpack

6. Next to take care of the raw edges, zigzag stitch all along the three stitched sides to the bag as close the stitch line as possible. This also double secures your ribbon at the bottom of the bag. Trim the excess fabric close to the zigzag stitch.


Now I have the perfect and unique bag for our walks to work! So excited to use it.


7 Layer Dip Recipe

Posted on
Follow Me on PinterestPin It

A party favorite of mine is 7 Layer Dip. Granted mine has eight layers, sometimes nine but 7 layer dip sounds better than nine layer dip to me.

Here is what is needed, but amount depends upon how big of a plate you’re putting it on.

  1. Refried Beans
  2. Guacamole 
  3. Sour Cream
  4. Salsa, I like to use mild
  5. Tomatoes, chopped
  6. Green Onions chopped
  7. Ground beef with taco seasoning (sometimes I omit this)
  8. Shredded Cheese, I prefer cheddar and more specifically a blend of mild and sharp cheddar
  9. Cilantro, chopped

On a plate spread and layer each ingredient in order as it is listed above. Serve with a bag of tortilla chips.

Enjoy!


knit mug cozy

Slip Stitch Knit Mug Cozy Revisited

Posted on
Follow Me on PinterestPin It

I decided to attempt my slip stitch knit mug cozy pattern again because I had so many problems the first time. Well, this one didn’t go according to plan either. My impatience got the better of me, resulting in this:

mug cozy

The pattern is slightly off. Using the yarn left over from my slip stitch belt, 100 % wool Crystal Palace Yarn, with size US 3 (3.25mm) needles, I decided to cast on 70 stitches and do the pattern

Row 1: P3 K2

Row 2: K1 S1 K1 P2

Repeat till desired length, I did 33 rows.

Cast off like it was an odd row so P3 K2.

Sew on button and loop.

But somewhere on Row 17 I noticed I combined two stitches leaving me with only 69 stitches on my needle and instead of  doing the smart thing and undoing my stitches until I found the problem, fix it, and move on, I decided I was too impatient and it was an amazing idea to just cast on another stitch at the end of the row. Wow I was wrong but I  knew I was wrong and did it anyways which makes it even worse. But that’s why my pattern is off. I do like the pattern and I do like my dressed up coffee mug in the morning. I also believe that this could be a great pattern for a cuff/bracelet.

The 70 stitches compared to the 75 in the first one I did it working out a lot better. It fits more of my coffee mugs!

knit mug cozyknit mug cozy


knit mug cozyknit mug cozy


fried fish

Fried Fish Recipe

Posted on
Follow Me on PinterestPin It

fried fish

My husband went ice fishing and brought back some fresh fish. The only problem was that it was already cleaned so I had no idea what kind of fish it was or how to prepare it. So I decided to make fried fish sandwiches. By now no one should be surprised I decided to fry it.

The amounts for everything are for 1 fish fillet. Do equal parts of flour and corn starch for more batter.

Ingredients:

  • 1/2 cup all-purpose flour
  • 1/2 cup cornstarch
  • ~ 3/4 cup water
  • tabasco sauce (optional)
  • celery salt
  • red pepper
  • cumin
  • oil for frying

Directions:

1. Heat a couple of inches of oil, I used canola, in a small sauce pan.

2. In a small bowl, combine flour and cornstarch, season to taste and mix.

3. Add water and a couple shakes of tabasco (to taste, can omit), to the flour mixture and whisk until smooth

4. Coat the fish in the batter, and place in the oil to fry.

fried fish

5. Fry for about 3 minutes on each side, until a nice golden brown. Remove with a slotted spoon. As you can see I didn’t put enough oil in the pan to where the fillet was completely submerged so I flip it.

6. Enjoy!

I like to make a sandwich out of it by placing it on a toasted bun, placing cheese on it right after it comes out of the oil so it melts and a little bit of tartar sauce.