tie onesie

Tie Onesie

Posted on
Follow Me on PinterestPin It

tie onesie

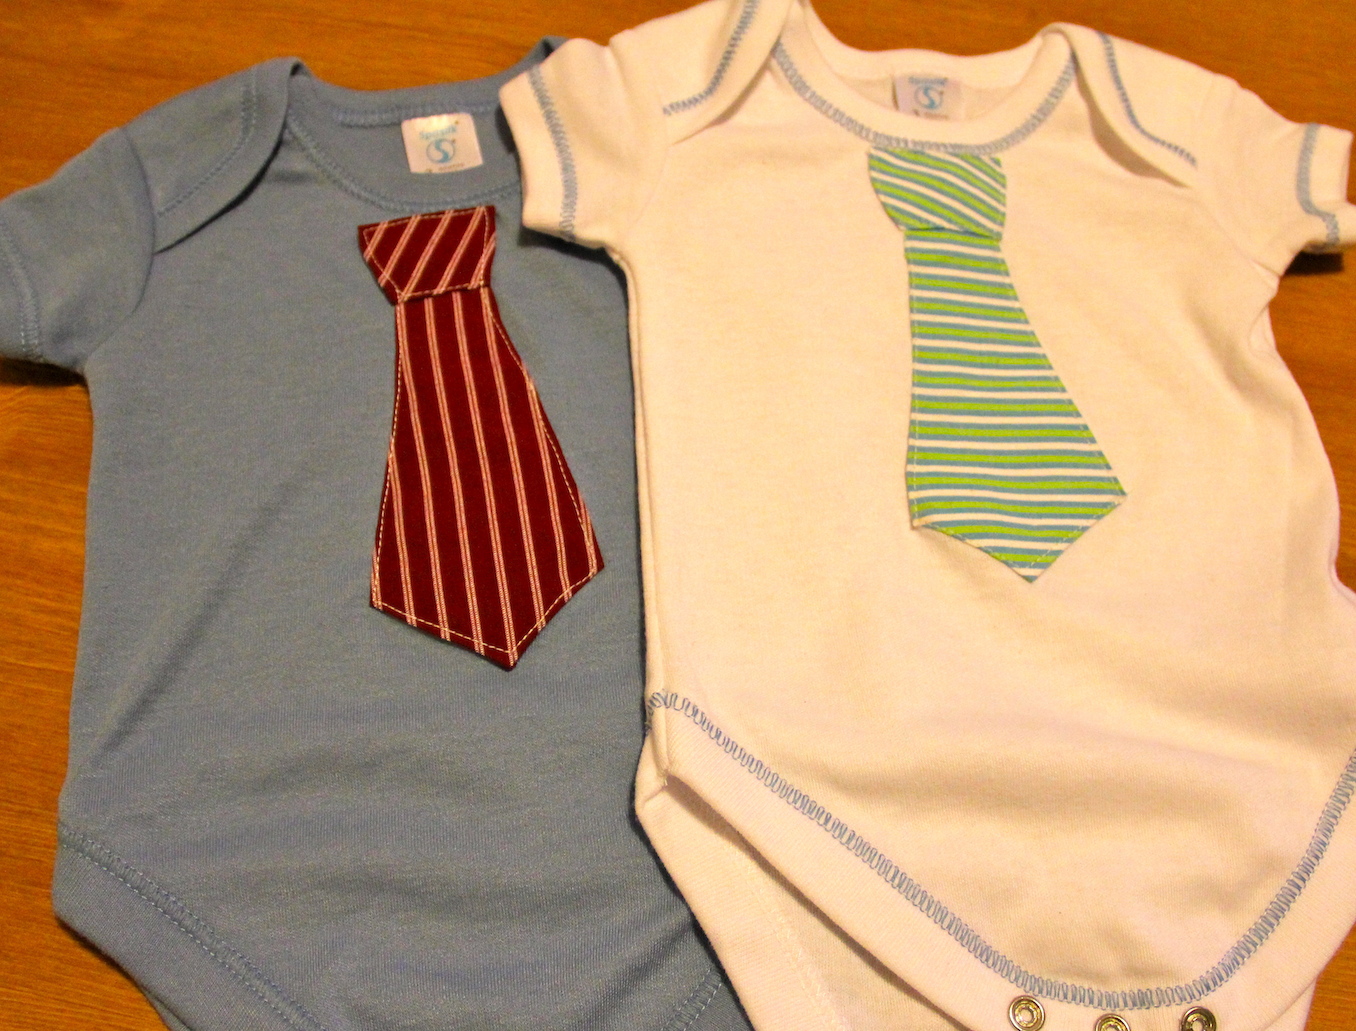
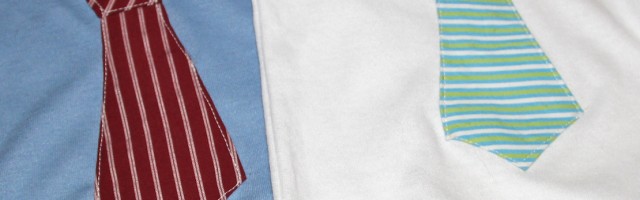
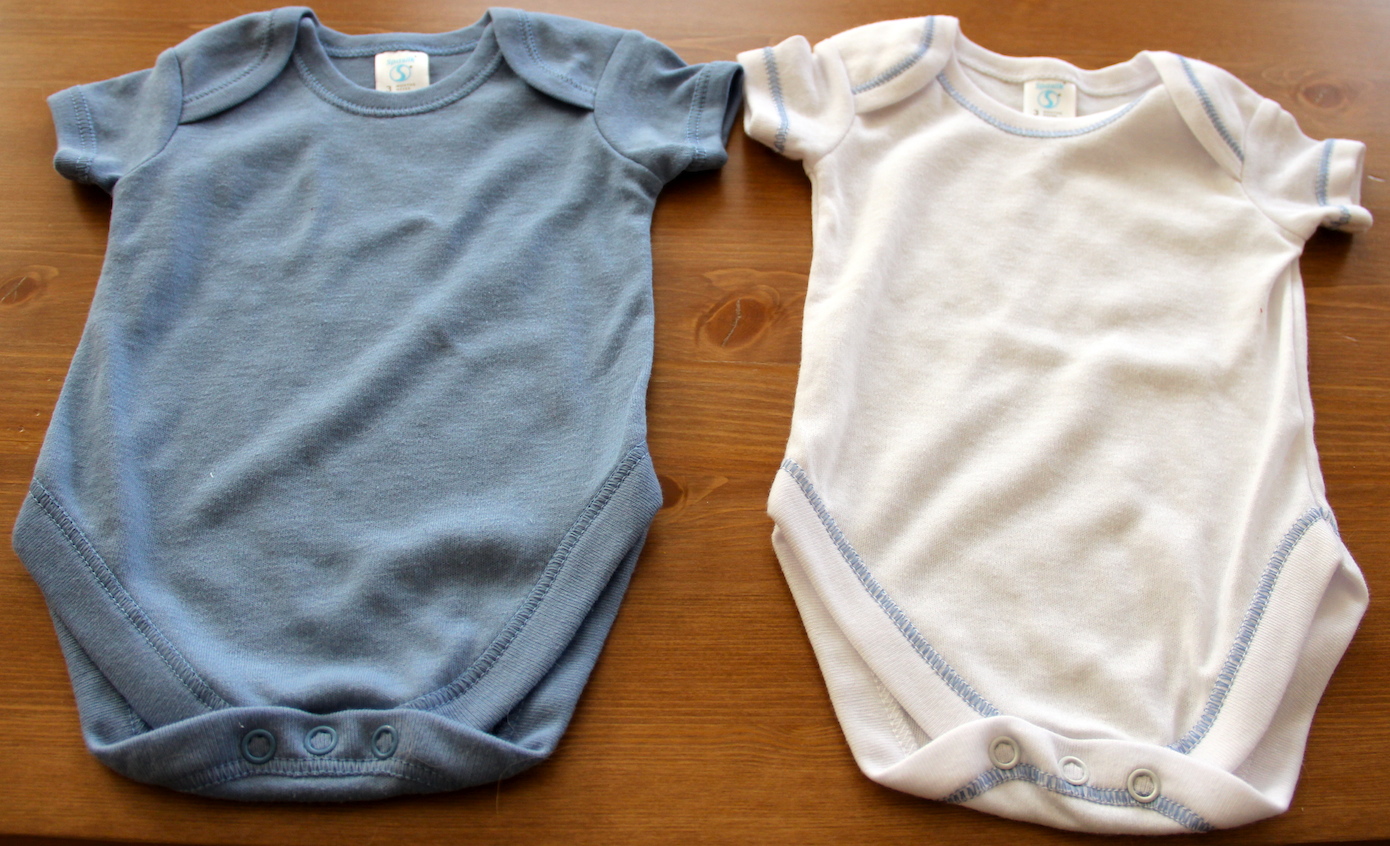
My friend is about to have a baby boy and I wanted to make him something special. I saw this DIY Necktie Onesie tutorial from HauteApplePie.com  and thought that would be the perfect gift. I ended up using the pattern from CrapIveMade.com. Both are great tutorials but I did a few things differently for my tie onesie.

What I used:

  • muslin scraps
  • cotton fabric scraps
  • water-soluble fabric glue stick
  • matching or coordinating thread

What I did:

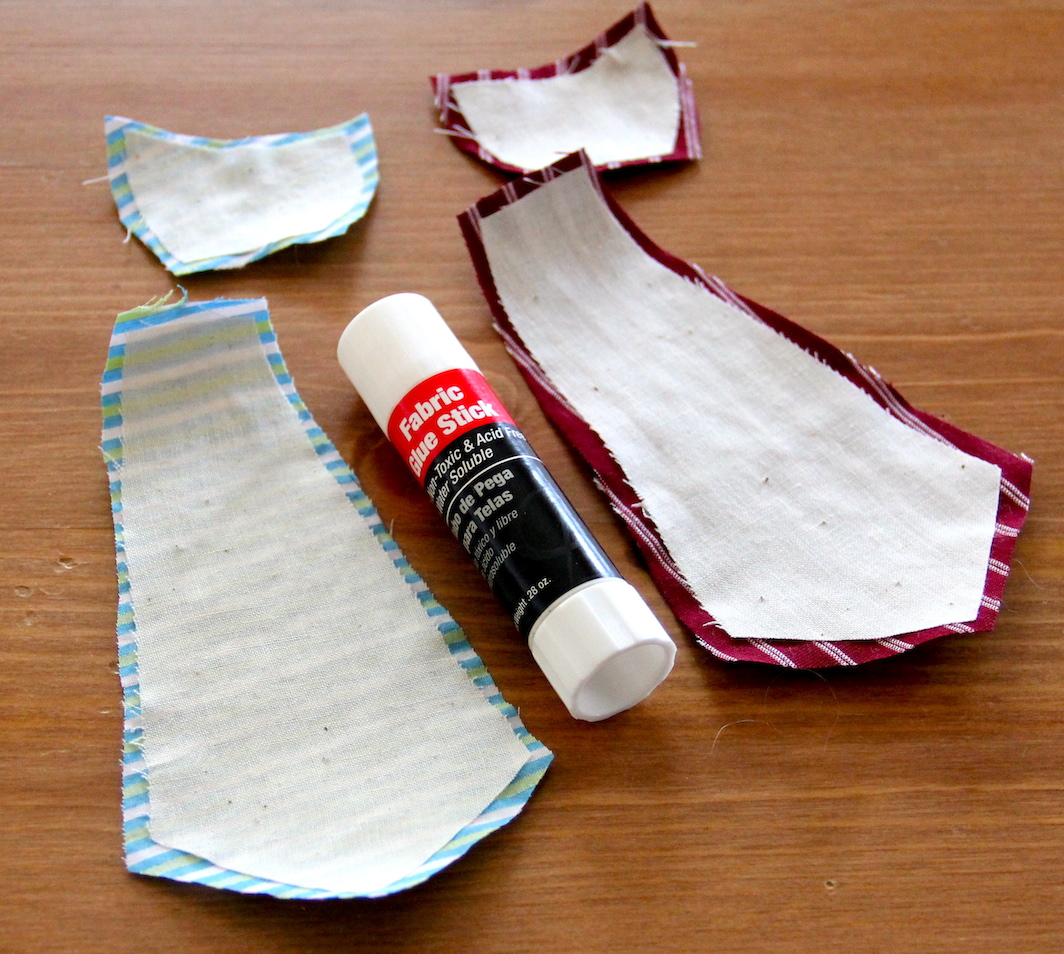
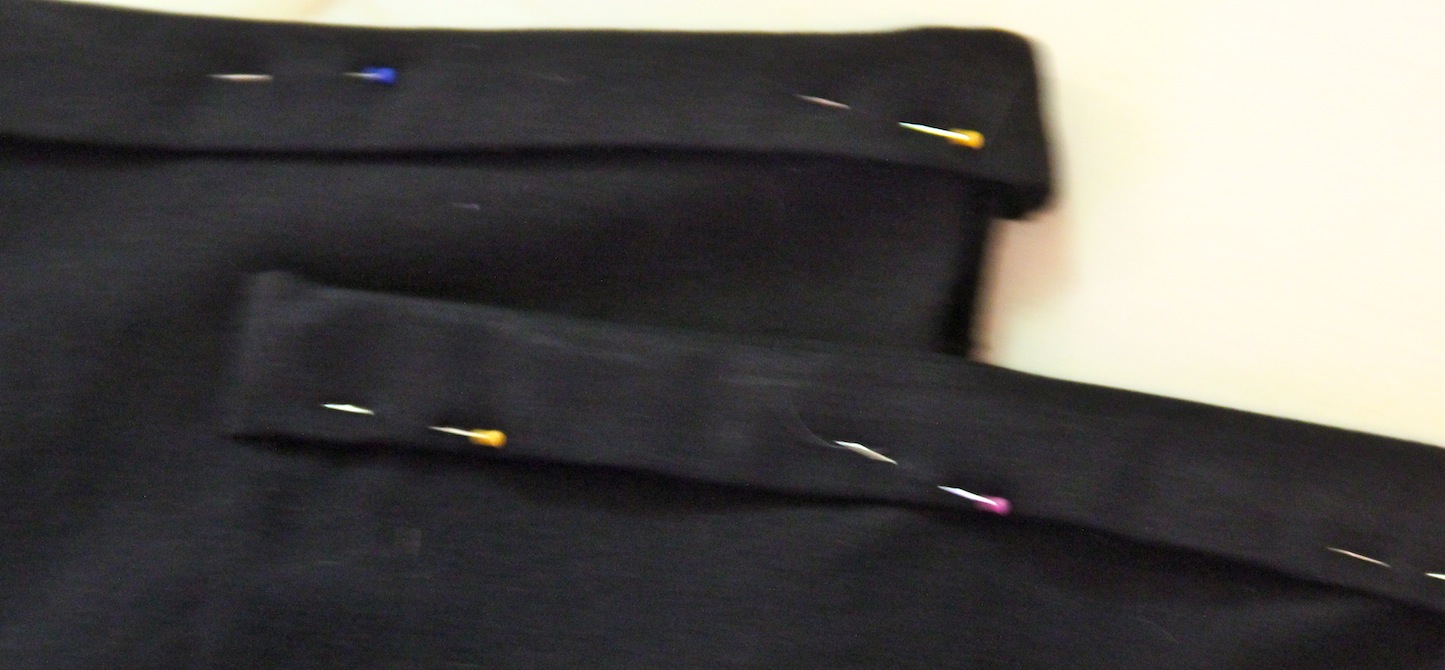
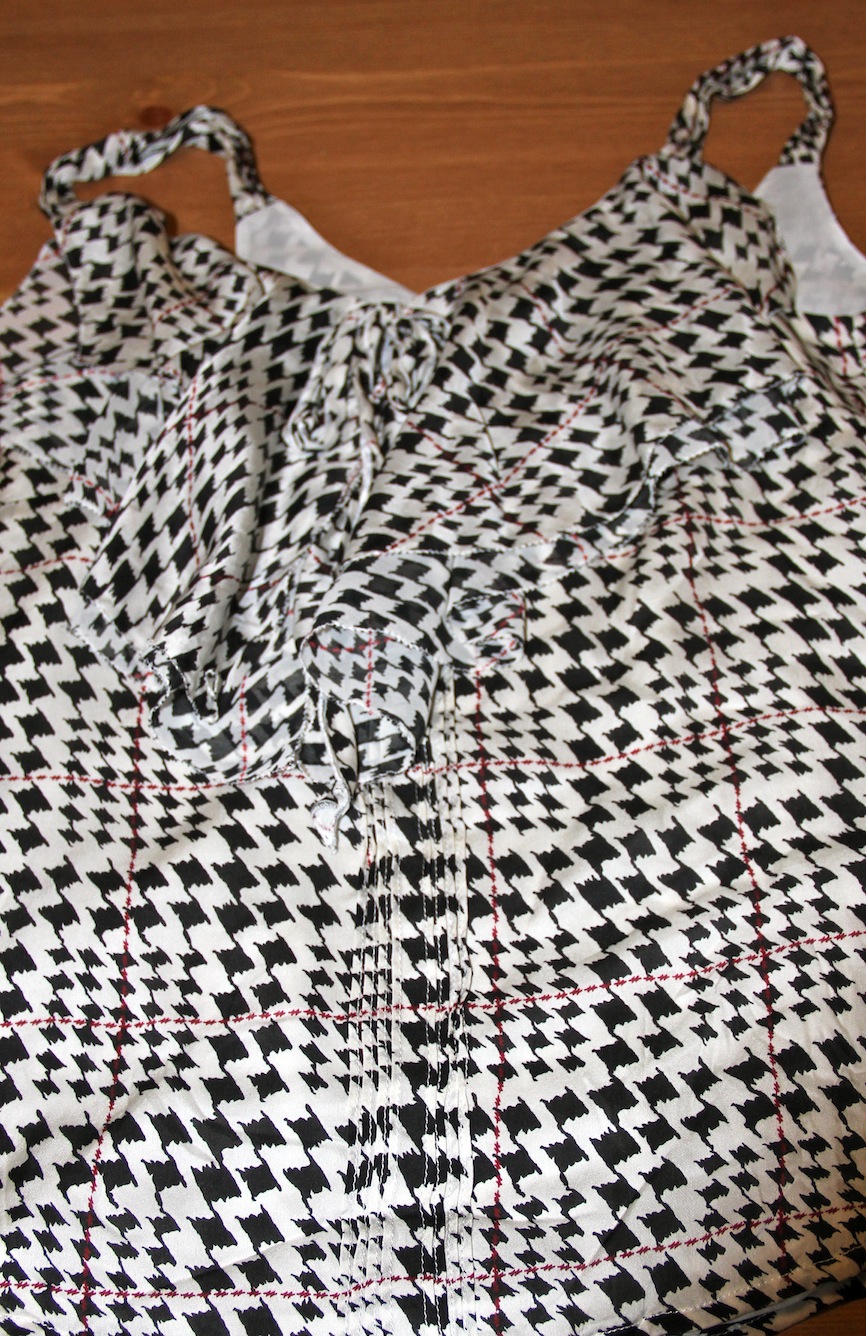
First I cut out the pattern pieces, I angled the knot part to make it look more like a real tie.

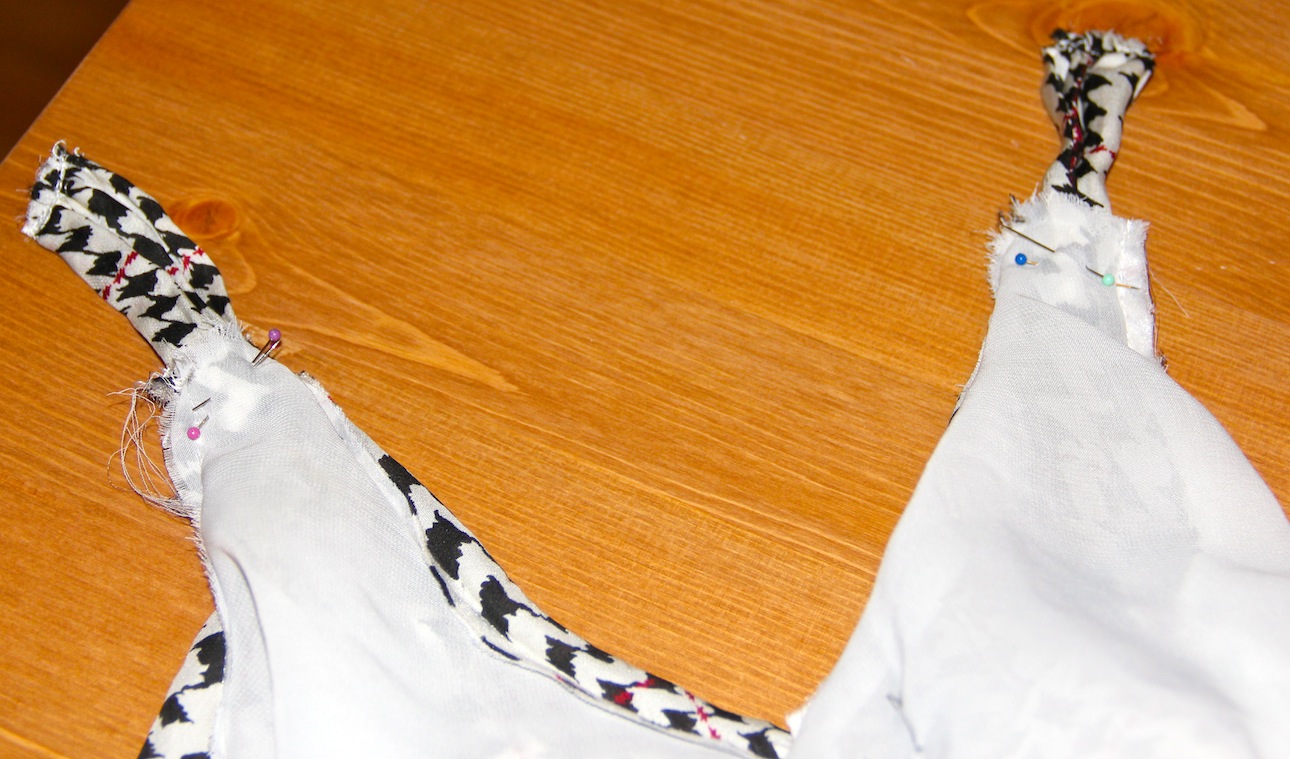
I wanted the tie to be a bit sturdier and I didn’t have interfacing on hand so I used muslin. I cut one of each pattern piece. I then trimmed ¼” off of the muslin piece.

Next, glue the muslin pieces to the wrong side of the patterned fabric pieces, positioning them so there’s a ¼” edge around the muslin.

tie onesie

Iron the ¼” fabric over towards the muslin, being careful of the points. Use the glue to help keep the fabric down. I didn’t iron the top part of the tie because the know will be covering it.

tie onesie

Position the knot over the un-ironed part of the tie, sew a line across the bottom of the knot, connecting the two pieces.

tie onesietie onesie

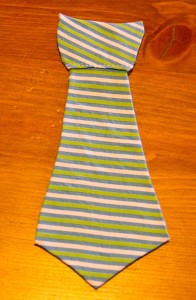
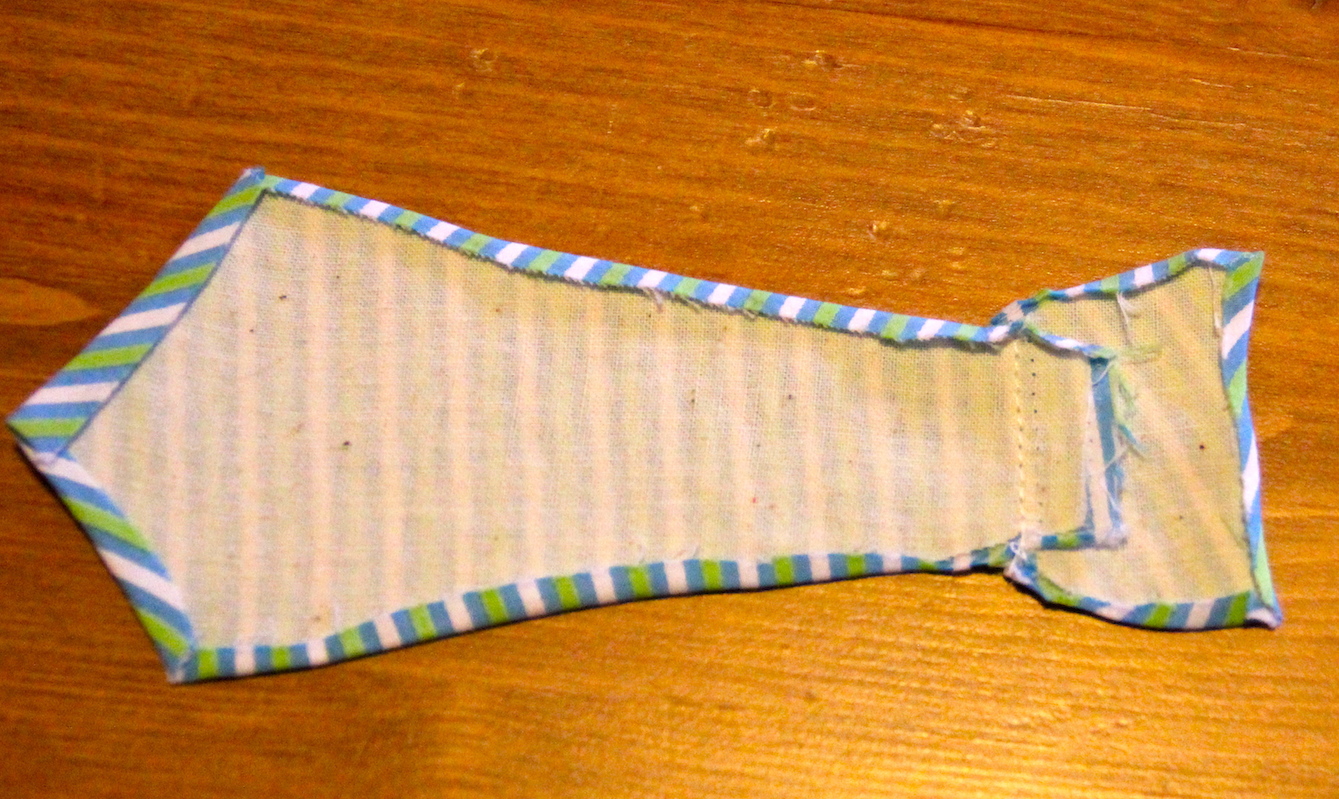
I trimmed the thread and ironed again.

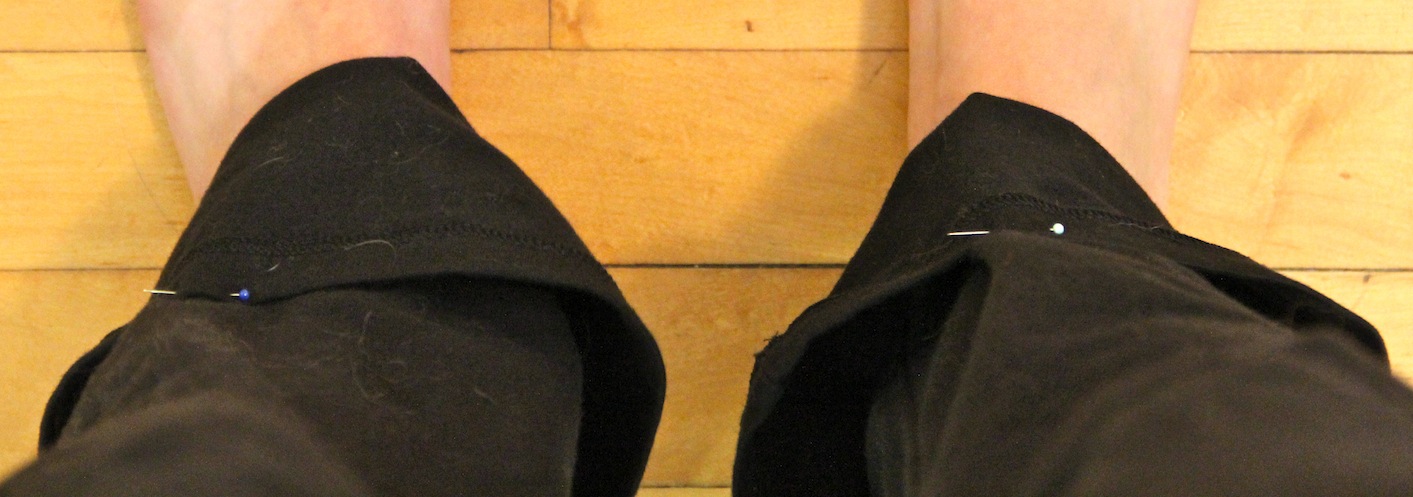
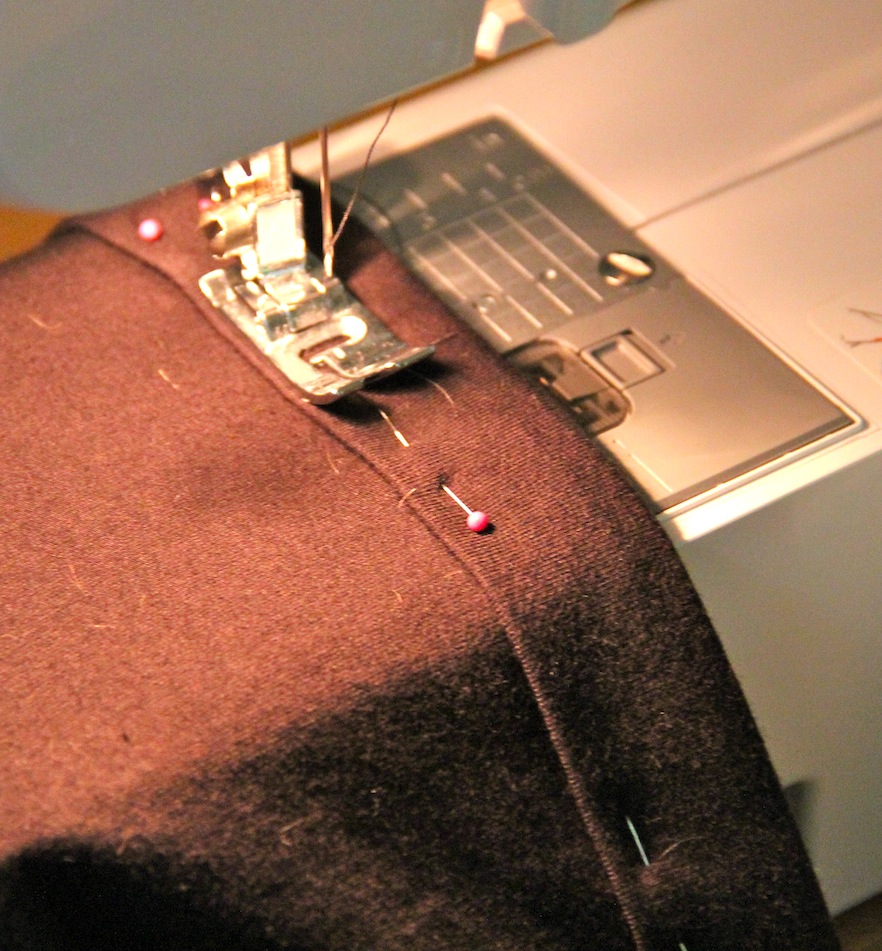
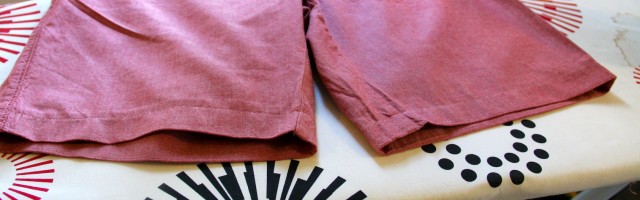
I then took out the universal needle and replaced it with a knit needle because the onesie is a nice stretchy knit cotton. I then positioned and pinned the tie onto the onesie. I did it in a way to where I didn’t have to move the needles as I sewed so I could concentrate on the lines of the tie.

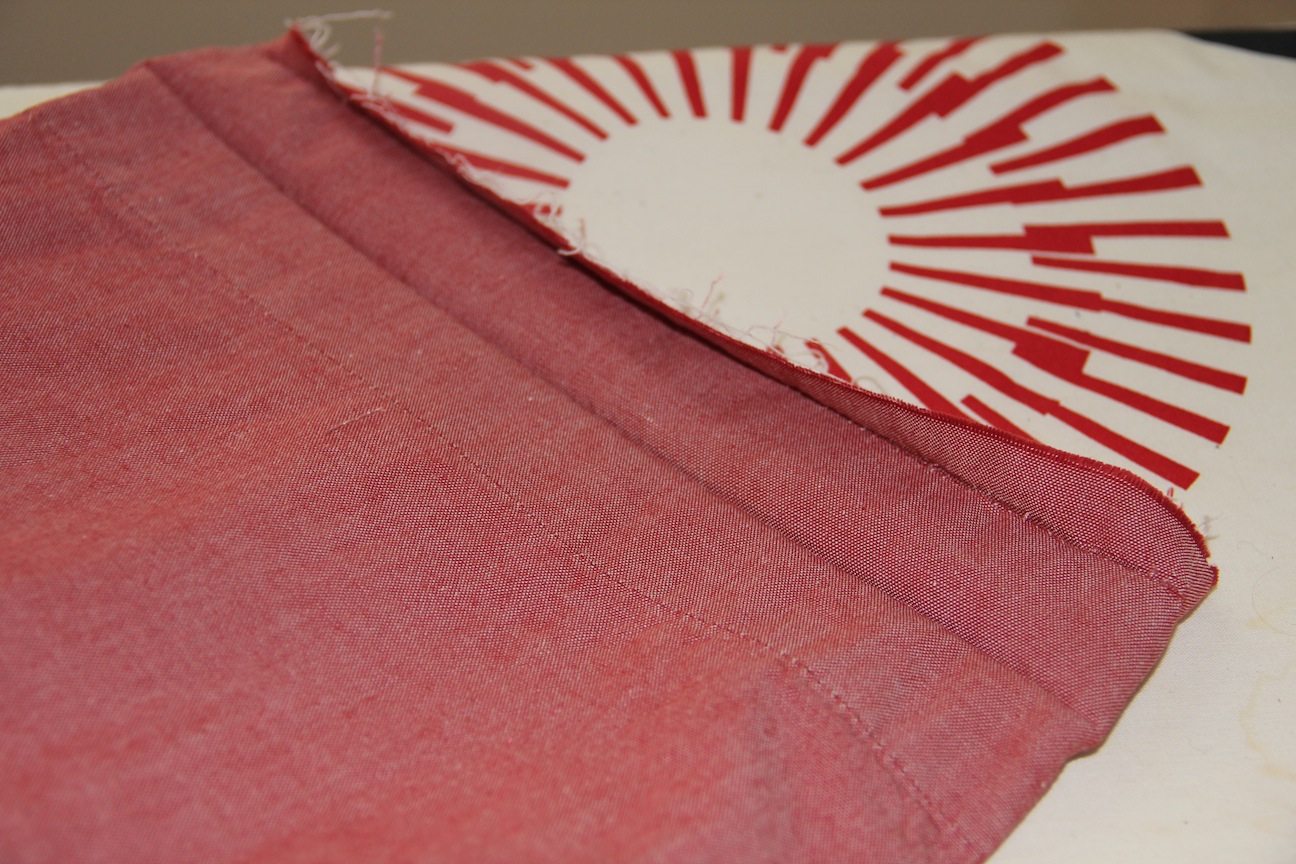
I sewed along all edges of the tie and close to the edge of the fabric as possible, pivoting at the points. Be careful as you sew, go slow. It’s very easy to catch some of the onesie as you sew .
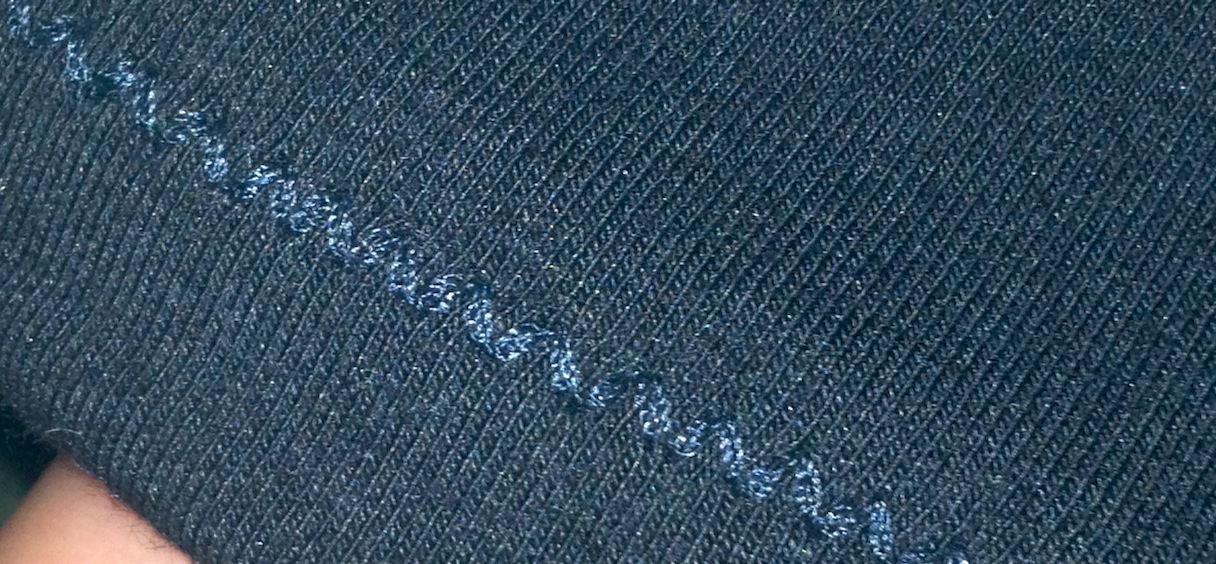
Iron and wash.

Enjoy!

tie onesietie onesie


dress into a skirt

How To Turn a Strapless Dress into a Skirt

Posted on
Follow Me on PinterestPin It

dress into a skirt

I had this strapless dress and although I like it and love the color, I hardly ever wore it. I decided it needed a make over into something I’d actually wear. I made it into a high-waisted skirt and kept the pockets.  I worked on the fit in the waist of the skirt before I moved on to the length of the skirt.

How I did it:

1. Removed the hook and eye and zipper.

dress into skirt

2. Next I removed the top part of the dress being careful to keep the seam stitching on the top part of the band that is in between the top part and the skirt part.

dress into skirt

Close Up of the Seam

3. I shortened the zipper.

dress into a skirt

4. Next I put on the skirt to figure out how much I needed to take in on the waist because it is going to sit at a different spot on my body.

5. Seam rip the side seam.  Mark and pin it together with the new measurements. I left the seam allowance to be quite large to be cut down a bit with pinking shears later if I needed to let out the seam a bit.

6. It’s time to sew the new seam and install the zipper! It is important to note to TEST your FABRIC and USE the CORRECT NEEDLE in your machine. I’m sure you all know that, but I had a blonde moment and didn’t test my fabric first resulting in my universal needle poking/ripping some major holes into the material.

dress into a skirt

blurry picture of the holes that need repaired

The jersey/knit needle worked much better. Mark on the skirt where the zipper will begin. At that point, you’ll back stitch a couple of stitches and then change to a longer or basting stitch on the machine. The basting stitch is where the zipper will go.

7. Press the seam open, and carefully pin the zipper onto the seam making the teeth directly over the seam line. Make sure the pins can easily be removed as you sew the zipper on and that you changed to a zipper foot on your machine.

dress into a skirt

8. After the zipper is installed, it’s time to finish the top hem. Because I cut the top to where there was stitching at on the top band, I simply folded over ¼inch pressed and pinned. I then sewed it and pressed again. The only thing I wish I had done differently with this side seam and zipper would have been to leave space for the hook and eye. Rookie mistake on my part.

9. I put it on to make sure it fit and to figure out the length I wanted. I pinned it to the desired length. I needed to remove about 3½ inches. I marked the skirt to just below the desired length, and cut with my pinking shears. Folded up ¼inch and pressed and pinned.

dress into a skirt

10. Sew that seam! Press! Try on!

11. Enjoy!

dress into a skirt

Finished skirt and bonus flip flop tan lines!


shorten a shirt dress

How to Shorten a Shirt Dress

Posted on
Follow Me on PinterestPin It

dress

I recently bought a shirt dress to wear with boots as a fun fall work outfit but of course it is too long, about 2 inches too long. I knew I needed to shorten my shirt dress. This was going to be tricky for me because of the curves at the bottom. I usually only work with straight lines because my lack of patience usually gets the better of me when trying to work on a curve. But after a long afternoon with Rusty whining behind me from lack of attention I managed to get it to my desired length.

Here’s what I did:

Stood in front of a mirror and figured out how much fabric needed to be taken off the bottom. I pinned the length and then stood up straight to make sure that was my desired length.

shorten a shirt dress

chalk marks

Next I unbuttoned the shirt and laid it out, right side down, and with my chalk pencil, I marked a lot of spots up to the desired length of the dress. Then,  I also marked about an inch below that to serve as a cutting line.

shorten a shirt dress

two rows of chalk

It’s now time for my most time-consuming part, the hem! I needed to clip a couple of spots on the curves in order for the fabric to lay flat. Little by little I rolled over a ¼inch of fabric and then another ¼inch of fabric and pinned. I made sure to put the pins in to where I could sew with them still in the fabric so I’d have one less thing to worry about. And after all of that work, carefully, put the dress back on to make sure it is at the desired length.

http://www.covergirl.com/collections/nfl-collection/chicago-bears

lots of pins

Sew time! Slow and steady with some patience, wins the race because it is a tiny hem and there are curves, it’s best to go slow.

Try on one last time. Good? Press. Now I have a dress that will be perfect with flat and boots this Fall!

shorten a shirt dress


yoga pants

Shortened Yoga Pants

Posted on
Follow Me on PinterestPin It

yoga pants

This always happens when I buy new pants. They’re too long and these new yoga pants are no exception. I was a little worried about altering them because my experience with stretch fabric is next to zero. There was that one time when I used lycra for Rusty’s lions mane. But these pants needed to be about three inches shorter if I was ever going to get any use out of them. And let’s face it, when I say use, I mean lounging around my apartment, not working out in a yoga studio.

yoga pantsI folded and pinned the pants so they were the proper length while they were still on me. I changed and then measured the in-seam and the folded part to make sure that the lengths of each pant leg were even. Also, to see how much length, 3 inches, needed to be taken from each leg.

Next, I removed the pins and turned the pants inside out. I then carefully measured and cut 2 inches from each pant leg.

yoga pants

I then folded over ½ inch of fabric and pressed and then another ½ inch and pressed. Then I pinned the folds into place.

yoga pants

Rusty was not impressed by my cutting and ironing skills. I gave him a stretchy collar but he was even less impressed with that.

yoga pantsI placed my pins so they could be quickly and easily removed as I was sewing. I realized that although my machine can use a double needle, I don’t have two spools of thread in the same color. So that option was thrown out and instead I used a stretch stitch function my machine, a triple zig-zag stitch. I definitely had to pull out my user’s manual to make sure I was doing it correctly, very glad I kept it.

yoga pants

I stitched both legs using the edge of the folded fabric as my seam guide. I then pressed the seams.

yoga pants

I have crazy flip-flop tan lines on my feet. :/

I turned the pants right side out, put them on, and enjoyed my shortened yoga pants by watching TV and cuddling with Rusty.


shirt

How to Shorten Shoulder Straps

Posted on
Follow Me on PinterestPin It

shoulder strap

I bought a really cute top for work, the only problem is that it is not petite sized. The straps are way too long making me expose too much of myself. Luckily I knew I could easily fix this after examining the shirt.

First I needed to figure out how much to take off of the straps so I put it on and pinned them into the correct place. I then carefully removed the shirt and measured the amount I needed to take off.

Next I turned the shirt inside out and got my handy seam ripper and opened the area where the strap connects to the shirt.

shoulder strapNext, I pulled out the 2 inches it needed to be shortened by and pinned it into place. Repeat for the other strap. shoulder strap

Using matching thread and the proper needle, I sewed the shoulder straps into place, using a back-stitch at each end to make sure they’re secure. I didn’t cut off the extra because it’ll be sitting in between the two layers of the shirt so they won’t be an issue. Turn it right side out and brand new shirt that actually fits.

shoulder strap


hem shorts

How to Hem Shorts and Pants

Posted on
Follow Me on PinterestPin It

My husband needed his shorts hemmed. They were about an inch too long and it’s almost summer, well it’s May we just aren’t having summer weather yet, his shorts needed to be completed. The measuring and pressing part of hemming them is the most important part of this process. It is with most but usually I don’t pay too close attention but with it I needed to be precise.

Step 1. I needed to figure out what the desired length was and then turn the shorts right side in.

hem shorts

Step 2. Seam rip the bottom of both legs

Step 3. Press the bottom of the shorts and measure and mark desired length.

Step 4. Measure about an inch and a half below your desired finished length and cut off excess fabric.

Step 5. Fold over about 1/4 of an inch and press

hem shorts

Step 6. Fold over about 1.5 inches and press

shorts, pants, hem, shorten

Step 7. Sew your new seam as close to the edge as possible, I moved my needle over to the left and used the foot edge as my guide.

Step 8. Press again, flip right side out and press again.

Step 9. Repeat for the other leg.

hem shorts

inside finished seam

hem shorts

ready to wear close up

hem shorts

ready to wear


tie for dog

How to Make a Tie for a Dog

Posted on
Follow Me on PinterestPin It

tie for dog

I made a tie for a dog, my dog! Rusty has been going to work with me and I decided he needed an update to his office attire. I went with a tie. Now this is a very simple design. I could have gone one step farther and made it wider and then folded the sides in and tacked them down like a typical tie but the way I did it worked for me. Besides, it’s a tie for a dog, perfection is not required because any dog wearing any type of tie is going to be adorable.

1. I used one of my husband’s old ties as a basic pattern and just shortened the length. The length of my tie is 40 inches mainly because that is the length of the leftover flannel fabric I had. Also, I used an old tie just in case I accidentally clipped it with my scissors. If you don’t have a tie to use, there are many free patterns online for ties from newborn sizes to men’s.

I pressed the fabric and then folded it in half before I laid the tie on it so I could cut two equal pieces.

tie for dogtie for a dog


2. Next I pinned the tie onto the fabric, folding the tie to adjust the length.

3. I cut the fabric with my pinking shears because I just bought them and couldn’t wait to use them. I cut just outside the fabric. The area where the tie is folded, I just angled the scissors inward to reach the skinny part of the tie. Then I unpinned and removed the tie and adjusted the angle to make sure there was smooth line for the length of the tie.

4. I decided to apply fusible interfacing to both points of the tie because I wasn’t doing the traditional tie where, on the back of the tie, both sides fold in towards the middle, and wanted to create a little bit of heft to the fabric.

– For interfacing, cut it just on the inside of the seam line so you don’t have to sew through the extra bulk. Next, lay the fabric wrong side up on the ironing board. Then place the interfacing on the desired part of the fabric shiny side down. Place a pressing cloth over the fabric and interfacing. With a steam setting, use the spray button on the iron and wet down area of interfacing and iron over it, constantly moving for about 30 seconds. Allow the fabric to cool and then check to see if it is fused. If not, repeat the ironing.

5. Pin both layers together, right sides facing each other.

6. Press, just in case wrinkles have formed.

7. Sew around the edges with a 1/2 inch seam, start in the middle of the tie, in order to machine stitch each point, and leave an inch wide opening. Backstitch at the start and finish.

8. Press.

9. Pull fabric through so the right side of the fabric is now on the outside and press.

tie for dog


10. Slip stitch the hole closed, pressing it in the step before should have folded the fabric giving a nice area to stitch the hole closed.

tie for dog


I used this Youtube video to learn how to actually tie it.

Now Rusty is ready for work!

tie for dogtie for dog


altered men's suit jacket

Altered Men’s Suit Jacket

Posted on
Follow Me on PinterestPin It

My husband bought a $30 suit jacket from Target that was too big for him, mainly in the waist. We decided it would be a good project for me to work on since I’ve never done any tailoring or altering of men’s clothing except for the hem of pants. So I attempted at creating a great altered men’s suit jacket.

1. First thing I did was have him put it on and I pinched the fabric to fit and then pinned it. Then I unpinned it because I got his undershirt :/ and re-pinned it.

2. Then I marked the place where the pins went into and out of the fabric just in case a pin fell out with a chalk pencil. I did this on the lining of the jacket as well.

men's altered suit jacket

pinch and pin

3. I measured in between the dots and marked the measurements on the jacket, with a fabric chalk pencil, and on a piece of paper. These measurements are what I needed to take the jacket in by. I did this on the lining of the jacket as well.

men's altered suit jacket

my measurements

4. I then got out my handy seam ripper and separated the lining from the back of the jacket. I just did the bottom of the jacket and up the closest seam line on the side of the jacket.

altered men's suit jacket

lining pulled back

5. With the lining up and out of the way, I ironed the seam so it was no longer open. Then from the seam I measured and marked half the distance that I wrote down and because the measurements were slightly different in some locations I did this at each site of where a pin was and connected the dots. This starts with no measurements at the top because the shoulders fit so the line in a diagonal down the back of the jacket increasing as it goes to the bottom because the waist of the jacket is what was too big. I pinned the layers together and sewed down the chalk line, cut off the extra fabric and ironed the seam open. The first time I did this, I had a notch of extra fabric at the collar and had to redo it. 

men's altered suit jacket

mark and sew

6. Repeat step 5 for the lining.

The last couple of steps is figuring out the tail and reattaching the lining to the jacket.

7. For the matching the lining to the tail I just kept folding and pinning until I had what I thought looked acceptable.

altered men's suit jacket

all sewn up

8. To reattach the lining to the jacket, I am sure there is a machine stitch way, like a blind hem stitch possibly, but I decided to hand stitch it with a slip stitch, I own a book called Teach Yourself Visually Sewing and does a great job illustrating how to do it. The stitch mimicked the rest of the lining to the jacket pretty well which is another reason why I picked it. I then ironed the lining and now the jacket is a great fit!

altered men's suit jacket

finished!