tie onesie

Tie Onesie

Posted on
Follow Me on PinterestPin It

tie onesie

My friend is about to have a baby boy and I wanted to make him something special. I saw this DIY Necktie Onesie tutorial from HauteApplePie.com  and thought that would be the perfect gift. I ended up using the pattern from CrapIveMade.com. Both are great tutorials but I did a few things differently for my tie onesie.

What I used:

  • muslin scraps
  • cotton fabric scraps
  • water-soluble fabric glue stick
  • matching or coordinating thread

What I did:

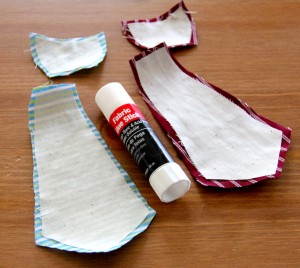
First I cut out the pattern pieces, I angled the knot part to make it look more like a real tie.

I wanted the tie to be a bit sturdier and I didn’t have interfacing on hand so I used muslin. I cut one of each pattern piece. I then trimmed ¼” off of the muslin piece.

Next, glue the muslin pieces to the wrong side of the patterned fabric pieces, positioning them so there’s a ¼” edge around the muslin.

tie onesie

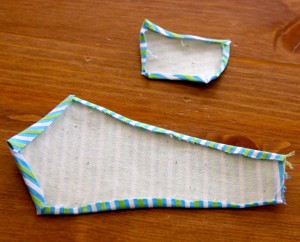
Iron the ¼” fabric over towards the muslin, being careful of the points. Use the glue to help keep the fabric down. I didn’t iron the top part of the tie because the know will be covering it.

tie onesie

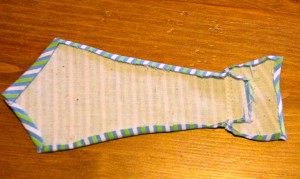
Position the knot over the un-ironed part of the tie, sew a line across the bottom of the knot, connecting the two pieces.

tie onesietie onesie

I trimmed the thread and ironed again.

I then took out the universal needle and replaced it with a knit needle because the onesie is a nice stretchy knit cotton. I then positioned and pinned the tie onto the onesie. I did it in a way to where I didn’t have to move the needles as I sewed so I could concentrate on the lines of the tie.

I sewed along all edges of the tie and close to the edge of the fabric as possible, pivoting at the points. Be careful as you sew, go slow. It’s very easy to catch some of the onesie as you sew .

Iron and wash.

Enjoy!

tie onesietie onesie


How to Make a T-Shirt into a Tote Bag

Posted on
Follow Me on PinterestPin It

tote bag

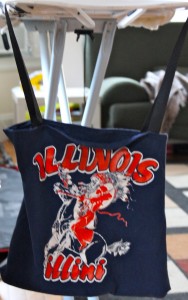
totebagI had this old University of Illinois shirt that I got on Ebay when I was a sophomore there. I wore it a few times and it was a fantastic and soft shirt. But it was old and didn’t fit me quite right. I first tried to make it a more fitted shirt and that was a fail. The weird seam line above the chest just made it look like a ruined sports jersey or something. So, I decided to turn it into a tote bag. Now I just need to decide what to do with the sleeves. I’m thinking Rusty might need some leg warmers or a hat.

Materials Needed:

  • Shirt with design you love but don’t really want to wear
  • Nylon Webbing or durable Ribbon for the straps, I used this ribbon.
  • Sewing Machine
  • Matching thread

Directions:

tote bag

Measure and Mark


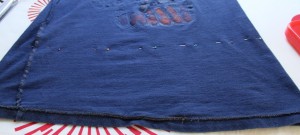
1. Measure and mark where on your shirt you’d like to cut on the top and bottom of the shirt. I decided to make it a little easier on myself and re-use the side seams of the shirt. My finished bag was 15″x 14″

To cut, I used regular fabric scissors for the top and pinking shears at the bottom. If you don’t have pinking shears, cut with your fabric scissors and finish the raw edge with a zigzag stitch.

2. With right sides together, pin the bottom and sew with 5/8″ seam. Press. Now, if you kept the side seams intact, you should have a pillow case with three sides sewn.

3. To finish the opening of the bag, roll the hem about 1/4″ all the way around and press to keep it in place. Repeat, to incase the raw edge. Sew to finish the edge.

4. Cut 2 pieces of ribbon or webbing to your desired length, I cut mine to be 36″ long.

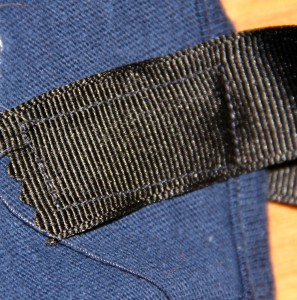
5. Place and pin where you’d like your straps being careful not to twist them as you’re placing them. I put mine on the inside of the bag a couple of inches down.

tote bag

kind of difficult to see, but it’s a rectangle

6. Sew the straps on, if you’re using webbing make sure you have the correct needle, in a rectangle, this is a little bit of added strength to the straps and bag. Press.

7. Enjoy! I think I’ll take mine to work and light grocery shopping , maybe one I’ll add a zipper to it. And it’s washable!


tote bag


drawstring backpack

How to Make a DrawString Backpack

Posted on
Follow Me on PinterestPin It

drawstring backpack

I needed something lightweight and easy to carry on my long walks with Rusty. I decided to go with a drawstring backpack. It’s big enough to hold everything I need and keeps my hands free. I am using leftover material from my tree skirt and had dyed awhile ago.

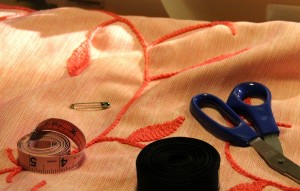
Materials:

  • (2) 17″ X 15″ rectangles of fabric
  • (2) 60″ pieces of ribbon, or cording would work great as well
  • safety-pin
  • sewing machine
  • matching thread
  • iron and board

drawstring backpack

Instructions:

1. After you have measured and cut your fabric, I think mine is a cotton/polyester blend, figure out which end of each piece you want to be the top or opening of your bag. Fold over and press a tiny bit of fabric, ~¼”, and sew. Repeat with the other piece. This is to take care of the raw edge at the opening of your bag.

drawstring backpack

2. Next, take what you have just sewn and fold over about an 1½” and press. Then sew on top of the stitch line in Step 1. This will create a tube for your ribbon to go through.

3. With right sides together, pin the rectangles and stitch with a 5/8″ seam all along the three unstitched sides, starting and stopping where the tube begins. Back stitch at the beginning and end.

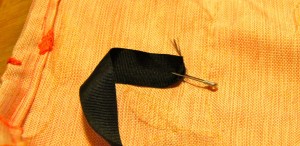
4. Attach a safety-pin to an end of your ribbon, and thread the ribbon through the tube on one side of the bag. Repeat for the other side. The safety-pin just makes this process easier.

drawstring backpack

5. Make sure that both pieces of ribbon are of equal length on each side of the bag. With right sides still together, seam rip up the bottom corners of the bag about an inch. Place the ribbon, inside the bag and through the hole you just ripped open. Stitch the hole closed, securing the ribbon to the bag.drawstring backpack

6. Next to take care of the raw edges, zigzag stitch all along the three stitched sides to the bag as close the stitch line as possible. This also double secures your ribbon at the bottom of the bag. Trim the excess fabric close to the zigzag stitch.


Now I have the perfect and unique bag for our walks to work! So excited to use it.