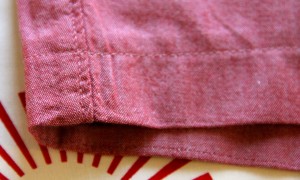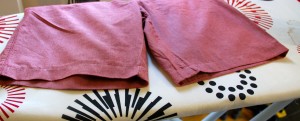
ornament

Cross Stitch Advent Calendar Ornaments

Posted on
Follow Me on PinterestPin It

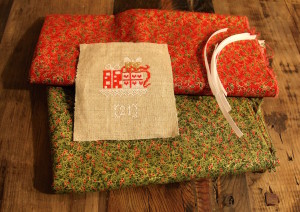
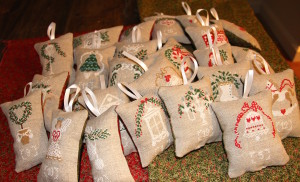
ornamentI have worked hard to complete cross stitch advent calendar ornaments. I loved how they turned out!

Materials:

What I did:

ornamentsFirst I decided how to space out the ornaments on the linen. I should have measured it but I didn’t. Then I cross stitched them all which felt like it took forever mainly because it almost did.

Next, I measured about in inch around all sides on the pattern pieces and cut. I then took out my sewing machine and found matching thread and did a zigzag stitch around the edges of all 25 pieces.

Then I decided which color of fabric would go best with each ornament. I then placed the fabric right side up on table and laid the cross stitched pieces wrong side up and pinned them to the fabric. Then I took pinking shears and cut out the fabric around the linen getting as close to it as possible without cutting the linen.
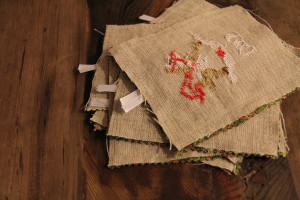
ornamentsNext, I cut 6 inch pieces of ribbon and slipped a folded in half piece between the two fabric layers and centered  and pinned it with about ½ inch of the cut sides sticking out.

Then, leaving about an 1½ inch opening (to be able to turn right side out) I straight stitched with about ½ inch seam going back and forth over the ribbon a couple of times.

Press, on the fabric side, and carefully turn ornaments right side out, pushing corners out. Press again.

Stuff to your desired fullness.
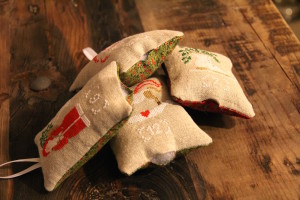
ornamentHand stitch the openings closed.

Enjoy your hard work!

ornament


tie onesie

Tie Onesie

Posted on
Follow Me on PinterestPin It

tie onesie

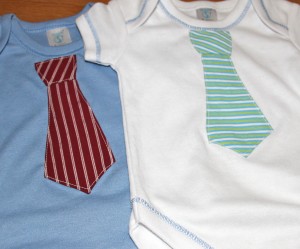
My friend is about to have a baby boy and I wanted to make him something special. I saw this DIY Necktie Onesie tutorial from HauteApplePie.com  and thought that would be the perfect gift. I ended up using the pattern from CrapIveMade.com. Both are great tutorials but I did a few things differently for my tie onesie.

What I used:

  • muslin scraps
  • cotton fabric scraps
  • water-soluble fabric glue stick
  • matching or coordinating thread

What I did:

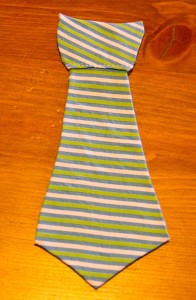
First I cut out the pattern pieces, I angled the knot part to make it look more like a real tie.

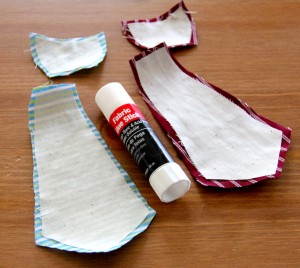
I wanted the tie to be a bit sturdier and I didn’t have interfacing on hand so I used muslin. I cut one of each pattern piece. I then trimmed ¼” off of the muslin piece.

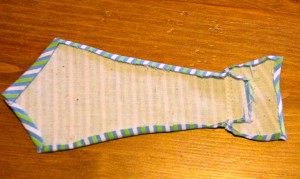
Next, glue the muslin pieces to the wrong side of the patterned fabric pieces, positioning them so there’s a ¼” edge around the muslin.

tie onesie

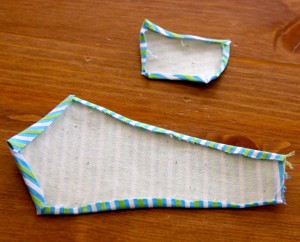
Iron the ¼” fabric over towards the muslin, being careful of the points. Use the glue to help keep the fabric down. I didn’t iron the top part of the tie because the know will be covering it.

tie onesie

Position the knot over the un-ironed part of the tie, sew a line across the bottom of the knot, connecting the two pieces.

tie onesietie onesie

I trimmed the thread and ironed again.

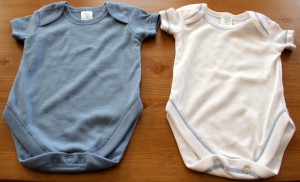
I then took out the universal needle and replaced it with a knit needle because the onesie is a nice stretchy knit cotton. I then positioned and pinned the tie onto the onesie. I did it in a way to where I didn’t have to move the needles as I sewed so I could concentrate on the lines of the tie.

I sewed along all edges of the tie and close to the edge of the fabric as possible, pivoting at the points. Be careful as you sew, go slow. It’s very easy to catch some of the onesie as you sew .

Iron and wash.

Enjoy!

tie onesietie onesie


dress into a skirt

How To Turn a Strapless Dress into a Skirt

Posted on
Follow Me on PinterestPin It

dress into a skirt

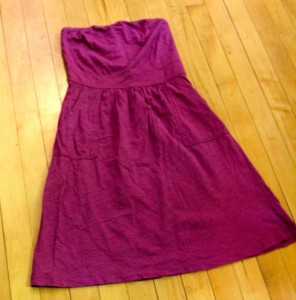
I had this strapless dress and although I like it and love the color, I hardly ever wore it. I decided it needed a make over into something I’d actually wear. I made it into a high-waisted skirt and kept the pockets.  I worked on the fit in the waist of the skirt before I moved on to the length of the skirt.

How I did it:

1. Removed the hook and eye and zipper.

dress into skirt

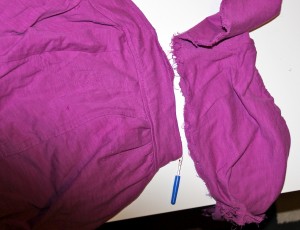
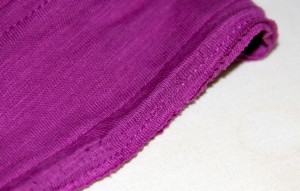
2. Next I removed the top part of the dress being careful to keep the seam stitching on the top part of the band that is in between the top part and the skirt part.

dress into skirt

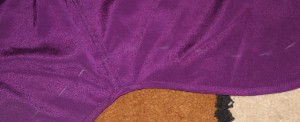
Close Up of the Seam

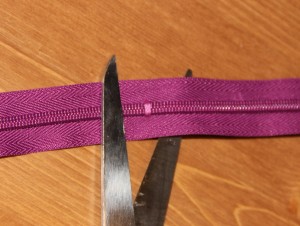
3. I shortened the zipper.

dress into a skirt

4. Next I put on the skirt to figure out how much I needed to take in on the waist because it is going to sit at a different spot on my body.

5. Seam rip the side seam.  Mark and pin it together with the new measurements. I left the seam allowance to be quite large to be cut down a bit with pinking shears later if I needed to let out the seam a bit.

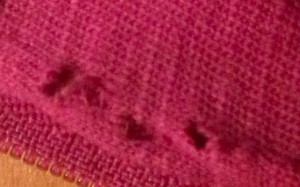
6. It’s time to sew the new seam and install the zipper! It is important to note to TEST your FABRIC and USE the CORRECT NEEDLE in your machine. I’m sure you all know that, but I had a blonde moment and didn’t test my fabric first resulting in my universal needle poking/ripping some major holes into the material.

dress into a skirt

blurry picture of the holes that need repaired

The jersey/knit needle worked much better. Mark on the skirt where the zipper will begin. At that point, you’ll back stitch a couple of stitches and then change to a longer or basting stitch on the machine. The basting stitch is where the zipper will go.

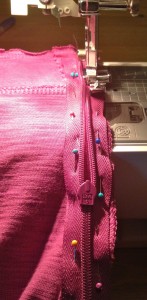
7. Press the seam open, and carefully pin the zipper onto the seam making the teeth directly over the seam line. Make sure the pins can easily be removed as you sew the zipper on and that you changed to a zipper foot on your machine.

dress into a skirt

8. After the zipper is installed, it’s time to finish the top hem. Because I cut the top to where there was stitching at on the top band, I simply folded over ¼inch pressed and pinned. I then sewed it and pressed again. The only thing I wish I had done differently with this side seam and zipper would have been to leave space for the hook and eye. Rookie mistake on my part.

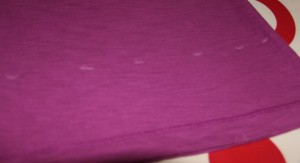
9. I put it on to make sure it fit and to figure out the length I wanted. I pinned it to the desired length. I needed to remove about 3½ inches. I marked the skirt to just below the desired length, and cut with my pinking shears. Folded up ¼inch and pressed and pinned.

dress into a skirt

10. Sew that seam! Press! Try on!

11. Enjoy!

dress into a skirt

Finished skirt and bonus flip flop tan lines!


shorten a shirt dress

How to Shorten a Shirt Dress

Posted on
Follow Me on PinterestPin It

dress

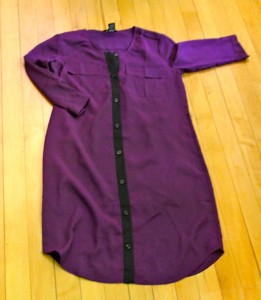
I recently bought a shirt dress to wear with boots as a fun fall work outfit but of course it is too long, about 2 inches too long. I knew I needed to shorten my shirt dress. This was going to be tricky for me because of the curves at the bottom. I usually only work with straight lines because my lack of patience usually gets the better of me when trying to work on a curve. But after a long afternoon with Rusty whining behind me from lack of attention I managed to get it to my desired length.

Here’s what I did:

Stood in front of a mirror and figured out how much fabric needed to be taken off the bottom. I pinned the length and then stood up straight to make sure that was my desired length.

shorten a shirt dress

chalk marks

Next I unbuttoned the shirt and laid it out, right side down, and with my chalk pencil, I marked a lot of spots up to the desired length of the dress. Then,  I also marked about an inch below that to serve as a cutting line.

shorten a shirt dress

two rows of chalk

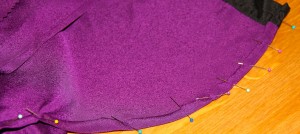
It’s now time for my most time-consuming part, the hem! I needed to clip a couple of spots on the curves in order for the fabric to lay flat. Little by little I rolled over a ¼inch of fabric and then another ¼inch of fabric and pinned. I made sure to put the pins in to where I could sew with them still in the fabric so I’d have one less thing to worry about. And after all of that work, carefully, put the dress back on to make sure it is at the desired length.

http://www.covergirl.com/collections/nfl-collection/chicago-bears

lots of pins

Sew time! Slow and steady with some patience, wins the race because it is a tiny hem and there are curves, it’s best to go slow.

Try on one last time. Good? Press. Now I have a dress that will be perfect with flat and boots this Fall!

shorten a shirt dress


Make Your Own Dress Form Links

Posted on
Follow Me on PinterestPin It

Ever wanted to make your own dress form? Me too! I have complied a list of tutorials to choose from. Pick the one that is best for you and good luck on your dress form making endeavors!

dress form


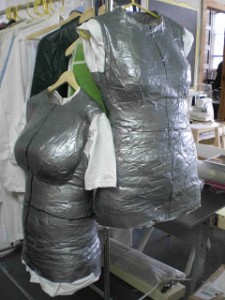
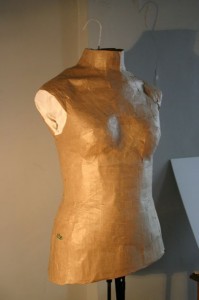
This how to is from The Esty Labs Archive gives a very detailed description with pictures to make a dress form out of a t-shirt and duct tape with the help of a friend. You can also jazz it up a bit by using colored or patterned duct tape.


dress form


This paper tape dress form from Instructables is great idea with the use of paper tape, t-shirt, spray sealant foam and a friend. The instructions and pictures are extremely detailed.


dress form


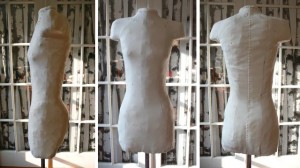
This dress form from Jezebel is probably the closest to buying the real thing, but it is also a lot more involved. It uses plaster bandages, sealant foam, IV cart to create your own stand for it to go on and sewing and creating a cover to cover the form.


dress form


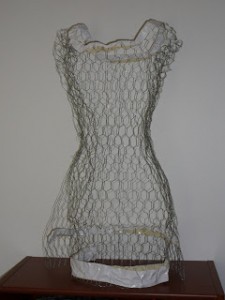
I love the creativity used to make this form. It seems to be so simple. Syzygyo of Worlds created one from chicken wire and some duct tape!


Also, if you have your own dress form already but it isn’t to you exact measurements, look at FabulousFit, they sell “fitting systems” which are pads you can buy to help make adjustments to any part of your dress form!


yoga pants

Shortened Yoga Pants

Posted on
Follow Me on PinterestPin It

yoga pants

This always happens when I buy new pants. They’re too long and these new yoga pants are no exception. I was a little worried about altering them because my experience with stretch fabric is next to zero. There was that one time when I used lycra for Rusty’s lions mane. But these pants needed to be about three inches shorter if I was ever going to get any use out of them. And let’s face it, when I say use, I mean lounging around my apartment, not working out in a yoga studio.

yoga pantsI folded and pinned the pants so they were the proper length while they were still on me. I changed and then measured the in-seam and the folded part to make sure that the lengths of each pant leg were even. Also, to see how much length, 3 inches, needed to be taken from each leg.

Next, I removed the pins and turned the pants inside out. I then carefully measured and cut 2 inches from each pant leg.

yoga pants

I then folded over ½ inch of fabric and pressed and then another ½ inch and pressed. Then I pinned the folds into place.

yoga pants

Rusty was not impressed by my cutting and ironing skills. I gave him a stretchy collar but he was even less impressed with that.

yoga pantsI placed my pins so they could be quickly and easily removed as I was sewing. I realized that although my machine can use a double needle, I don’t have two spools of thread in the same color. So that option was thrown out and instead I used a stretch stitch function my machine, a triple zig-zag stitch. I definitely had to pull out my user’s manual to make sure I was doing it correctly, very glad I kept it.

yoga pants

I stitched both legs using the edge of the folded fabric as my seam guide. I then pressed the seams.

yoga pants

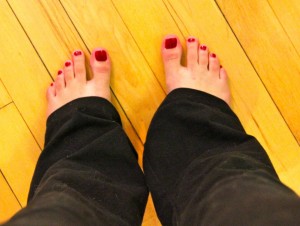
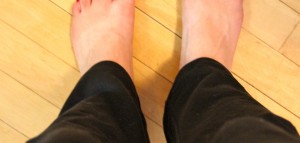
I have crazy flip-flop tan lines on my feet. :/

I turned the pants right side out, put them on, and enjoyed my shortened yoga pants by watching TV and cuddling with Rusty.


shirt

How to Shorten Shoulder Straps

Posted on
Follow Me on PinterestPin It

shoulder strap

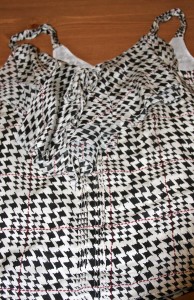
I bought a really cute top for work, the only problem is that it is not petite sized. The straps are way too long making me expose too much of myself. Luckily I knew I could easily fix this after examining the shirt.

First I needed to figure out how much to take off of the straps so I put it on and pinned them into the correct place. I then carefully removed the shirt and measured the amount I needed to take off.

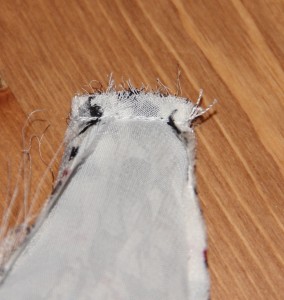
Next I turned the shirt inside out and got my handy seam ripper and opened the area where the strap connects to the shirt.

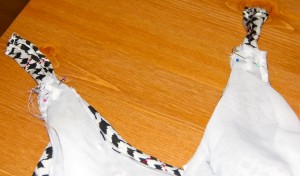
shoulder strapNext, I pulled out the 2 inches it needed to be shortened by and pinned it into place. Repeat for the other strap. shoulder strap

Using matching thread and the proper needle, I sewed the shoulder straps into place, using a back-stitch at each end to make sure they’re secure. I didn’t cut off the extra because it’ll be sitting in between the two layers of the shirt so they won’t be an issue. Turn it right side out and brand new shirt that actually fits.

shoulder strap


Where to Buy Fabric Online

Posted on
Follow Me on PinterestPin It

A lot of people don’t have access to great fabric stores in their areas and some, like me, are a bit lazy and prefer the comfort of their homes and computer screens to buy fabric. I have found a few online fabric stores to aid in your search for the perfect fabric. Granted you can’t touch the fabric and you have to wait for it to be shipped to you but I feel being able to find exactly what you want is worth the wait.

  1. Big Z Fabric has a something for everyone. It has your basics, as well as beaded fabric, faux leather, lace, velvet and upholstery fabric. It’s worth it to just browse to see what all it has to offer.
  2. Fabric.com has all of your basics. It also has great sales and a couple of free patterns.
  3. Fabric Exchange is another great place that has everything from cotton, fake fur, sequined fabric, taffeta and many more options. It’s an addicting fabric website to just look at. There are so many unique fabrics at the Fabric Exchange.
  4. Fabric Worm is great for children’s and quilting fabrics. It also has a few free patterns.
  5. Mood Fabrics has a little bit of everything. Part of my love for it stems from it being featured on Project Runway, I love that show!
  6. Purl Soho is another website that is fun to browse. It has fabric, notions, yarns and books. All seem to be unique and it even has kits to make a variety of projects.
  7. Spoon Flower is another fun online fabric store. It has a lot of unique patterns. It also sells wallpaper and wall decals. Another reason to love this store is because you can design your own fabric, wall paper, decals and wrapping paper! You just need to upload your file of the pattern you designed and they create it for you!
  8. Emma One Sock for fabric! It even lets you order swatches of material.
  9. Fabrics Fashion Club
  10. Trim Fabric for fabric and it has a great selection of trims and notions.
  11. M&J Trimming for all trims! Ribbons, rhinestones, lace, crystals, buttons and more!
  12. Mendel’s is where I purchased the faux fur for the lion’s mane costume.

Knit Fabric Sewing Information

Posted on
Follow Me on PinterestPin It

I usually sew cotton with my sewing machine. I have tried other types of fabric and one fabric that scares me to sew but would love to use is all knit fabric mainly jersey. I am always drawn to jersey in the fabric store but get frightened by the idea of sewing it. Since I am self-taught through instructional books and web searches, I’m not always sure how to complete a project. Prudent Baby website has a great tutorial about sewing jersey including pictures of what’s right and what’s wrong. It is definitely a reference I need to remember.

First thing I need to remember when sewing knit fabric is to have the right needle in my machine. My previous failed efforts, I think, have had a lot to do with the fact I left the universal needle in and it poked holes and pulled on the fabric. I also need to practice with the stretch stitch options on my machine.

Click here for the tutorial. It’s worth reading.


hem shorts

How to Hem Shorts and Pants

Posted on
Follow Me on PinterestPin It

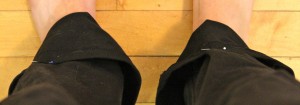
My husband needed his shorts hemmed. They were about an inch too long and it’s almost summer, well it’s May we just aren’t having summer weather yet, his shorts needed to be completed. The measuring and pressing part of hemming them is the most important part of this process. It is with most but usually I don’t pay too close attention but with it I needed to be precise.

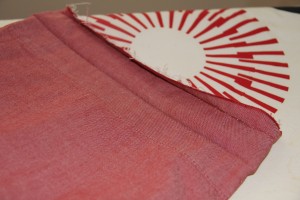
Step 1. I needed to figure out what the desired length was and then turn the shorts right side in.

hem shorts

Step 2. Seam rip the bottom of both legs

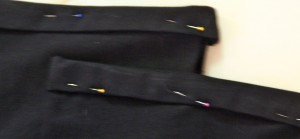
Step 3. Press the bottom of the shorts and measure and mark desired length.

Step 4. Measure about an inch and a half below your desired finished length and cut off excess fabric.

Step 5. Fold over about 1/4 of an inch and press

hem shorts

Step 6. Fold over about 1.5 inches and press

shorts, pants, hem, shorten

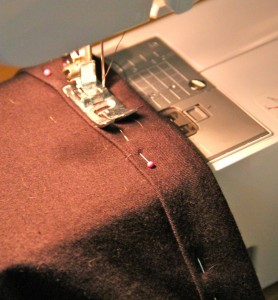
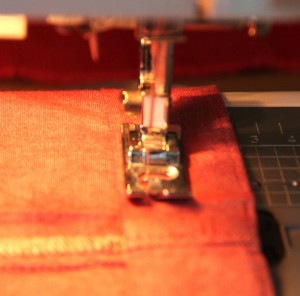
Step 7. Sew your new seam as close to the edge as possible, I moved my needle over to the left and used the foot edge as my guide.

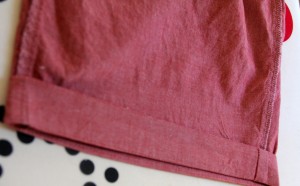
Step 8. Press again, flip right side out and press again.

Step 9. Repeat for the other leg.

hem shorts

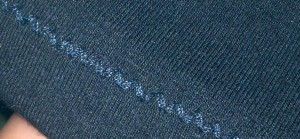
inside finished seam

hem shorts

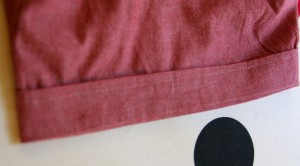
ready to wear close up

hem shorts

ready to wear