ornament

Cross Stitch Advent Calendar Ornaments

Posted on
Follow Me on PinterestPin It

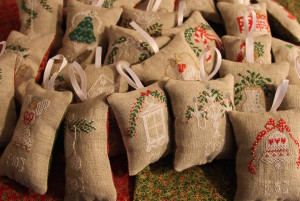
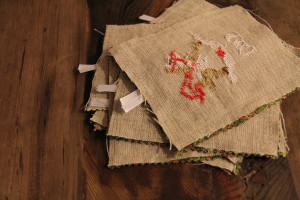
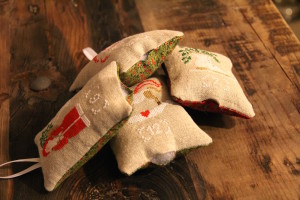
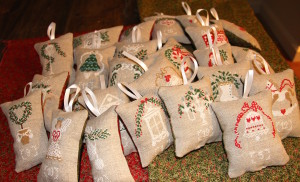
ornamentI have worked hard to complete cross stitch advent calendar ornaments. I loved how they turned out!

Materials:

What I did:

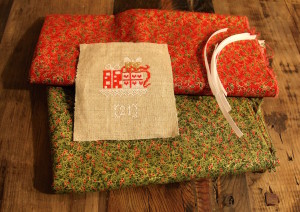
ornamentsFirst I decided how to space out the ornaments on the linen. I should have measured it but I didn’t. Then I cross stitched them all which felt like it took forever mainly because it almost did.

Next, I measured about in inch around all sides on the pattern pieces and cut. I then took out my sewing machine and found matching thread and did a zigzag stitch around the edges of all 25 pieces.

Then I decided which color of fabric would go best with each ornament. I then placed the fabric right side up on table and laid the cross stitched pieces wrong side up and pinned them to the fabric. Then I took pinking shears and cut out the fabric around the linen getting as close to it as possible without cutting the linen.

ornamentsNext, I cut 6 inch pieces of ribbon and slipped a folded in half piece between the two fabric layers and centered  and pinned it with about ½ inch of the cut sides sticking out.

Then, leaving about an 1½ inch opening (to be able to turn right side out) I straight stitched with about ½ inch seam going back and forth over the ribbon a couple of times.

Press, on the fabric side, and carefully turn ornaments right side out, pushing corners out. Press again.

Stuff to your desired fullness.

ornamentHand stitch the openings closed.

Enjoy your hard work!

ornament


tie onesie

Tie Onesie

Posted on
Follow Me on PinterestPin It

tie onesie

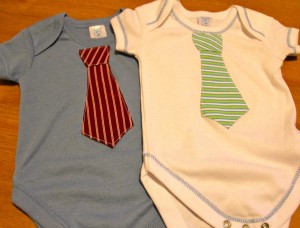
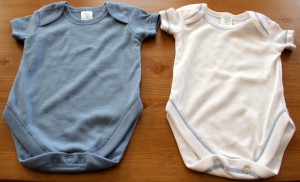
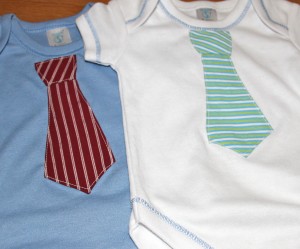
My friend is about to have a baby boy and I wanted to make him something special. I saw this DIY Necktie Onesie tutorial from HauteApplePie.com  and thought that would be the perfect gift. I ended up using the pattern from CrapIveMade.com. Both are great tutorials but I did a few things differently for my tie onesie.

What I used:

  • muslin scraps
  • cotton fabric scraps
  • water-soluble fabric glue stick
  • matching or coordinating thread

What I did:

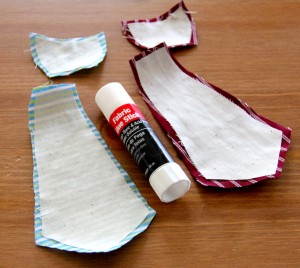
First I cut out the pattern pieces, I angled the knot part to make it look more like a real tie.

I wanted the tie to be a bit sturdier and I didn’t have interfacing on hand so I used muslin. I cut one of each pattern piece. I then trimmed ¼” off of the muslin piece.

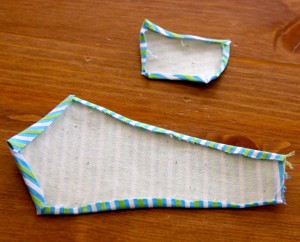
Next, glue the muslin pieces to the wrong side of the patterned fabric pieces, positioning them so there’s a ¼” edge around the muslin.

tie onesie

Iron the ¼” fabric over towards the muslin, being careful of the points. Use the glue to help keep the fabric down. I didn’t iron the top part of the tie because the know will be covering it.

tie onesie

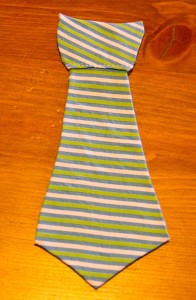
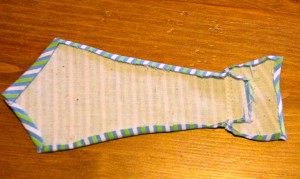
Position the knot over the un-ironed part of the tie, sew a line across the bottom of the knot, connecting the two pieces.

tie onesietie onesie

I trimmed the thread and ironed again.

I then took out the universal needle and replaced it with a knit needle because the onesie is a nice stretchy knit cotton. I then positioned and pinned the tie onto the onesie. I did it in a way to where I didn’t have to move the needles as I sewed so I could concentrate on the lines of the tie.

I sewed along all edges of the tie and close to the edge of the fabric as possible, pivoting at the points. Be careful as you sew, go slow. It’s very easy to catch some of the onesie as you sew .

Iron and wash.

Enjoy!

tie onesietie onesie


reflective dog leash

How to Sew a Reflective Dog Leash, Revisited.

Posted on
Follow Me on PinterestPin It

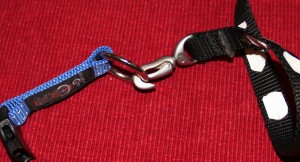
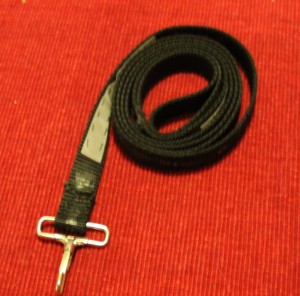
Awhile ago I made a reflective dog leash for Rusty. It served  us well but Rusty got a new collar and the buckle on the leash was too small for the ring. So it was time to redo his leash. I’m using the same leash with  nylon webbing and a clip I picked up from Ragged Mountain, a store in North Conway, NH.

reflective dog leash

First thing I did was seam rip the old buckle off and remove the pieces of reflective tape that remained.

Next I hand stitched the new clip in place. I decided to sew by hand because the webbing is very thick and I don’t know how my machine would handle it. I don’t have a lot of needles to pick from, so I went with a crewel hand needle. I’m not even sure why I have these but they were in my sewing kit. The webbing is thick and stiff so it took awhile to sew.

I then cut 2, ½inch wide by 4 inch long reflective fabric tape to replace the old tape. I then stitched one on the bottom of the leash near the clasp and one near the handle of the leash. My stitching for the reflective tape is terrible. I’d like to say that I am a perfectionist and will redo it but I know I won’t. Feel free to judge. 🙂

reflective dog leash

Now it’s time to take Rusty out on a walk and enjoy the new leash.


10 Adorable Homemade Halloween Dog Costumes

Posted on
Follow Me on PinterestPin It

Here is a list of my 10 favorite homemade dog costumes that will be perfect for Halloween. Click on the links or pictures for instructions on how to make one of these great costumes for your furry baby.

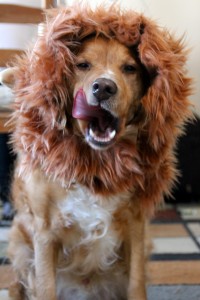
lion mane dog costume

1. Lion


Turning your dog into a lion always seems to be a popular and oh so cute choice! This is my dog Rusty, he has two different lions’ manes. Version 1 is a pretty simple a quick mane. Version 2, shown in the picture, is little more complicated but adds some volume to the mane the first version lacked. But I think Rusty looks good in both.


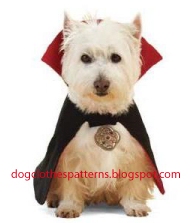
dog costume

2. Dracula


This adorable Dracula cape comes from Mimi & Tara Dog Clothes Patterns. There are multiple sizes for this costume available. So dogs of all sizes can wear it. Just make sure your dog doesn’t bite. 🙂 There’s also a pumpkin pattern for your pup on this site.


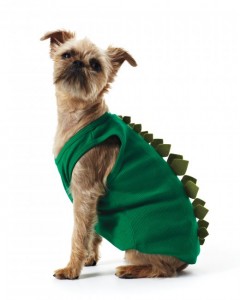
dog costume

3. Dinosaur


This cute little dinosaur tank comes from Martha Stewart. It’s the perfect little costume to make your pup the hit of the party.


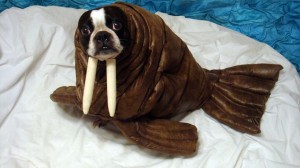
dog costume

4. Walrus


I immediately smiled when I saw this walrus costume on Instructables. It’s the perfect statement dog costume. I would really love to see a video of this cute pup walking in this costume. It makes me happy just thinking about it.


dog costume

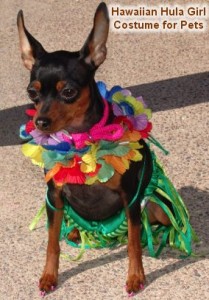
5. Hula Dog


I imagine matching dog parent and dog costumes with this Hula outfit from Celebrating Halloween, it would be cute! The hula outfit is a classic and after Halloween, this too cute costume is the perfect excuse to have a Luau.


make a bird costume dog

6. Bird


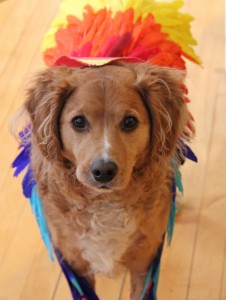
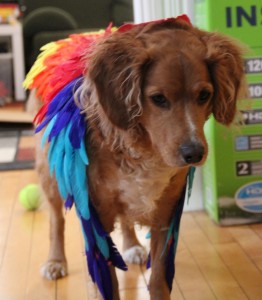
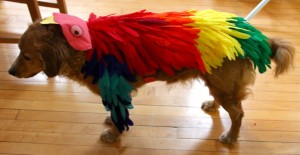
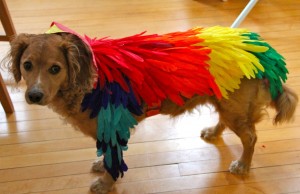
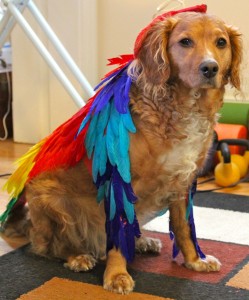
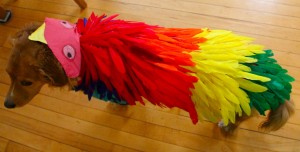
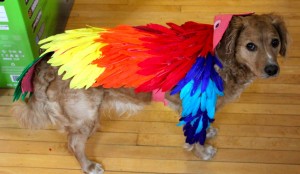
This is my Rusty modeling a parrot costume I made him. Lots of feathers meant a lot of the work but it was completely worth it.


dog costume

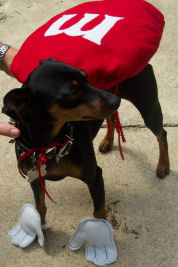
7. M&M


This tasty and easy to create M&M costume by Love to Sew Studio is perfect. It’s because you can easily change the color of the candy. If you prefer fruit flavored candy instead of chocolate, put an ‘S’ for a Skittles costume!


dog costume

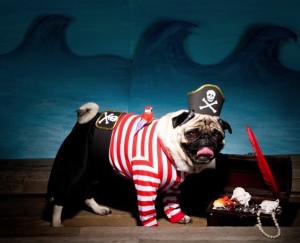
8. Pirate


This cute pirate costume comes from Make: Craft. This costume is actually two pieces. So it’s a nice bonus having new shirt and pants patterns for your pooch.


dog costume

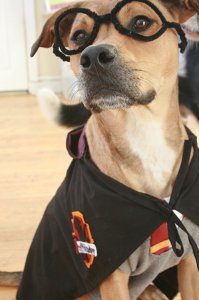
9. Harry Potter


Turn your dog into Harry Potter, or should I say Hairy Potter? Okay wow, that was terrible. Sorry I didn’t attempt a pun on the pirate costume. I’ll leave the jokes to the professionals. But this cute costume comes from All Free Holiday Crafts.


dog costume

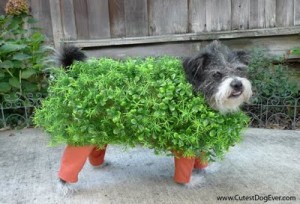
10. Chia Pet


This Chia Pet costume from The Flirty Blog is just hilarious. If you want to make sure you and your dog are the center of attention this would be the perfect costume. This blog also has other dog costume ideas.


dress into a skirt

How To Turn a Strapless Dress into a Skirt

Posted on
Follow Me on PinterestPin It

dress into a skirt

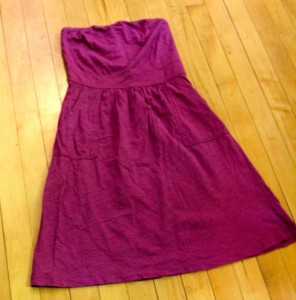
I had this strapless dress and although I like it and love the color, I hardly ever wore it. I decided it needed a make over into something I’d actually wear. I made it into a high-waisted skirt and kept the pockets.  I worked on the fit in the waist of the skirt before I moved on to the length of the skirt.

How I did it:

1. Removed the hook and eye and zipper.

dress into skirt

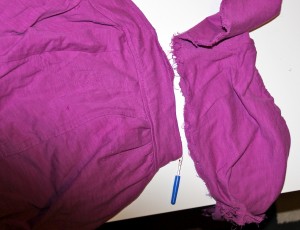
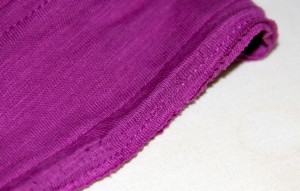
2. Next I removed the top part of the dress being careful to keep the seam stitching on the top part of the band that is in between the top part and the skirt part.

dress into skirt

Close Up of the Seam

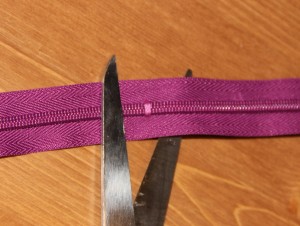
3. I shortened the zipper.

dress into a skirt

4. Next I put on the skirt to figure out how much I needed to take in on the waist because it is going to sit at a different spot on my body.

5. Seam rip the side seam.  Mark and pin it together with the new measurements. I left the seam allowance to be quite large to be cut down a bit with pinking shears later if I needed to let out the seam a bit.

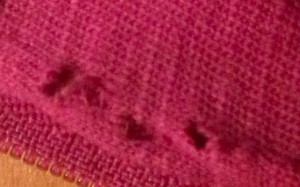
6. It’s time to sew the new seam and install the zipper! It is important to note to TEST your FABRIC and USE the CORRECT NEEDLE in your machine. I’m sure you all know that, but I had a blonde moment and didn’t test my fabric first resulting in my universal needle poking/ripping some major holes into the material.

dress into a skirt

blurry picture of the holes that need repaired

The jersey/knit needle worked much better. Mark on the skirt where the zipper will begin. At that point, you’ll back stitch a couple of stitches and then change to a longer or basting stitch on the machine. The basting stitch is where the zipper will go.

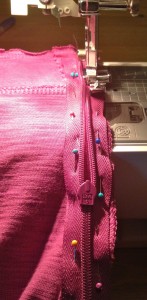
7. Press the seam open, and carefully pin the zipper onto the seam making the teeth directly over the seam line. Make sure the pins can easily be removed as you sew the zipper on and that you changed to a zipper foot on your machine.

dress into a skirt

8. After the zipper is installed, it’s time to finish the top hem. Because I cut the top to where there was stitching at on the top band, I simply folded over ¼inch pressed and pinned. I then sewed it and pressed again. The only thing I wish I had done differently with this side seam and zipper would have been to leave space for the hook and eye. Rookie mistake on my part.

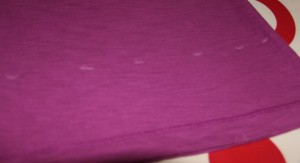
9. I put it on to make sure it fit and to figure out the length I wanted. I pinned it to the desired length. I needed to remove about 3½ inches. I marked the skirt to just below the desired length, and cut with my pinking shears. Folded up ¼inch and pressed and pinned.

dress into a skirt

10. Sew that seam! Press! Try on!

11. Enjoy!

dress into a skirt

Finished skirt and bonus flip flop tan lines!


shirt collar

How to Make a Shirt Collar for a Dog

Posted on
Follow Me on PinterestPin It

dog shirt collar

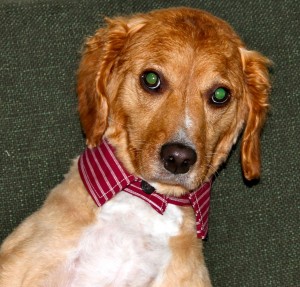
I decided Rusty needed another piece for his work wardrobe. So I decided to make his a shirt collar. I have a pattern for it. But the easiest way, I think, for someone to make it at home is to use an old collared shirt you don’t want anymore and take apart that collar for the pattern. Or if you use my pattern, please note the sizing of 14.5inch neck and adjust the printing size accordingly. Also there is a lot of ironing for this pattern. Yes, it is annoying but taking the time to properly press each piece will end in much cleaner results and make sewing much easier.

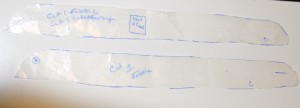
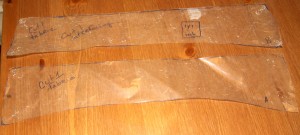
bottompatterntoppattern

Things you need:

  • fabric, preferably cotton
  • interfacing
  • matching thread
  • if you’re like me, a sewing machine that can make a button-hole because I don’t know how to do it by hand.
  • button

1. Place, pin and cut out fabric and interfacing pattern pieces.

applyinterfacing

2. Apply interfacing B to Fabric A leaving about ¼ inch of fabric at the top of A.

3. Apply interfacing D to fabric C leaving about ¼ inch of fabric at the bottom of C.

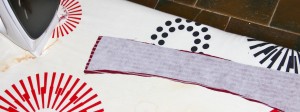
shirt collar

4. On pieces, A and B fold over and press raw edges on 3 sides, leaving the bottom as is.

5. Pin together A and B, right sides out, and sew with a ¼ inch top stitch and the 3 sides you’ve pressed the edges.

6. On pieces C and D fold over about ¼ inch and press all four sides.

7. Center AB in between C and D and pin all the layers together, right sides out.

8. Stitch around all four sides of C and D, encasing AB in between the layers making one piece.

9. Position and mark where the button-hole should be, and use your machines button-hole foot to create the button-hole. If you don’t have a machine that can do that click here to learn how to do it by hand.

10. Sew on the button.

shirt collarshirt collar

11. Put it on your pooch and enjoy!

shirt collarshirt collar


Hopefully your dog will enjoy it more than Rusty because he looks scared in these pictures 🙁


dog tank top

How to Make a Tank Top for a Dog

Posted on
Follow Me on PinterestPin It

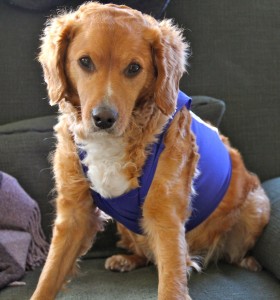
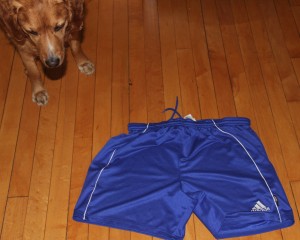
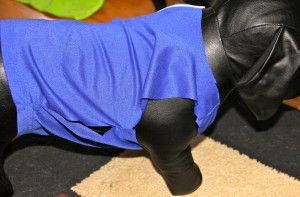
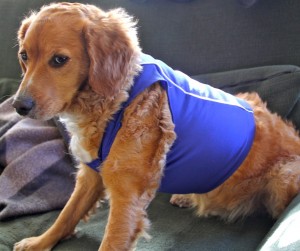
dog tank topMy husband was getting rid of an old pair of athletic shorts and I saw them and thought that would be a cute dog tank top. Let’s face it, I have a difficult time coming up with things that aren’t costumes for Rusty. But this tank top is the perfect summer athletic shirt for him. Even if he didn’t seem too impressed with it, I like it.

dog tank top

Rusty checking out the shorts.

First thing I did was cut off the top of the shorts right below where the tired elastic and draw string are. Next thing I did was seam rip the two legs apart.

dog tank top

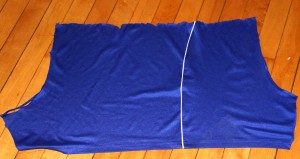
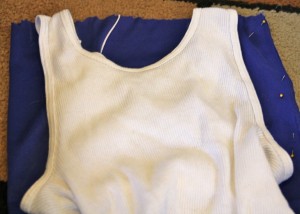
Next, I folded the fabric in half and pinned it closed. Then I took a tank top I had with large arm holes and measured Rusty and it to make sure it would work as a pattern for him and traced the lines for the arm holes and neck.

dog tank topThen I cut out the pattern and placed the fabric inside out. I pinned and sewed the shoulder seams together. I used a jersey needle in my sewing machine because I found the universal needle was too rough on the nylon fabric. I then tried it on Manne to check fit and how I wanted to velcro it shut.

dog tank top

Manne the model

It might not be very noticeable in the picture, but I made this tank top to where one of Rusty’s leg has to go through a hole and then his head goes through the neck hole and it velcro to make the other leg hole and close the shirt. I did it this way so couldn’t shake it off.

Next I folded over and pressed all unfinished edges, and then folded them over again to encase the raw edges and sewed the seam.

To finish I took some fusible velcro, cut to the right size, and ironed them on to correct spots. I used a pressing cloth for this because the iron needed to be set to a steam setting. All that there was left for me to do was to have Rusty model it.


dog tank top

Model shot

dog tank top

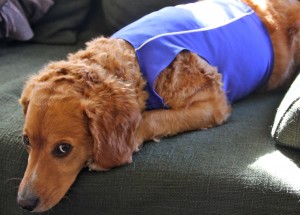
He’s about had it.

dog tank top

He’s over it.


knit mug cozy

Slip Stitch Knit Mug Cozy Revisited

Posted on
Follow Me on PinterestPin It

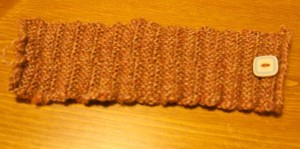
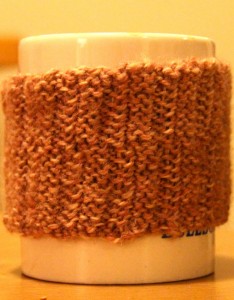
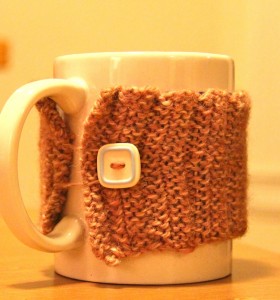
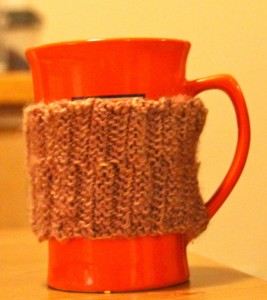
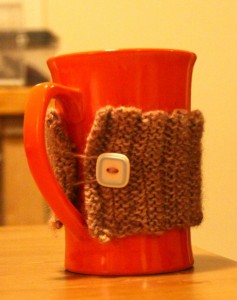
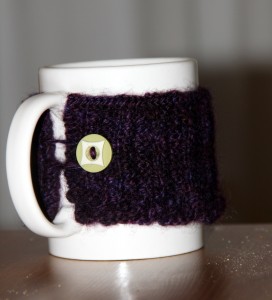
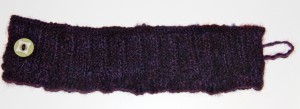
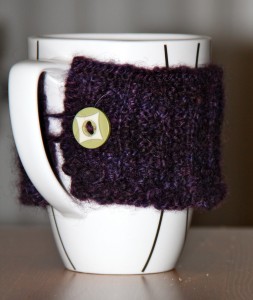
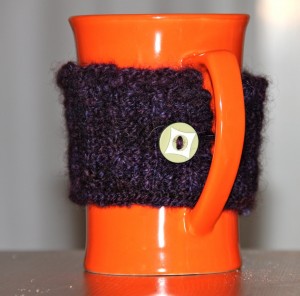
I decided to attempt my slip stitch knit mug cozy pattern again because I had so many problems the first time. Well, this one didn’t go according to plan either. My impatience got the better of me, resulting in this:

mug cozy

The pattern is slightly off. Using the yarn left over from my slip stitch belt, 100 % wool Crystal Palace Yarn, with size US 3 (3.25mm) needles, I decided to cast on 70 stitches and do the pattern

Row 1: P3 K2

Row 2: K1 S1 K1 P2

Repeat till desired length, I did 33 rows.

Cast off like it was an odd row so P3 K2.

Sew on button and loop.

But somewhere on Row 17 I noticed I combined two stitches leaving me with only 69 stitches on my needle and instead of  doing the smart thing and undoing my stitches until I found the problem, fix it, and move on, I decided I was too impatient and it was an amazing idea to just cast on another stitch at the end of the row. Wow I was wrong but I  knew I was wrong and did it anyways which makes it even worse. But that’s why my pattern is off. I do like the pattern and I do like my dressed up coffee mug in the morning. I also believe that this could be a great pattern for a cuff/bracelet.

The 70 stitches compared to the 75 in the first one I did it working out a lot better. It fits more of my coffee mugs!

knit mug cozyknit mug cozy


knit mug cozyknit mug cozy


make a bird costume dog

How to Make a Bird Costume for a Dog

Posted on
Follow Me on PinterestPin It

make a bird costume dog

I wanted to make a fun bird costume for Rusty for a while now. I just had no clue how. I decided to make it up as I went a long.

First I scribbled all over a few pieces of paper trying to work out in my head how to do this. I went with a red dyed body, which turned out pink, made of muslin with paint, and fabric pastels to color the face and glued the feathers to the muslin.

Here’s the Pattern for the body. It’s my very first time creating a pattern!  Well all I did was draw  half of the pattern on the fold of the muslin. I didn’t think I could make it exact on both sides. Then I went over it in a dark marker and traced it onto paper. Hopefully it can be easily followed.

Rusty’s measurements for this were:

  • top of the head to base of the tail: 29 inches
  • middle top of head down to mid neck (for head of parrot): 7 inches
  • middle of back down to top of front paw: 17½ inches
  • length I wanted tail feathers that would start as base of tail: 7 inches

I made the head of the bird to sit more on Rusty’s neck instead of on top of his head because he hates wearing clothes but hates it even more to have things on his head, so I decided to be nice.

Materials:

  • 1 1/3 yards of dyed muslin, 45″ wide or red cotton fabric
  • matching thread
  • fabric dye sticks
  • fabric paint
  • feathers
  • fabric glue, such as Scotch Maximum Strength Adhesive or E-6000
  • 1/4″ elastic
  • velcro
  • sewing machine
  • iron and board

Directions:

1. Wash and press fabric

2.  Cut out pattern, Pin to fabric and cut

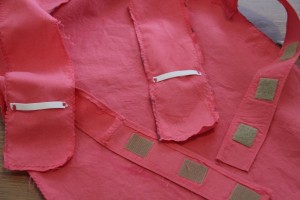
3. Cut out 4 ~ 14″L x 2″W strips, length may very depending on size of your dog, these are for the velcro straps to go on their belly.

4.  On 2 of the 4 pieces, plan out and attach velcro according the package directions, I used Fabric Fusion velcro, I ended up using 4 pieces of velcro because my first measurements were a bit off. Guess the saying is true, “measure twice, cut once” or something like that

5. Pin right sides together and sew three sides of the pieces together, (2 long sides and 1 short side). Turn inside out, so velcro is on the outside.

6. Sew the velcro pieces onto the body piece and then try it on your puppy to make sure it fits.

7. Next do a zig zag stitch around the edge of the body piece.
make a bird costume dog

Velcro and Elastic

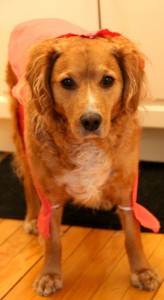
8. Cut 2, 1 3/4 inch long pieces of elastic. With a tight zig zag stitch, attach to wing/arms parts of the body piece. You want to place them so they are above where the legs bend so it doesn’t affect how they walk.
make a bird costume

trying it on

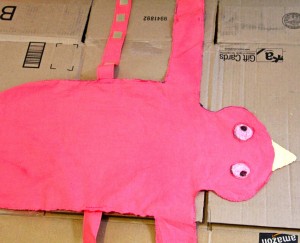
9. With Dye Sticks, draw on eyes and follow package directions to set it. Sewing on felt eyes would also be a cute idea, giving the costume more texture.

10.Lay the bird on some cardboard or newspaper and carefully paint on beak.
make a bird costume dog

eyes and beak

11. While the paint is drying, lay out the feathers on the pattern piece before you attach them to make sure you have enough and to allow you to figure out how you’d like your feathers to be arranged. Take a picture so you remember your pattern.
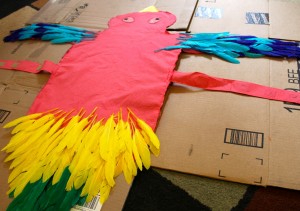
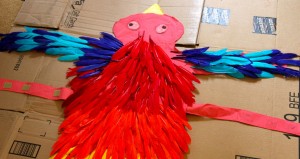
make a bird costume dogmake a bird costume dog


12. Next thing I did was put a tiny piece of cardboard between the elastic straps and the fabric just in case my glue bled through the fabric. I then started gluing my feathers onto the fabric starting with the bottom and working my way up. I started a new row by lining up the end of the feathers to the end of the quills so the quills wouldn’t show. I also let the feathers hang over the edge of the fabric. At the top row, I cut off the quill and applied the glue to the base of the feather. Then I let the glue sit over night before trying it on Rusty to make sure adhesion to the fabric.
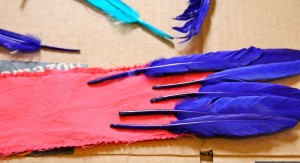
make a bird costume dog

starting to glue

– Alternatively, you can sew the feathers on by pinning the rows, starting with the bottom row first like if you were gluing, to the fabric with a piece of tissue paper between the fabric and feathers and tearing away the tissue after they have been sewed on. This is probably the best choice to make sure the feathers don’t fall off but I decided to re-watch Glee season 1 and my sewing machine is not in my living room. 🙂

13. After the glue has dried, try it on and enjoy your adorable bird dog!
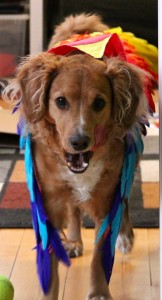
make a bird costumemake a bird costumemake a bird costume dog


make a bird costume dogmake a bird costume dog

make a bird costume dogmake a bird costume dog]make a bird costume dog


knit mug cozy

Slip Stitch Pattern for a Knit Mug Cozy

Posted on
Follow Me on PinterestPin It

knit mug cozy

I decided to dress up my morning coffee a bit with a knit mug cozy. I was still excited about learning the slip stitch from the belt I made and wanted to create a pattern that used the slip stitch in it. I still had to do a bit of research to figure out exactly how to do it but after compiling everything and then some trial and error,  this is what I came up with:

US 2 needles (2.75mm)

2 ply lace weight yarn from Hettinger Corriedales. It’s a farm, in Illinois near my hometown that raises the sheep, and dyes the wool and spins them at their farm! You should check it out.

I’m not sure how much yarn I’m using. The skein I’m using had 214 yards but I’m using it for multiple projects. This fits a 10.5 inch circumference mug best. The yarn is a little too dark to get a great picture of the pattern but it looks great in person. Maybe I’ll make another in a different yarn to better display the pattern.

Pattern:

  • Cast on 70 stitches
  • Row 1: P3 K2 repeat until row is finished
  • Row 2: K1 S1 (P) K1 P2 repeat until row is finished
  • Repeat pattern until desired length. Mine ended up being 31 rows
  • Cast off on an odd-numbered row in the P3 K2 pattern
  • Sew loop like in the felted bag on one side and sew the button on the other
  • Attach to the mug by putting the button next to the handle and loop through the mug handle
  • Enjoy a nice cup of whatever with your cozy.

*Please note that for this pattern, unlike the belt, when you slip stitch purl style you do NOT bring the yarn forward, you simply just put the needle through the stitch like you would for a purl stitch and then push the stitch onto the needle.

knit mug cozy

What I actually did to figure that pattern out:

  • Cast on 75 stitches
  • Row 1: K2 P3 repeat
  • Row 2: P2 K1 S1 (P) K1 repeat

After 8 rows, it was looking like a hot jumbled mess, that’s the point of trial and error I guess. It’s a little difficult to see because the thread because it was hand spun isn’t the same thickness throughout. I decided to flip the pattern and test it out. To be honest, I don’t completely understand why it worked but it did so that’s awesome.

  • Row 9: P3 K2
  • Row 10: K1 S1(P) K1 P2
  • Rows 30 and 31 in a garter stitch to somewhat match the bottom of the cozy.
  • Add loop like I did with the felted bag to one end
  • Sew on button to the other end

*I marked on a piece of paper every time I did 5 stitches, and would only stop after doing five to keep my place. I also, marked them by row just incase I forgot which row I was on.

Didn’t turn out how I had envisioned in my head. But I was able to figure it out and I think it still looks cute and definitely serves its purpose. I can now create a mug cozy with the exact pattern I was hoping for. Like I said before, it’s best for a mug with a 10.5 inch circumference. I found it slipped a little on a 9.5inch and a 10 inch that decreases towards the bottom of the mug. Decrease the amount of stitches, by 5, to fit the mug you would like to use it on.

knit mug cozy

10inch and decreasing


knit mug cozy

9.5in circumference

knit mug cozy

10.5inch circumference