reflective dog leash

How to Sew a Reflective Dog Leash, Revisited.

Posted on
Follow Me on PinterestPin It

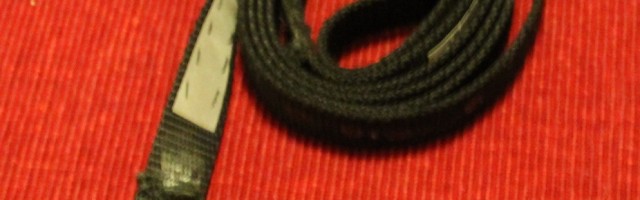
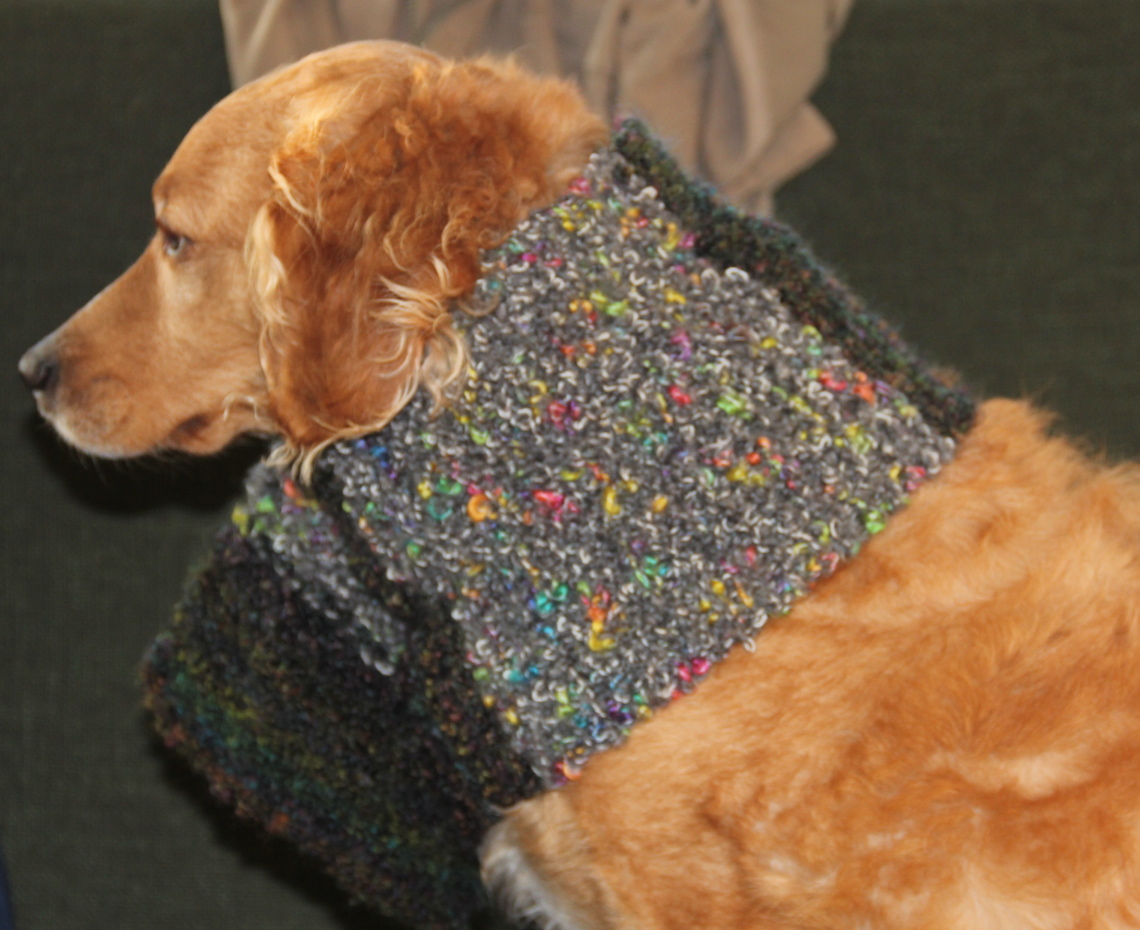
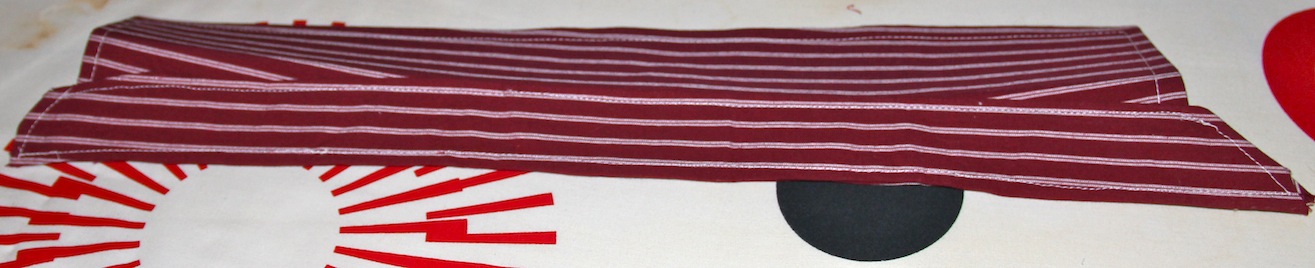
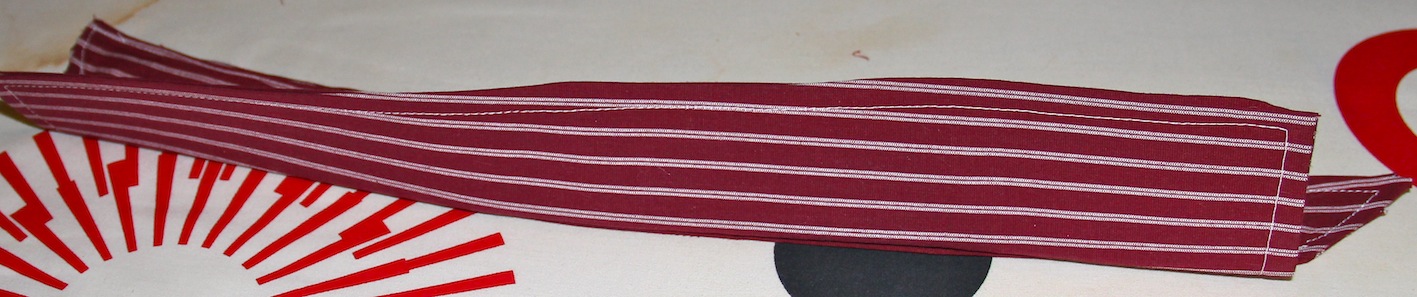
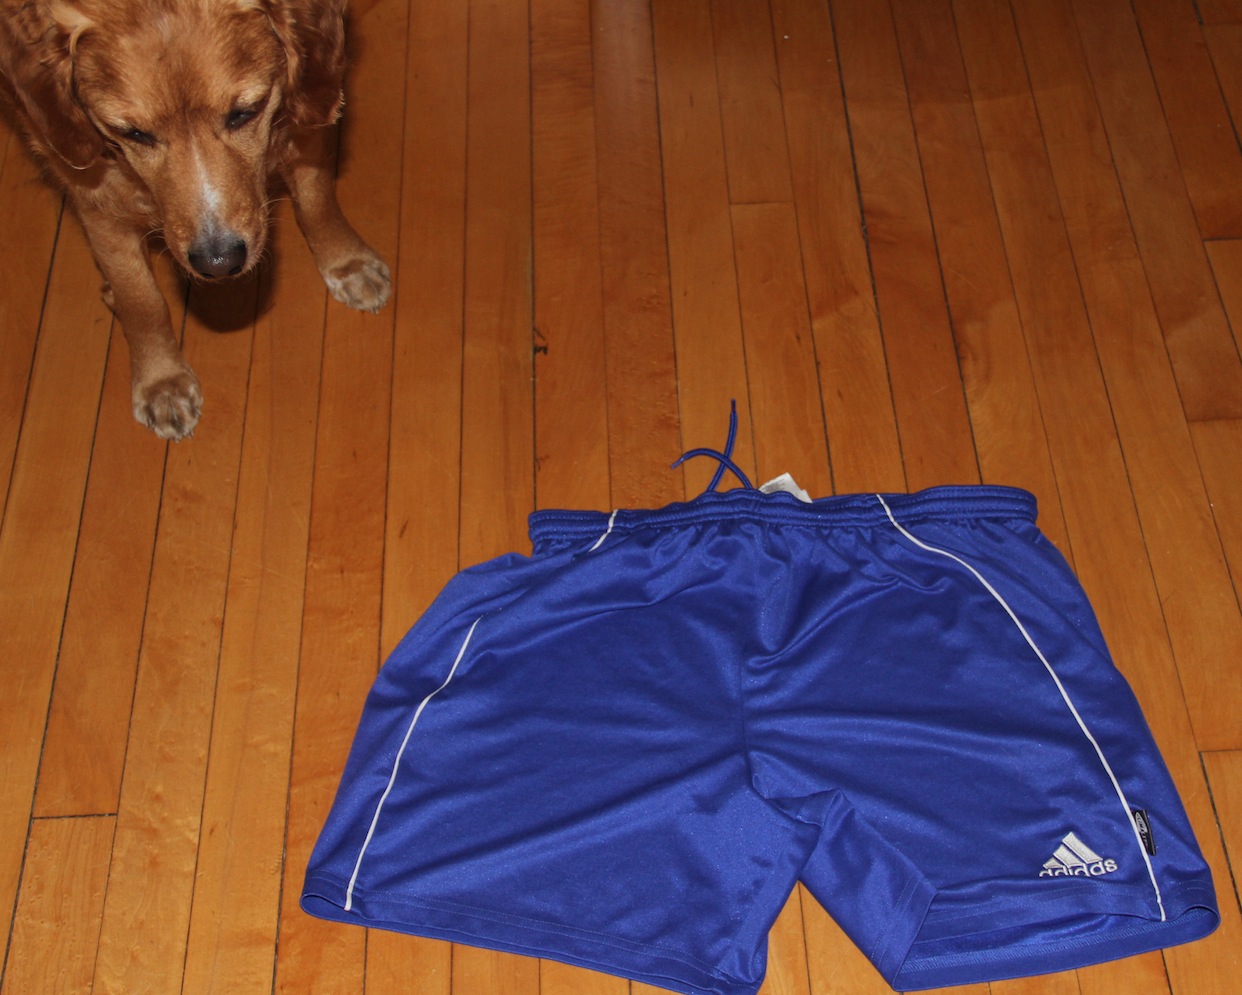
Awhile ago I made a reflective dog leash for Rusty. It served  us well but Rusty got a new collar and the buckle on the leash was too small for the ring. So it was time to redo his leash. I’m using the same leash with  nylon webbing and a clip I picked up from Ragged Mountain, a store in North Conway, NH.

reflective dog leash

First thing I did was seam rip the old buckle off and remove the pieces of reflective tape that remained.

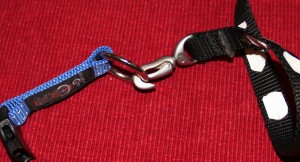
Next I hand stitched the new clip in place. I decided to sew by hand because the webbing is very thick and I don’t know how my machine would handle it. I don’t have a lot of needles to pick from, so I went with a crewel hand needle. I’m not even sure why I have these but they were in my sewing kit. The webbing is thick and stiff so it took awhile to sew.

I then cut 2, ½inch wide by 4 inch long reflective fabric tape to replace the old tape. I then stitched one on the bottom of the leash near the clasp and one near the handle of the leash. My stitching for the reflective tape is terrible. I’d like to say that I am a perfectionist and will redo it but I know I won’t. Feel free to judge. 🙂

reflective dog leash

Now it’s time to take Rusty out on a walk and enjoy the new leash.


knit scarf

How to Knit a Neck Warmer or Scarf for a dog

Posted on
Follow Me on PinterestPin It

knit scarf

I have this extra yarn from the felted envelope I made last year and I just couldn’t decide what to do with it. So, I decided to make a knit scarf for Rusty. Or it can be called and neck warmer or ear warmer, it serves all of those purposes. This is a very wide scarf for a dog because Rusty has a giraffe neck. Adjust the amount of stitches in order to fit your dog. The yarns are Lion Brand Yarn Color Waves #353 Lava and Watercolors #352 Mist Grey.

  1. I used US size 11 needles and cast on 20 stitches.
  2. Knit stitch 15 rows with the first color
  3. Add new color,(LINK), knit 15 rows
  4. Repeat until desired length. I ended up doing it 3 times and then just completing each color. It’s a different look and I wanted it to begin and end with the same yarn.
  5. Bind off.
  6. Then I sewed on 3 buttons because I knew Rusty would try to shake it off. Since I used such large needles there is no need for button holes. They slip through the knitting. The key was finding the right size of buttons.

knit scarfknit scarf

The complete scarf is 28 inches long and 7 inches wide.


front knit scarfknit scarf


How to Add New Yarn to a Knitting Project

Posted on
Follow Me on PinterestPin It

It is not difficult to add a new yarn ball to a knitting project.

add new yarn

Finish row, slip needle into first stitch like for a knit stitch.

add new yarn

Take the new yarn and wrap around the needle you want to knit stitch with, leaving enough of a tail to weave in later.

add new yarn

Hold the tail to make sure it doesn’t slip and finish the knit stitch.

add new yarn

Continue to knit stitch using the new color until row is completed.

add new yarn

After row is complete, cut the old color, leaving enough yarn to weave it in.

Weave in all tails and continue to knit with your new color.


knit headband

Easy Knit Headbands

Posted on
Follow Me on PinterestPin It

knit headbandI’ve seen girls around Boston wearing these fantastic knit headbands instead of stocking caps and decided I needed one too. I got searching online for patterns. I’m not an advanced knitter by any means so I needed a quick easy pattern. I found a great one on the cute blog Crafting College.


The first headband I knitted didn’t go exactly as planned. In fact the thing was kind of a hot mess. It was my first time using circular needles and I forgot to combine my first and last stitch to make it one continuous piece! Just plain silly on my part. I was knitting it straight and had to sew it together after it was completed.  I was using a bulky weight yarn, Plymouth Grande Glow Yarn. I was in a hurry and saw 10 on the needles but they were actually US size 15, I bought a set of circular needles awhile ago. Anyways as per instruction I cast on 60 stitches. It ended up being too big, but I’m going to go ahead and say that’s because of a couple of things. 1. I didn’t combine my stitches at the beginning and 2. More importantly, I have at tiny head. So I guess this will probably turn into a Christmas present. Also, because of the bulky yarn I didn’t do step 4 of the instructions, Repeat steps 2 and 3 three more times. This headband was plenty wide.

For this headband, I used US size 15 needles, bulky weight yarn. I cast on 60 stitches. Knit 4 rows, purl 2 rows, knit 3 rows purl 3 rows, and bind off. I didn’t follow the directions so it wasn’t the cute twisty one that she did on her blog but I do like the way it turned out.

knit headband

top view

knit headband

side view, crappy phone quality picture

So I tried again. This time with US size 10 circular needles. I also used Rowan bulky Biggy Print yarn. It only has 33 yards in the ball. If you’re considering using this you’ll need another ball.  I cast on 50 stitches, combined my first and last stitch! I then placed a stitch marker on that stitch so I would know when a row was completed. knit headband

Next, I did what I did for the green one, knit 4 rows, purl 2 rows, knit 3 rows, purl 3 rows and bind off. I did it! I successfully used circular needles for the first time and it had the cute twisty effect that the original one had. I’m thinking about making another one out a lighter weight yarn too, but I wanted a nice warm wool knit headband so I used the bulky yarn I had. I am very pleased with how this turned out and now my ears can be warm without having such bad hat hair this winter!


knit headband

side view

knit headband

top view


xStitch Designer, cross stitch iPad App Review

Posted on
Follow Me on PinterestPin It

cross stitch app

xStitch Designer is a cross stitch app for iPad only and costs $1.99.  I love the idea of being able to create patterns sitting in a coffee shop, waiting in the doctor’s office and things like that. I have to say, it is worth the price. I know people have a hard time spending money on apps but I don’t know the last time I’ve spent $2 and have been entertained for more than a minute.

Things I love:

  • 5 brands of thread to choose from! DMC, JP Coats, Sullivan’s, Anchor, Madeira
  • You have options for canvas size, for creating from scratch and for picture conversion
  • You can create patterns from scratch
  • Picture to pattern conversion and you can edit the picture pattern further
  • Right side bar, it’s out-of-the-way and self-explanatory
  • Simple tap the square to add a stitch, can choose between adding the thread color, symbol or both
  • Scissors to remove a stitch instead of an eraser is a cute idea
  • Can save your works in progress
  • Email and share with Facebook or Twitter your patterns
  • Print to AirPrint printer

Things I’m not so in love with:

  • Screen size, zooming in and out distorts the proportions of the pattern and you have to zoom in a lot to make sure you click the correct square
  • No finishing details, backstitch, french knots etc options
  • No letter writing help, it can be done but you have to figure it out on your own
  • No half stitch, quarter stitch, etc options
  • No undo button

Something I noticed when playing around with a picture of a hibiscus flower was that the size of the canvas affects the detail of the pattern which is obvious but also the brand of thread changed the detail of the pattern. Some brands are better for picture conversion apparently.

Overall, I enjoy this app. It’s perfect for creating smaller, simple projects. I think I’m going to use it create some coaster patterns. You can never have too many coasters. It’s great for getting the basic understanding of cross stitch pattern making. xStitch Designer is worth it for those who want to create patterns on their iPad.


knit headband

Knit Headband for Running

Posted on
Follow Me on PinterestPin It

knit headband

I wanted to a knit headband I could wear while running in the late fall early spring that would cover my ears. I decided on Lion Brand pattern #60760, which is available for free if you sign up for an account with them. I did not check my gauge in this like it says to do in all capital letters. But it turned out well in the end, it was supposed to be 3.5 inches wide and mine turned out to be 2.5 inches which was perfect because I only wanted my ears covered. I used an acrylic instead of wool because I want to be able to throw it in the wash after each run.

The pattern is super simple, US size 10 needles, cast on 10 stitches and stockinette stitch until desired length, bind off. Sew ends together, weave in tails.

To make the stockinette stitch you knit one row and purl the next, and repeat. I wrote down a K or P after I completed each row to help me keep track.

knit headband

It started to curl around row 20 but that’s ok, it just hugs my ears that way. I whip stitched the ends together with a fingerling weight yarn in a similar color. I did this because I wanted to be able to go over it twice for extra strength but not add a lot of bulk.

knit headband So different colors but I’m going running, I don’t really care that it’s not perfectly blended. But, if I make another one to wear just out and about I’ll be more careful with my yarn choices.

knit headbandNow I can’t use “my ears are cold” as an excuse to not run. I don’t know if I’m happy or sad about that.


10 Adorable Homemade Halloween Dog Costumes

Posted on
Follow Me on PinterestPin It

Here is a list of my 10 favorite homemade dog costumes that will be perfect for Halloween. Click on the links or pictures for instructions on how to make one of these great costumes for your furry baby.

lion mane dog costume

1. Lion


Turning your dog into a lion always seems to be a popular and oh so cute choice! This is my dog Rusty, he has two different lions’ manes. Version 1 is a pretty simple a quick mane. Version 2, shown in the picture, is little more complicated but adds some volume to the mane the first version lacked. But I think Rusty looks good in both.


dog costume

2. Dracula


This adorable Dracula cape comes from Mimi & Tara Dog Clothes Patterns. There are multiple sizes for this costume available. So dogs of all sizes can wear it. Just make sure your dog doesn’t bite. 🙂 There’s also a pumpkin pattern for your pup on this site.


dog costume

3. Dinosaur


This cute little dinosaur tank comes from Martha Stewart. It’s the perfect little costume to make your pup the hit of the party.


dog costume

4. Walrus


I immediately smiled when I saw this walrus costume on Instructables. It’s the perfect statement dog costume. I would really love to see a video of this cute pup walking in this costume. It makes me happy just thinking about it.


dog costume

5. Hula Dog


I imagine matching dog parent and dog costumes with this Hula outfit from Celebrating Halloween, it would be cute! The hula outfit is a classic and after Halloween, this too cute costume is the perfect excuse to have a Luau.


make a bird costume dog

6. Bird


This is my Rusty modeling a parrot costume I made him. Lots of feathers meant a lot of the work but it was completely worth it.


dog costume

7. M&M


This tasty and easy to create M&M costume by Love to Sew Studio is perfect. It’s because you can easily change the color of the candy. If you prefer fruit flavored candy instead of chocolate, put an ‘S’ for a Skittles costume!


dog costume

8. Pirate


This cute pirate costume comes from Make: Craft. This costume is actually two pieces. So it’s a nice bonus having new shirt and pants patterns for your pooch.


dog costume

9. Harry Potter


Turn your dog into Harry Potter, or should I say Hairy Potter? Okay wow, that was terrible. Sorry I didn’t attempt a pun on the pirate costume. I’ll leave the jokes to the professionals. But this cute costume comes from All Free Holiday Crafts.


dog costume

10. Chia Pet


This Chia Pet costume from The Flirty Blog is just hilarious. If you want to make sure you and your dog are the center of attention this would be the perfect costume. This blog also has other dog costume ideas.


shirt collar

How to Make a Shirt Collar for a Dog

Posted on
Follow Me on PinterestPin It

dog shirt collar

I decided Rusty needed another piece for his work wardrobe. So I decided to make his a shirt collar. I have a pattern for it. But the easiest way, I think, for someone to make it at home is to use an old collared shirt you don’t want anymore and take apart that collar for the pattern. Or if you use my pattern, please note the sizing of 14.5inch neck and adjust the printing size accordingly. Also there is a lot of ironing for this pattern. Yes, it is annoying but taking the time to properly press each piece will end in much cleaner results and make sewing much easier.

bottompatterntoppattern

Things you need:

  • fabric, preferably cotton
  • interfacing
  • matching thread
  • if you’re like me, a sewing machine that can make a button-hole because I don’t know how to do it by hand.
  • button

1. Place, pin and cut out fabric and interfacing pattern pieces.

applyinterfacing

2. Apply interfacing B to Fabric A leaving about ¼ inch of fabric at the top of A.

3. Apply interfacing D to fabric C leaving about ¼ inch of fabric at the bottom of C.

shirt collar

4. On pieces, A and B fold over and press raw edges on 3 sides, leaving the bottom as is.

5. Pin together A and B, right sides out, and sew with a ¼ inch top stitch and the 3 sides you’ve pressed the edges.

6. On pieces C and D fold over about ¼ inch and press all four sides.

7. Center AB in between C and D and pin all the layers together, right sides out.

8. Stitch around all four sides of C and D, encasing AB in between the layers making one piece.

9. Position and mark where the button-hole should be, and use your machines button-hole foot to create the button-hole. If you don’t have a machine that can do that click here to learn how to do it by hand.

10. Sew on the button.

shirt collarshirt collar

11. Put it on your pooch and enjoy!

shirt collarshirt collar


Hopefully your dog will enjoy it more than Rusty because he looks scared in these pictures 🙁


basket weave scarf

Basket Weave Scarf

Posted on
Follow Me on PinterestPin It

basket weave scarf

So remember way back in November when I started to knit a basket weave scarf for my husband? Well I FINALLY finished it! Just in time for this 90 degree and humid weather we’re having. So my husband will have to wait a few months to wear it but I’m very happy to have finally finished it.

Here’s what happened. I don’t enjoy long projects so I started knitting it in November worked on it for maybe two weeks and put it away. Then a few weeks ago I was sorting my yarn when I found this unfinished project sitting at the bottom of basket. I decided it was time I got back at it. I’m very happy with the results. The pattern is just nice enough to give it some visual interest without being overbearing. I love it. Now I need to tackle some other unfinished projects.

It ended up being  about 5½ inches wide x 6 feet long.

basket weave scarf

basket weave scarf


dog tank top

How to Make a Tank Top for a Dog

Posted on
Follow Me on PinterestPin It

dog tank topMy husband was getting rid of an old pair of athletic shorts and I saw them and thought that would be a cute dog tank top. Let’s face it, I have a difficult time coming up with things that aren’t costumes for Rusty. But this tank top is the perfect summer athletic shirt for him. Even if he didn’t seem too impressed with it, I like it.

dog tank top

Rusty checking out the shorts.

First thing I did was cut off the top of the shorts right below where the tired elastic and draw string are. Next thing I did was seam rip the two legs apart.

dog tank top

Next, I folded the fabric in half and pinned it closed. Then I took a tank top I had with large arm holes and measured Rusty and it to make sure it would work as a pattern for him and traced the lines for the arm holes and neck.

dog tank topThen I cut out the pattern and placed the fabric inside out. I pinned and sewed the shoulder seams together. I used a jersey needle in my sewing machine because I found the universal needle was too rough on the nylon fabric. I then tried it on Manne to check fit and how I wanted to velcro it shut.

dog tank top

Manne the model

It might not be very noticeable in the picture, but I made this tank top to where one of Rusty’s leg has to go through a hole and then his head goes through the neck hole and it velcro to make the other leg hole and close the shirt. I did it this way so couldn’t shake it off.

Next I folded over and pressed all unfinished edges, and then folded them over again to encase the raw edges and sewed the seam.

To finish I took some fusible velcro, cut to the right size, and ironed them on to correct spots. I used a pressing cloth for this because the iron needed to be set to a steam setting. All that there was left for me to do was to have Rusty model it.


dog tank top

Model shot

dog tank top

He’s about had it.

dog tank top

He’s over it.