ornament

Cross Stitch Advent Calendar Ornaments

Posted on
Follow Me on PinterestPin It

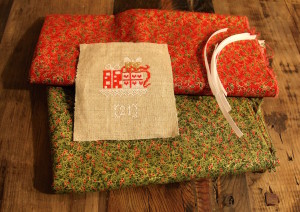
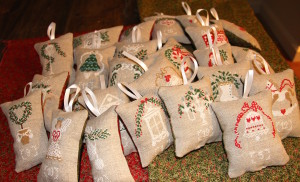
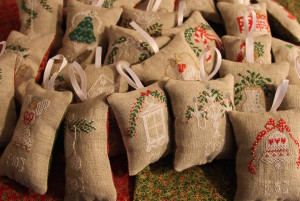
ornamentI have worked hard to complete cross stitch advent calendar ornaments. I loved how they turned out!

Materials:

What I did:

ornamentsFirst I decided how to space out the ornaments on the linen. I should have measured it but I didn’t. Then I cross stitched them all which felt like it took forever mainly because it almost did.

Next, I measured about in inch around all sides on the pattern pieces and cut. I then took out my sewing machine and found matching thread and did a zigzag stitch around the edges of all 25 pieces.

Then I decided which color of fabric would go best with each ornament. I then placed the fabric right side up on table and laid the cross stitched pieces wrong side up and pinned them to the fabric. Then I took pinking shears and cut out the fabric around the linen getting as close to it as possible without cutting the linen.
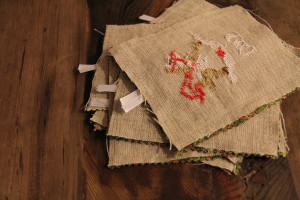
ornamentsNext, I cut 6 inch pieces of ribbon and slipped a folded in half piece between the two fabric layers and centered  and pinned it with about ½ inch of the cut sides sticking out.

Then, leaving about an 1½ inch opening (to be able to turn right side out) I straight stitched with about ½ inch seam going back and forth over the ribbon a couple of times.

Press, on the fabric side, and carefully turn ornaments right side out, pushing corners out. Press again.

Stuff to your desired fullness.
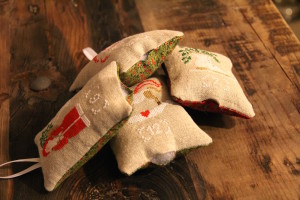
ornamentHand stitch the openings closed.

Enjoy your hard work!

ornament


knit kitchen mat

Knit Kitchen Mat

Posted on
Follow Me on PinterestPin It

knit rug

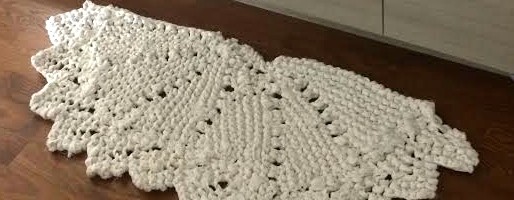
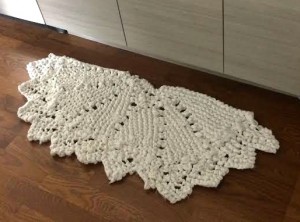
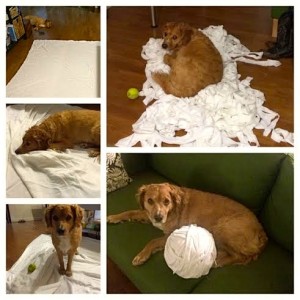
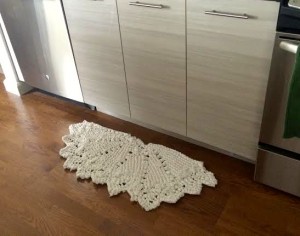
I recently moved into a new apartment and along the way my old kitchen mat got thrown away. I was trying to decide whether to buy one or make one and then I saw the Rag Doily Rug on Cocoknits.com and knew I wanted it in my kitchen. I followed her rag yarn tutorial and the only thing I did different was use an old queen sheet set because I didn’t have a king size flat sheet and I didn’t want to buy one. Rusty really enjoyed the process of making the yarn or enjoyed getting in the way at least.

knit kitchen matIt was a really quick and fun process except for the part when I was watching a show and messed up and didn’t rip out enough stitches. But now mine is unique, right? That’s what I’ll tell myself. It was my first time knitting with rag yarn and using size 19 circular needles. I enjoyed using both. I’ve actually put it in the washer and dryer twice now and it still looks good! So happy with my special kitchen accessory.

knit kitchen mat


xStitch Designer, cross stitch iPad App Review

Posted on
Follow Me on PinterestPin It

cross stitch app

xStitch Designer is a cross stitch app for iPad only and costs $1.99.  I love the idea of being able to create patterns sitting in a coffee shop, waiting in the doctor’s office and things like that. I have to say, it is worth the price. I know people have a hard time spending money on apps but I don’t know the last time I’ve spent $2 and have been entertained for more than a minute.

Things I love:

  • 5 brands of thread to choose from! DMC, JP Coats, Sullivan’s, Anchor, Madeira
  • You have options for canvas size, for creating from scratch and for picture conversion
  • You can create patterns from scratch
  • Picture to pattern conversion and you can edit the picture pattern further
  • Right side bar, it’s out-of-the-way and self-explanatory
  • Simple tap the square to add a stitch, can choose between adding the thread color, symbol or both
  • Scissors to remove a stitch instead of an eraser is a cute idea
  • Can save your works in progress
  • Email and share with Facebook or Twitter your patterns
  • Print to AirPrint printer

Things I’m not so in love with:

  • Screen size, zooming in and out distorts the proportions of the pattern and you have to zoom in a lot to make sure you click the correct square
  • No finishing details, backstitch, french knots etc options
  • No letter writing help, it can be done but you have to figure it out on your own
  • No half stitch, quarter stitch, etc options
  • No undo button

Something I noticed when playing around with a picture of a hibiscus flower was that the size of the canvas affects the detail of the pattern which is obvious but also the brand of thread changed the detail of the pattern. Some brands are better for picture conversion apparently.

Overall, I enjoy this app. It’s perfect for creating smaller, simple projects. I think I’m going to use it create some coaster patterns. You can never have too many coasters. It’s great for getting the basic understanding of cross stitch pattern making. xStitch Designer is worth it for those who want to create patterns on their iPad.


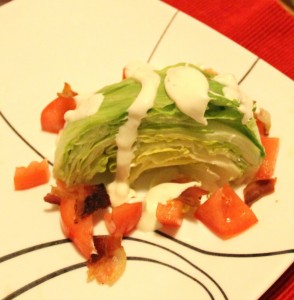
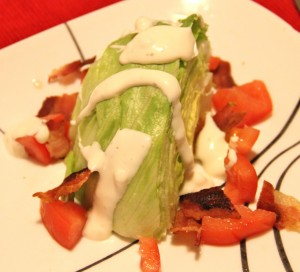
wedge salad

BLT Wedge Salad

Posted on
Follow Me on PinterestPin It

wedge salad

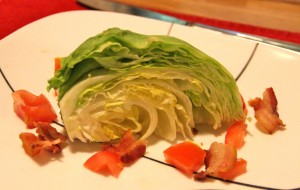
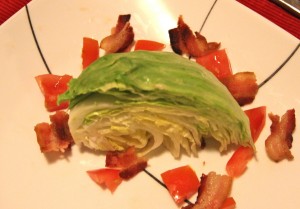
I had a BLT wedge salad at a restaurant the other day and loved it. It’s a fun new way to eat your veggies. I needed to make it at home. It is really easy to make too! Just wash and cut your head of lettuce into 4 pieces, sprinkle your favorite salad veggies and proteins around it, dress it and you’re done!  A wedge salad is also an easy way to wow your guests at your next get together! I like to serve it with salmon and a twice baked potato or biscuits.

Serves 4

Ingredients:

  • head of iceberg lettuce
  • diced tomato seeds removed, or cherry tomatoes cut in half
  • bacon
  • blue cheese
  • blue cheese dressing

Directions:

  1. Cut off bottom/stem of head of lettuce and then cut head into 4 equal pieces
  2. Cook bacon in skillet until and break into pieces.
  3. Put quartered lettuce onto four separate plates.
  4. Sprinkle the tomatoes, blue cheese and bacon around the lettuce.
  5. Cover in blue cheese dressing.
  6. Get your knife and fork and enjoy your wedge salad!

wedgesaladwedge saladwedge salad


shredded chicken

Shredded Chicken Recipe

Posted on
Follow Me on PinterestPin It

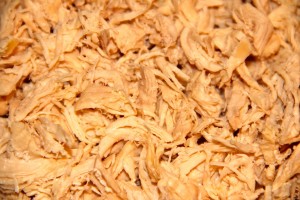
shredded chicken

Shredded chicken is a very versatile food. You can cover it in barbecue sauce, taco seasoning or anything else you can think of; there are endless possibilities. This makes it a great meal starter and it’s super easy to make!

How I make shredded chicken:

Serves 1-2

Ingredients:

  • 2-4 chicken tenders or 1-2 chicken breasts, boneless and skinless
  • 1 cup chicken broth

Directions:

  1. Pour broth into a skillet that has a lid, bring to a boil.
  2. Reduce to a simmer and carefully place chicken into the skillet. Cover with the lid.
  3. After 4 minutes, carefully flip the chicken and cook another 3-4 minutes. *I found using tongs much easier than using a turner.
  4. Remove the chicken from skillet and place onto a cutting board. Discard the broth.
  5. With two forks, shred the chicken.
  6. Season as you wish.
  7. Enjoy!

shredded chicken


jack and ginger

Jack and Ginger Drink Recipe

Posted on
Follow Me on PinterestPin It

jack and ginger

I love ginger ale so I often try to find ways to include it in my drinks.

Jack and Ginger:

  • 3 ice cubes
  • 4oz oz ginger ale
  • 1oz Jack Daniels
  • 1 lemon wedge or 1/2oz lemon juice
  1. Mix them all together and garnish with lime.
  2. Enjoy!

jack and ginger


bacon tomato grilled cheese

Bacon Tomato Grilled Cheese

Posted on
Follow Me on PinterestPin It

bacon tomato grilled cheeseIt’s no secret by now that I LOVE grilled cheese sandwiches. I probably should have a category just for all the grilled cheeses I have made. I made a bacon, tomato grilled cheese and ate with tomato soup and it was delicious. But how can you go wrong with melted cheese and bacon?

Ingredients:

  • 2 slices of bread
  • 1 slice Muenster cheese
  • 1 slice Colby Jack cheese
  • 2 pieces of bacon cut in half
  • 2 slices of tomato
  • butter

Directions:

  1. Fry up the bacon, I like to get it out of the pan something between limp but still cooked and so crispy that it crumbles easily. 
  2. Heat up the pan to medium heat
  3. Butter one side of each piece of bread
  4. Place one slice of bread butter side down onto the hot pan
  5. Put one slice of cheese followed by the bacon, then the tomatoes and then the other slice of cheese on the bread
  6. Put the other piece of bread on your sandwich, butter side up
  7. Flip the sandwich over, after the bread is a nice brown color on the bottom and the cheese closest to the pan is melted
  8. Remove the sandwich from the pan after the other side is brown and cheese is melted
  9. Enjoy!
*If it seems like your bread is browning before the cheese has melted, try turning down the heat and placing a lid over the pan for a minute to help the cheese melt faster. 

dog tank top

How to Make a Tank Top for a Dog

Posted on
Follow Me on PinterestPin It

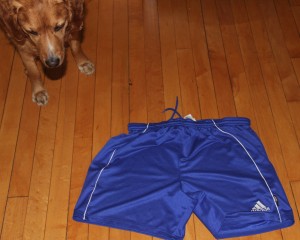
dog tank topMy husband was getting rid of an old pair of athletic shorts and I saw them and thought that would be a cute dog tank top. Let’s face it, I have a difficult time coming up with things that aren’t costumes for Rusty. But this tank top is the perfect summer athletic shirt for him. Even if he didn’t seem too impressed with it, I like it.

dog tank top

Rusty checking out the shorts.

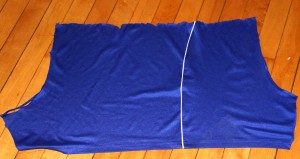
First thing I did was cut off the top of the shorts right below where the tired elastic and draw string are. Next thing I did was seam rip the two legs apart.

dog tank top

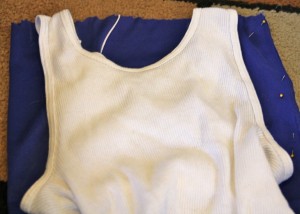
Next, I folded the fabric in half and pinned it closed. Then I took a tank top I had with large arm holes and measured Rusty and it to make sure it would work as a pattern for him and traced the lines for the arm holes and neck.

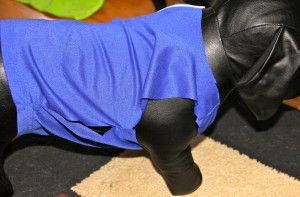
dog tank topThen I cut out the pattern and placed the fabric inside out. I pinned and sewed the shoulder seams together. I used a jersey needle in my sewing machine because I found the universal needle was too rough on the nylon fabric. I then tried it on Manne to check fit and how I wanted to velcro it shut.

dog tank top

Manne the model

It might not be very noticeable in the picture, but I made this tank top to where one of Rusty’s leg has to go through a hole and then his head goes through the neck hole and it velcro to make the other leg hole and close the shirt. I did it this way so couldn’t shake it off.

Next I folded over and pressed all unfinished edges, and then folded them over again to encase the raw edges and sewed the seam.

To finish I took some fusible velcro, cut to the right size, and ironed them on to correct spots. I used a pressing cloth for this because the iron needed to be set to a steam setting. All that there was left for me to do was to have Rusty model it.


dog tank top

Model shot

dog tank top

He’s about had it.

dog tank top

He’s over it.


Margarita Recipe

Posted on
Follow Me on PinterestPin It

Happy Cinco De Mayo!

I hope everyone is having a great Sunday. Enjoy a cucumber margarita or if you prefer a regular one try this margarita recipe, it’s for an individual drink:

Ingredients:

  • 2oz tequila
  • 2oz simple syrup, the recipe for this can be found on my cucumber margarita page
  • 2oz lime juice
  • ice
  • lime wedge for garnish

Frozen:

1. Combine all ingredients plus around 4 ice cubes and blend.

2. Pour into salted rim cup and garnish with lime wedge

On the rocks:

1. Pour all ingredients over 3 ice cubes in a salted rim glass

2. Stir to mixture

3. Enjoy!


Twice Baked Potato Recipe

Posted on
Follow Me on PinterestPin It

twice baked potato


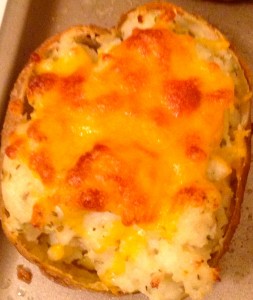
Twice baked potatoes are amazing. Enough said, here’s how I make mine.

Ingredients:

  • 4 potatoes, the ones that are good for baking not the red ones
  • olive oil to taste
  • salt to taste
  • black pepper to taste
  • 3-4 cloves of garlic, minced
  • 1/2 cup mixed herbs
  • 1 cup cheese of your choice, I do mozzarella
  • sour cream to taste
  • butter to taste

OR

  • 4 potatoes
  • salt and pepper to taste
  • 3-4 cloves of garlic minced
  • 1 cup cheese of your choice, I use cheddar
  • A lot of ranch dressing, to taste

Directions:

  1. Pre-heat oven to 400 degrees
  2. Scrub potatoes well, you need clean skins
  3. Pat dry with a paper towel
  4. Pierce with sharp object several times,  I use a fork
  5. Place in roasting tin or cookie sheet with a lip and drizzle with olive oil until potatoes are well coated, salt to taste
  6. Place tin on an upper shelf and roast for about 1 hour or until cooked, if you’re using a convection oven the time is about 40 minutes because it has a smaller small to heat up.
  7. While potatoes are in the oven, combine the rest of the ingredients to taste, set aside until the potatoes are done
  8. Carefully remove and cut each potato in half, lengthwise
  9. With a spoon, remove the potato flesh but be careful not to rip the skin and put into the bowl with the rest of the ingredients and mash until well combined
  10. Pile flesh back into the skins and return the potato halves to the roasting tin, sprinkle with cheese
  11. Return the tin to the oven for 10-15 or until the tops of the potatoes are light golden brown and cheese has melted
  12. Remove from the oven and serve immediately.
  13. Enjoy!

twice baked potato