10 Adorable Homemade Halloween Dog Costumes

Posted on
Follow Me on PinterestPin It

Here is a list of my 10 favorite homemade dog costumes that will be perfect for Halloween. Click on the links or pictures for instructions on how to make one of these great costumes for your furry baby.
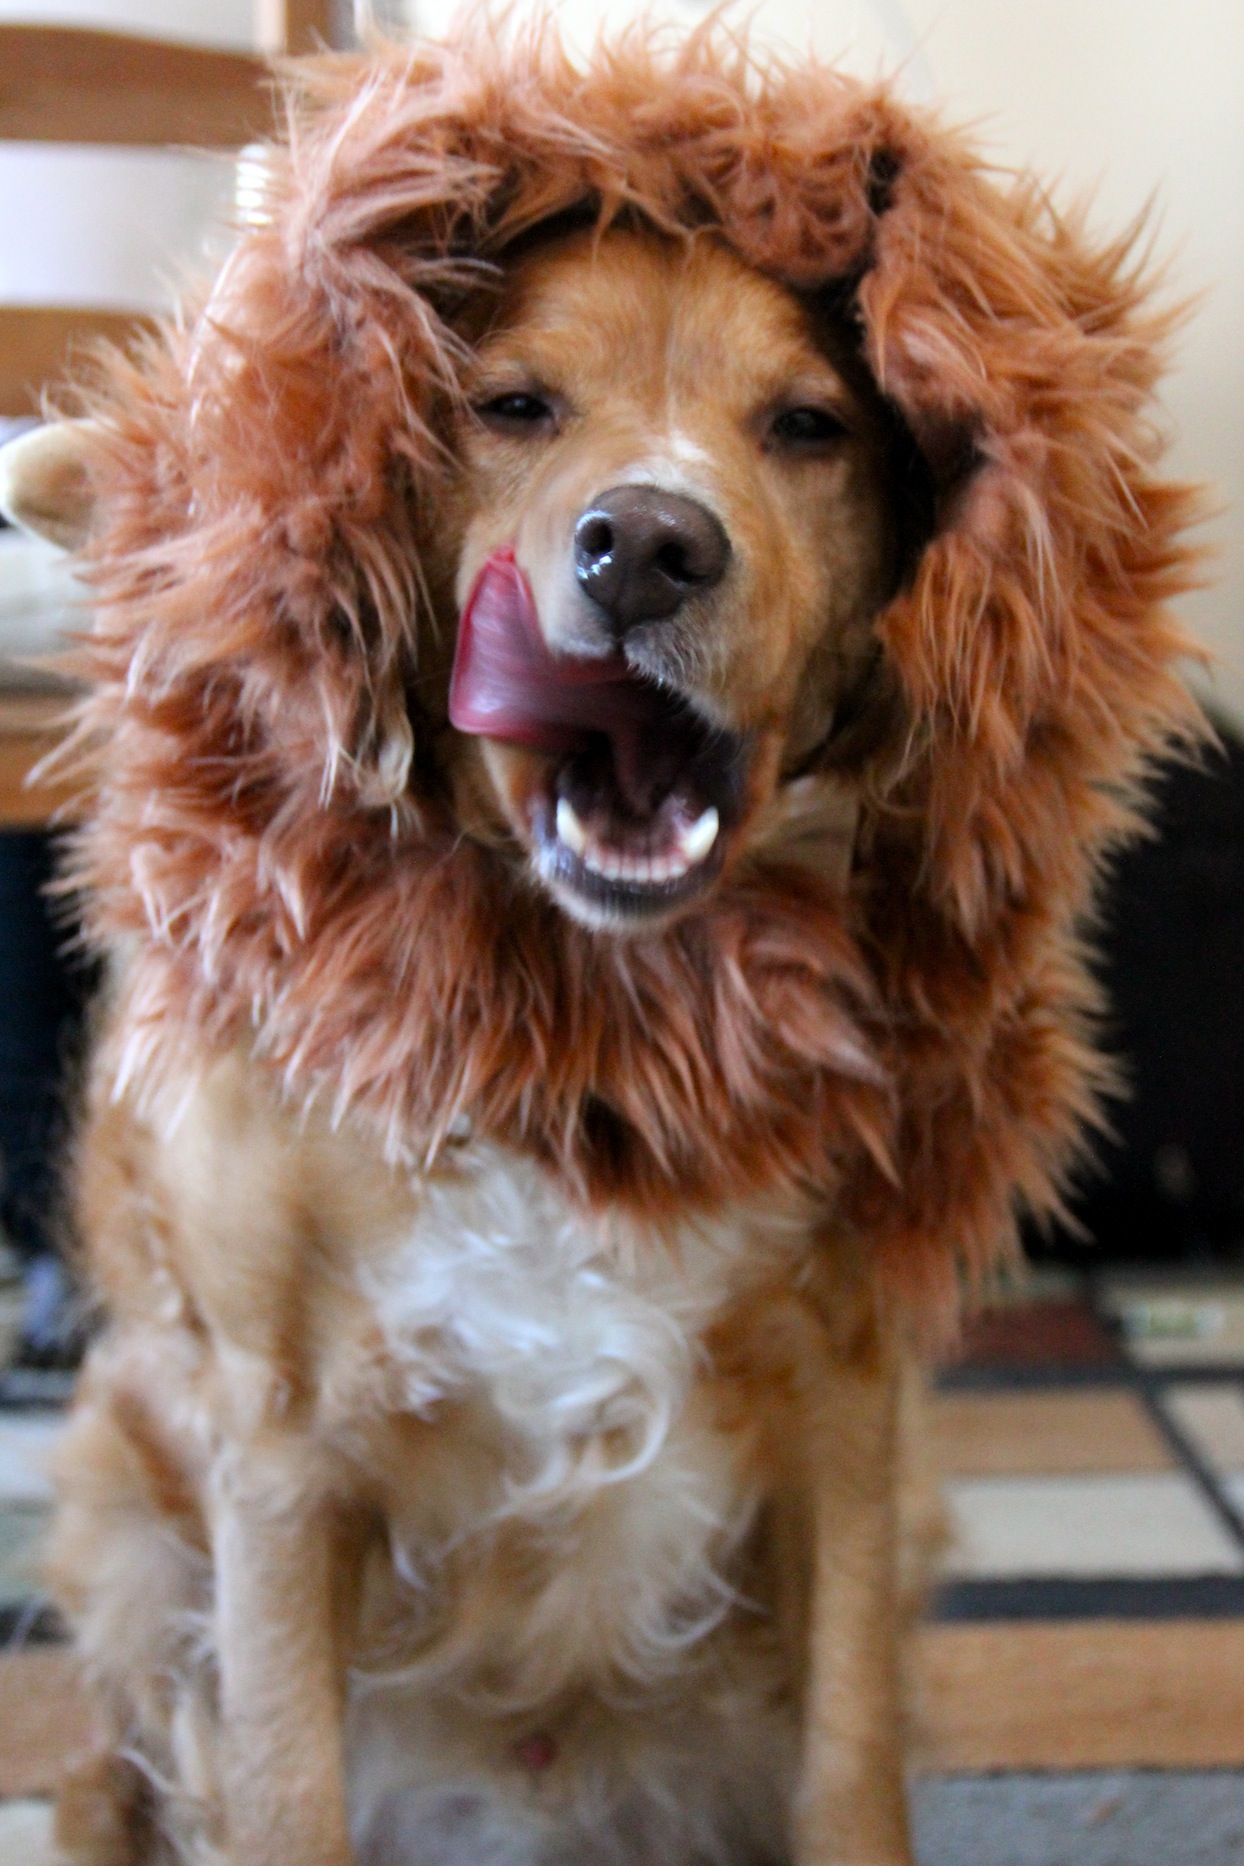
lion mane dog costume

1. Lion


Turning your dog into a lion always seems to be a popular and oh so cute choice! This is my dog Rusty, he has two different lions’ manes. Version 1 is a pretty simple a quick mane. Version 2, shown in the picture, is little more complicated but adds some volume to the mane the first version lacked. But I think Rusty looks good in both.
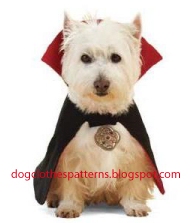


dog costume

2. Dracula


This adorable Dracula cape comes from Mimi & Tara Dog Clothes Patterns. There are multiple sizes for this costume available. So dogs of all sizes can wear it. Just make sure your dog doesn’t bite. 🙂 There’s also a pumpkin pattern for your pup on this site.
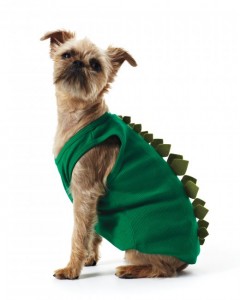


dog costume

3. Dinosaur


This cute little dinosaur tank comes from Martha Stewart. It’s the perfect little costume to make your pup the hit of the party.
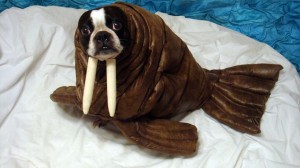


dog costume

4. Walrus


I immediately smiled when I saw this walrus costume on Instructables. It’s the perfect statement dog costume. I would really love to see a video of this cute pup walking in this costume. It makes me happy just thinking about it.
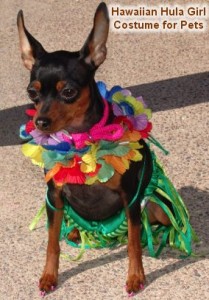


dog costume

5. Hula Dog


I imagine matching dog parent and dog costumes with this Hula outfit from Celebrating Halloween, it would be cute! The hula outfit is a classic and after Halloween, this too cute costume is the perfect excuse to have a Luau.


make a bird costume dog

6. Bird


This is my Rusty modeling a parrot costume I made him. Lots of feathers meant a lot of the work but it was completely worth it.
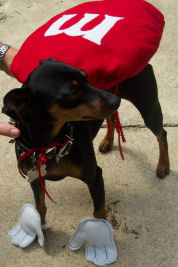


dog costume

7. M&M


This tasty and easy to create M&M costume by Love to Sew Studio is perfect. It’s because you can easily change the color of the candy. If you prefer fruit flavored candy instead of chocolate, put an ‘S’ for a Skittles costume!
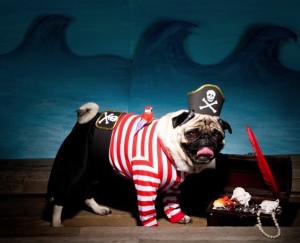


dog costume

8. Pirate


This cute pirate costume comes from Make: Craft. This costume is actually two pieces. So it’s a nice bonus having new shirt and pants patterns for your pooch.
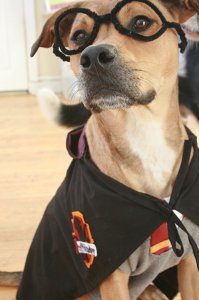


dog costume

9. Harry Potter


Turn your dog into Harry Potter, or should I say Hairy Potter? Okay wow, that was terrible. Sorry I didn’t attempt a pun on the pirate costume. I’ll leave the jokes to the professionals. But this cute costume comes from All Free Holiday Crafts.
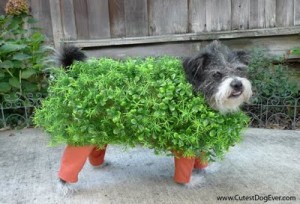


dog costume

10. Chia Pet


This Chia Pet costume from The Flirty Blog is just hilarious. If you want to make sure you and your dog are the center of attention this would be the perfect costume. This blog also has other dog costume ideas.


kiwi

How to Peel a Kiwi

Posted on
Follow Me on PinterestPin It

kiwi

I bought a couple kiwis at the store and I realized that I didn’t know how to peel them.  Usually I buy them pre-cut so I have never thought about how to do it.  My husband showed me a quick an easy way to peel a kiwi. It was so clever I thought I’d share.

First cut the fruit in half.

kiwi

Next, take a soup spoon and wedge it between the flesh and the skin and move it around the fruit to separate it

.kiwikiwi

Peel back the skin from the fruit.

kiwi

Slice.

kiwi

Enjoy!


dress into a skirt

How To Turn a Strapless Dress into a Skirt

Posted on
Follow Me on PinterestPin It

dress into a skirt

I had this strapless dress and although I like it and love the color, I hardly ever wore it. I decided it needed a make over into something I’d actually wear. I made it into a high-waisted skirt and kept the pockets.  I worked on the fit in the waist of the skirt before I moved on to the length of the skirt.

How I did it:

1. Removed the hook and eye and zipper.

dress into skirt

2. Next I removed the top part of the dress being careful to keep the seam stitching on the top part of the band that is in between the top part and the skirt part.

dress into skirt

Close Up of the Seam

3. I shortened the zipper.

dress into a skirt

4. Next I put on the skirt to figure out how much I needed to take in on the waist because it is going to sit at a different spot on my body.

5. Seam rip the side seam.  Mark and pin it together with the new measurements. I left the seam allowance to be quite large to be cut down a bit with pinking shears later if I needed to let out the seam a bit.

6. It’s time to sew the new seam and install the zipper! It is important to note to TEST your FABRIC and USE the CORRECT NEEDLE in your machine. I’m sure you all know that, but I had a blonde moment and didn’t test my fabric first resulting in my universal needle poking/ripping some major holes into the material.

dress into a skirt

blurry picture of the holes that need repaired

The jersey/knit needle worked much better. Mark on the skirt where the zipper will begin. At that point, you’ll back stitch a couple of stitches and then change to a longer or basting stitch on the machine. The basting stitch is where the zipper will go.

7. Press the seam open, and carefully pin the zipper onto the seam making the teeth directly over the seam line. Make sure the pins can easily be removed as you sew the zipper on and that you changed to a zipper foot on your machine.

dress into a skirt

8. After the zipper is installed, it’s time to finish the top hem. Because I cut the top to where there was stitching at on the top band, I simply folded over ¼inch pressed and pinned. I then sewed it and pressed again. The only thing I wish I had done differently with this side seam and zipper would have been to leave space for the hook and eye. Rookie mistake on my part.

9. I put it on to make sure it fit and to figure out the length I wanted. I pinned it to the desired length. I needed to remove about 3½ inches. I marked the skirt to just below the desired length, and cut with my pinking shears. Folded up ¼inch and pressed and pinned.

dress into a skirt

10. Sew that seam! Press! Try on!

11. Enjoy!

dress into a skirt

Finished skirt and bonus flip flop tan lines!


shorten a shirt dress

How to Shorten a Shirt Dress

Posted on
Follow Me on PinterestPin It

dress

I recently bought a shirt dress to wear with boots as a fun fall work outfit but of course it is too long, about 2 inches too long. I knew I needed to shorten my shirt dress. This was going to be tricky for me because of the curves at the bottom. I usually only work with straight lines because my lack of patience usually gets the better of me when trying to work on a curve. But after a long afternoon with Rusty whining behind me from lack of attention I managed to get it to my desired length.

Here’s what I did:

Stood in front of a mirror and figured out how much fabric needed to be taken off the bottom. I pinned the length and then stood up straight to make sure that was my desired length.

shorten a shirt dress

chalk marks

Next I unbuttoned the shirt and laid it out, right side down, and with my chalk pencil, I marked a lot of spots up to the desired length of the dress. Then,  I also marked about an inch below that to serve as a cutting line.

shorten a shirt dress

two rows of chalk

It’s now time for my most time-consuming part, the hem! I needed to clip a couple of spots on the curves in order for the fabric to lay flat. Little by little I rolled over a ¼inch of fabric and then another ¼inch of fabric and pinned. I made sure to put the pins in to where I could sew with them still in the fabric so I’d have one less thing to worry about. And after all of that work, carefully, put the dress back on to make sure it is at the desired length.

http://www.covergirl.com/collections/nfl-collection/chicago-bears

lots of pins

Sew time! Slow and steady with some patience, wins the race because it is a tiny hem and there are curves, it’s best to go slow.

Try on one last time. Good? Press. Now I have a dress that will be perfect with flat and boots this Fall!

shorten a shirt dress


Make Your Own Dress Form Links

Posted on
Follow Me on PinterestPin It

Ever wanted to make your own dress form? Me too! I have complied a list of tutorials to choose from. Pick the one that is best for you and good luck on your dress form making endeavors!

dress form


This how to is from The Esty Labs Archive gives a very detailed description with pictures to make a dress form out of a t-shirt and duct tape with the help of a friend. You can also jazz it up a bit by using colored or patterned duct tape.


dress form


This paper tape dress form from Instructables is great idea with the use of paper tape, t-shirt, spray sealant foam and a friend. The instructions and pictures are extremely detailed.


dress form


This dress form from Jezebel is probably the closest to buying the real thing, but it is also a lot more involved. It uses plaster bandages, sealant foam, IV cart to create your own stand for it to go on and sewing and creating a cover to cover the form.


dress form


I love the creativity used to make this form. It seems to be so simple. Syzygyo of Worlds created one from chicken wire and some duct tape!


Also, if you have your own dress form already but it isn’t to you exact measurements, look at FabulousFit, they sell “fitting systems” which are pads you can buy to help make adjustments to any part of your dress form!