knit face mask

How to Make a Knit Face Mask

Posted on
Follow Me on PinterestPin It

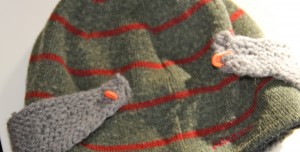
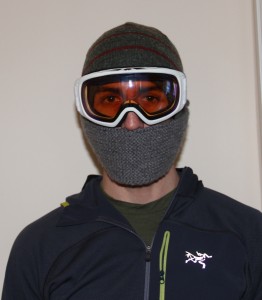
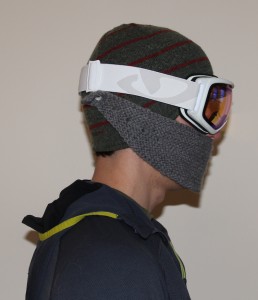
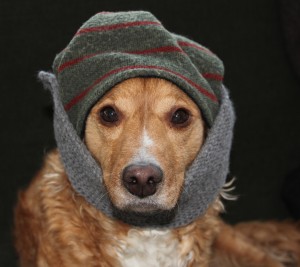
My husband requested a knit face mask that would cover his nose and mouth while he went snowboarding but the tricky part what that he wanted to be able to push it up when not going down slopes and removing it completely when it’s not necessary. I asked Reddit about how to carry out this and they suggested finding a calorimetry pattern on Raverly. That is exactly what I did.

I decide on the Calorimetry Pattern by Kathryn Schoendorf, Knitty.com directions. I attempted this many times and I found myself being too concerned about the pattern. I didn’t even know if it would even work and it was way too long. I made many changes, and simplified the pattern throughout my attempts. After I figured out my pattern, it only took me a couple of hours to knit.

This is what I ended up doing:

  • 1 skein of bulky weight yarn, the one shown is acrylic, with lots of yarn left over
  • size US 8 knitting needles
  • 2 stitch markers

Cast On 80 stitches

Row 1: Knit stitch all

Row 2: Knit stitch all until last 2 stitches, turn work

Row 3: Knit stitch 4 stitches, place marker, knit until last 2 stitches, turn work

Row 4: Knit stitch 4 stitches, place marker 2nd marker, work until next marker, turn work

Row 5: Remove marker, knit stitch 4 stitches, replace marker, knit stitch until next marker, turn work

Repeat row 5 nine more times

Row 6: Do not remove marker, knit stitch until next marker (knitting in between the markers, there should be an equal number of stitches on the outside of the markers)

Row 7: Knit stitch until next marker, remove marker, knit stitch 4 more stitches, replace marker, turn work.

Repeat row 7 until there are only 2 stitches on the outside of each marker.

Row 8: Knit stitch until marker, remove marker and knit stitch last 2 stitches, turn work.

Row 9: Knit stitch the entire row removing the last marker

Bind off loosely.

To attach it to the hat:

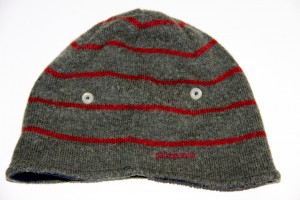
  • hat
  • thread
  • buttons
knit face mask

Mark where buttons should go.
knit face mask

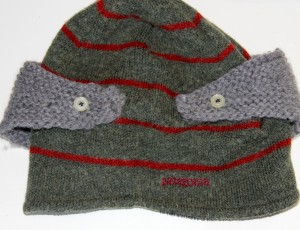
Sew buttons onto the hat.
knit face mask

Use the holes in the calorimetry, to attach it to the buttons.


knit face mask

knit face mask

knit face mask


Make Your Own Dress Form Links

Posted on
Follow Me on PinterestPin It

Ever wanted to make your own dress form? Me too! I have complied a list of tutorials to choose from. Pick the one that is best for you and good luck on your dress form making endeavors!

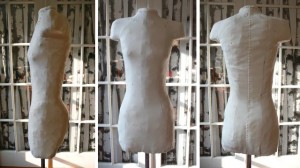
dress form


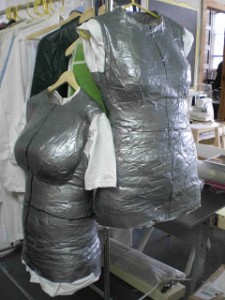
This how to is from The Esty Labs Archive gives a very detailed description with pictures to make a dress form out of a t-shirt and duct tape with the help of a friend. You can also jazz it up a bit by using colored or patterned duct tape.


dress form


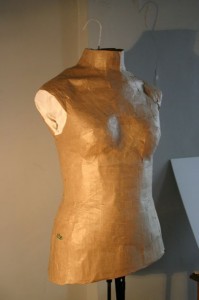
This paper tape dress form from Instructables is great idea with the use of paper tape, t-shirt, spray sealant foam and a friend. The instructions and pictures are extremely detailed.



dress form


This dress form from Jezebel is probably the closest to buying the real thing, but it is also a lot more involved. It uses plaster bandages, sealant foam, IV cart to create your own stand for it to go on and sewing and creating a cover to cover the form.


dress form


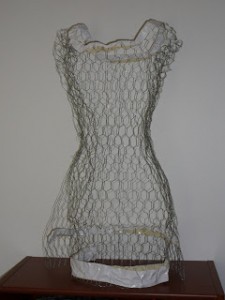
I love the creativity used to make this form. It seems to be so simple. Syzygyo of Worlds created one from chicken wire and some duct tape!


Also, if you have your own dress form already but it isn’t to you exact measurements, look at FabulousFit, they sell “fitting systems” which are pads you can buy to help make adjustments to any part of your dress form!


shirt collar

How to Make a Shirt Collar for a Dog

Posted on
Follow Me on PinterestPin It

dog shirt collar

I decided Rusty needed another piece for his work wardrobe. So I decided to make his a shirt collar. I have a pattern for it. But the easiest way, I think, for someone to make it at home is to use an old collared shirt you don’t want anymore and take apart that collar for the pattern. Or if you use my pattern, please note the sizing of 14.5inch neck and adjust the printing size accordingly. Also there is a lot of ironing for this pattern. Yes, it is annoying but taking the time to properly press each piece will end in much cleaner results and make sewing much easier.

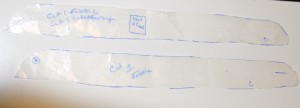
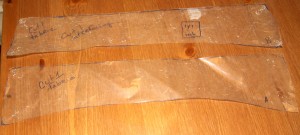
bottompatterntoppattern

Things you need:

  • fabric, preferably cotton
  • interfacing
  • matching thread
  • if you’re like me, a sewing machine that can make a button-hole because I don’t know how to do it by hand.
  • button

1. Place, pin and cut out fabric and interfacing pattern pieces.

applyinterfacing

2. Apply interfacing B to Fabric A leaving about ¼ inch of fabric at the top of A.

3. Apply interfacing D to fabric C leaving about ¼ inch of fabric at the bottom of C.

shirt collar

4. On pieces, A and B fold over and press raw edges on 3 sides, leaving the bottom as is.

5. Pin together A and B, right sides out, and sew with a ¼ inch top stitch and the 3 sides you’ve pressed the edges.

6. On pieces C and D fold over about ¼ inch and press all four sides.

7. Center AB in between C and D and pin all the layers together, right sides out.

8. Stitch around all four sides of C and D, encasing AB in between the layers making one piece.

9. Position and mark where the button-hole should be, and use your machines button-hole foot to create the button-hole. If you don’t have a machine that can do that click here to learn how to do it by hand.

10. Sew on the button.

shirt collarshirt collar

11. Put it on your pooch and enjoy!

shirt collarshirt collar


Hopefully your dog will enjoy it more than Rusty because he looks scared in these pictures 🙁


shirt

How to Shorten Shoulder Straps

Posted on
Follow Me on PinterestPin It

shoulder strap

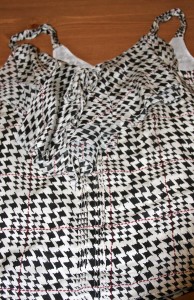
I bought a really cute top for work, the only problem is that it is not petite sized. The straps are way too long making me expose too much of myself. Luckily I knew I could easily fix this after examining the shirt.

First I needed to figure out how much to take off of the straps so I put it on and pinned them into the correct place. I then carefully removed the shirt and measured the amount I needed to take off.

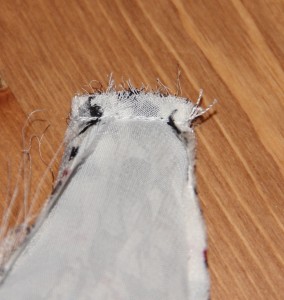
Next I turned the shirt inside out and got my handy seam ripper and opened the area where the strap connects to the shirt.

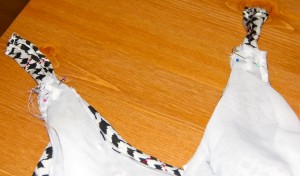
shoulder strapNext, I pulled out the 2 inches it needed to be shortened by and pinned it into place. Repeat for the other strap. shoulder strap

Using matching thread and the proper needle, I sewed the shoulder straps into place, using a back-stitch at each end to make sure they’re secure. I didn’t cut off the extra because it’ll be sitting in between the two layers of the shirt so they won’t be an issue. Turn it right side out and brand new shirt that actually fits.

shoulder strap


dog tank top

How to Make a Tank Top for a Dog

Posted on
Follow Me on PinterestPin It

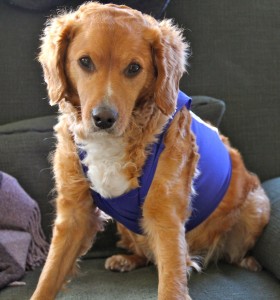
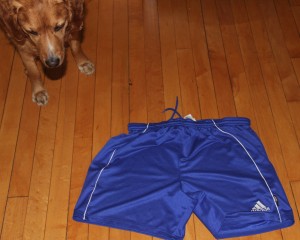
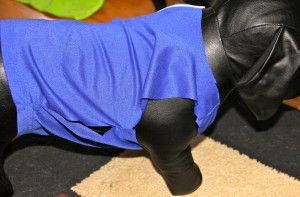
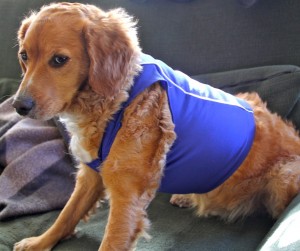
dog tank topMy husband was getting rid of an old pair of athletic shorts and I saw them and thought that would be a cute dog tank top. Let’s face it, I have a difficult time coming up with things that aren’t costumes for Rusty. But this tank top is the perfect summer athletic shirt for him. Even if he didn’t seem too impressed with it, I like it.

dog tank top

Rusty checking out the shorts.

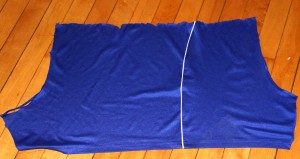
First thing I did was cut off the top of the shorts right below where the tired elastic and draw string are. Next thing I did was seam rip the two legs apart.

dog tank top

Next, I folded the fabric in half and pinned it closed. Then I took a tank top I had with large arm holes and measured Rusty and it to make sure it would work as a pattern for him and traced the lines for the arm holes and neck.

dog tank topThen I cut out the pattern and placed the fabric inside out. I pinned and sewed the shoulder seams together. I used a jersey needle in my sewing machine because I found the universal needle was too rough on the nylon fabric. I then tried it on Manne to check fit and how I wanted to velcro it shut.

dog tank top

Manne the model

It might not be very noticeable in the picture, but I made this tank top to where one of Rusty’s leg has to go through a hole and then his head goes through the neck hole and it velcro to make the other leg hole and close the shirt. I did it this way so couldn’t shake it off.

Next I folded over and pressed all unfinished edges, and then folded them over again to encase the raw edges and sewed the seam.

To finish I took some fusible velcro, cut to the right size, and ironed them on to correct spots. I used a pressing cloth for this because the iron needed to be set to a steam setting. All that there was left for me to do was to have Rusty model it.


dog tank top

Model shot

dog tank top

He’s about had it.

dog tank top

He’s over it.


How to Make a T-Shirt into a Tote Bag

Posted on
Follow Me on PinterestPin It

tote bag

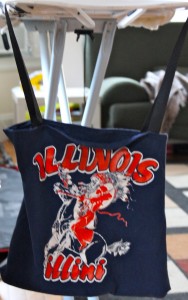
totebagI had this old University of Illinois shirt that I got on Ebay when I was a sophomore there. I wore it a few times and it was a fantastic and soft shirt. But it was old and didn’t fit me quite right. I first tried to make it a more fitted shirt and that was a fail. The weird seam line above the chest just made it look like a ruined sports jersey or something. So, I decided to turn it into a tote bag. Now I just need to decide what to do with the sleeves. I’m thinking Rusty might need some leg warmers or a hat.

Materials Needed:

  • Shirt with design you love but don’t really want to wear
  • Nylon Webbing or durable Ribbon for the straps, I used this ribbon.
  • Sewing Machine
  • Matching thread

Directions:

tote bag

Measure and Mark


1. Measure and mark where on your shirt you’d like to cut on the top and bottom of the shirt. I decided to make it a little easier on myself and re-use the side seams of the shirt. My finished bag was 15″x 14″

To cut, I used regular fabric scissors for the top and pinking shears at the bottom. If you don’t have pinking shears, cut with your fabric scissors and finish the raw edge with a zigzag stitch.

2. With right sides together, pin the bottom and sew with 5/8″ seam. Press. Now, if you kept the side seams intact, you should have a pillow case with three sides sewn.

3. To finish the opening of the bag, roll the hem about 1/4″ all the way around and press to keep it in place. Repeat, to incase the raw edge. Sew to finish the edge.

4. Cut 2 pieces of ribbon or webbing to your desired length, I cut mine to be 36″ long.

5. Place and pin where you’d like your straps being careful not to twist them as you’re placing them. I put mine on the inside of the bag a couple of inches down.

tote bag

kind of difficult to see, but it’s a rectangle

6. Sew the straps on, if you’re using webbing make sure you have the correct needle, in a rectangle, this is a little bit of added strength to the straps and bag. Press.

7. Enjoy! I think I’ll take mine to work and light grocery shopping , maybe one I’ll add a zipper to it. And it’s washable!


tote bag


pin cushion lid

Decorating a Glass Jar with Pin Cushion Lid

Posted on
Follow Me on PinterestPin It

pin cushion lid

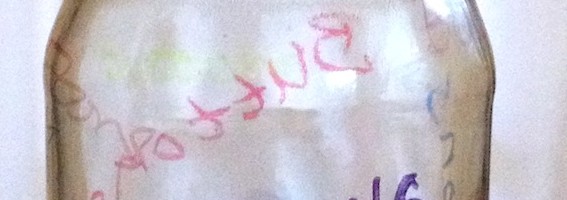
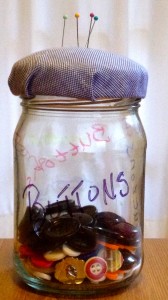
I decided I needed something new to hold my buttons. So I took a jelly jar and removed the label. It took a lot of soaking and scrubbing that thing was really stuck on there. Then I got out my rainbow of permanent markers, beads and hot glue and decided to get to work, free hand style. FAIL this is how it started to turn out and I was not impressed. My lack of patience got the better me, again.


pin cushion lid

FAIL :(

So I removed the beads and got out some rubbing alcohol and cotton balls and removed the marker. The silver was a bit stubborn but it eventually came off. Now, it was time for some planning.

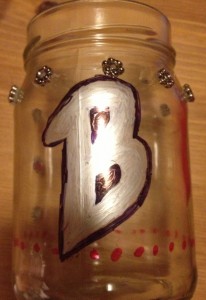
First I decided to create a design on my computer of what I wanted my jar to look like. But Photoshop kept crashing when I went to print the design so I said the heck with it, and hand drew the design on. It’s not perfect but I like it.

For the pin cushion lid. I just took a scrap piece of thick fabric and some Fiber Fill  stuffing and used Mod Podge to glue the fabric over the fill to the lid. I did have to fold over the fabric a bit along the edges but some better planning and correct cutting would fix this issue. The fabric was a little to long, so I cut off the excess from the bottom of the lid after the glue had dried and I now have my button jar with a pin cushion top!

pin cushion top


drawstring backpack

How to Make a DrawString Backpack

Posted on
Follow Me on PinterestPin It

drawstring backpack

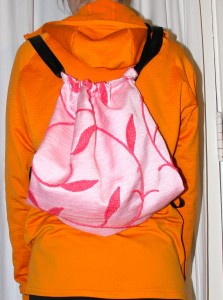
I needed something lightweight and easy to carry on my long walks with Rusty. I decided to go with a drawstring backpack. It’s big enough to hold everything I need and keeps my hands free. I am using leftover material from my tree skirt and had dyed awhile ago.

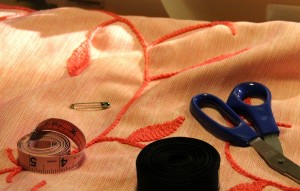
Materials:

  • (2) 17″ X 15″ rectangles of fabric
  • (2) 60″ pieces of ribbon, or cording would work great as well
  • safety-pin
  • sewing machine
  • matching thread
  • iron and board

drawstring backpack

Instructions:

1. After you have measured and cut your fabric, I think mine is a cotton/polyester blend, figure out which end of each piece you want to be the top or opening of your bag. Fold over and press a tiny bit of fabric, ~¼”, and sew. Repeat with the other piece. This is to take care of the raw edge at the opening of your bag.

drawstring backpack

2. Next, take what you have just sewn and fold over about an 1½” and press. Then sew on top of the stitch line in Step 1. This will create a tube for your ribbon to go through.

3. With right sides together, pin the rectangles and stitch with a 5/8″ seam all along the three unstitched sides, starting and stopping where the tube begins. Back stitch at the beginning and end.

4. Attach a safety-pin to an end of your ribbon, and thread the ribbon through the tube on one side of the bag. Repeat for the other side. The safety-pin just makes this process easier.

drawstring backpack

5. Make sure that both pieces of ribbon are of equal length on each side of the bag. With right sides still together, seam rip up the bottom corners of the bag about an inch. Place the ribbon, inside the bag and through the hole you just ripped open. Stitch the hole closed, securing the ribbon to the bag.drawstring backpack

6. Next to take care of the raw edges, zigzag stitch all along the three stitched sides to the bag as close the stitch line as possible. This also double secures your ribbon at the bottom of the bag. Trim the excess fabric close to the zigzag stitch.


Now I have the perfect and unique bag for our walks to work! So excited to use it.


tie for dog

How to Make a Tie for a Dog

Posted on
Follow Me on PinterestPin It

tie for dog

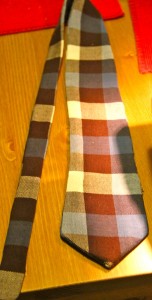
I made a tie for a dog, my dog! Rusty has been going to work with me and I decided he needed an update to his office attire. I went with a tie. Now this is a very simple design. I could have gone one step farther and made it wider and then folded the sides in and tacked them down like a typical tie but the way I did it worked for me. Besides, it’s a tie for a dog, perfection is not required because any dog wearing any type of tie is going to be adorable.

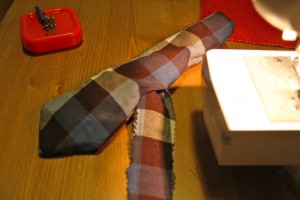
1. I used one of my husband’s old ties as a basic pattern and just shortened the length. The length of my tie is 40 inches mainly because that is the length of the leftover flannel fabric I had. Also, I used an old tie just in case I accidentally clipped it with my scissors. If you don’t have a tie to use, there are many free patterns online for ties from newborn sizes to men’s.
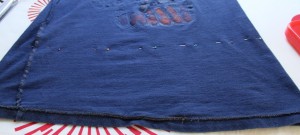
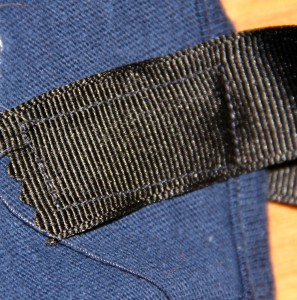
I pressed the fabric and then folded it in half before I laid the tie on it so I could cut two equal pieces.

tie for dogtie for a dog


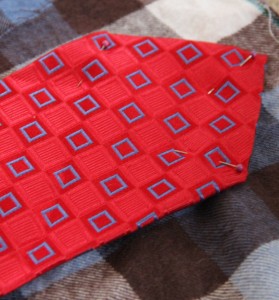
2. Next I pinned the tie onto the fabric, folding the tie to adjust the length.

3. I cut the fabric with my pinking shears because I just bought them and couldn’t wait to use them. I cut just outside the fabric. The area where the tie is folded, I just angled the scissors inward to reach the skinny part of the tie. Then I unpinned and removed the tie and adjusted the angle to make sure there was smooth line for the length of the tie.

4. I decided to apply fusible interfacing to both points of the tie because I wasn’t doing the traditional tie where, on the back of the tie, both sides fold in towards the middle, and wanted to create a little bit of heft to the fabric.

– For interfacing, cut it just on the inside of the seam line so you don’t have to sew through the extra bulk. Next, lay the fabric wrong side up on the ironing board. Then place the interfacing on the desired part of the fabric shiny side down. Place a pressing cloth over the fabric and interfacing. With a steam setting, use the spray button on the iron and wet down area of interfacing and iron over it, constantly moving for about 30 seconds. Allow the fabric to cool and then check to see if it is fused. If not, repeat the ironing.

5. Pin both layers together, right sides facing each other.

6. Press, just in case wrinkles have formed.

7. Sew around the edges with a 1/2 inch seam, start in the middle of the tie, in order to machine stitch each point, and leave an inch wide opening. Backstitch at the start and finish.

8. Press.

9. Pull fabric through so the right side of the fabric is now on the outside and press.

tie for dog


10. Slip stitch the hole closed, pressing it in the step before should have folded the fabric giving a nice area to stitch the hole closed.

tie for dog


I used this Youtube video to learn how to actually tie it.

Now Rusty is ready for work!

tie for dogtie for dog


altered men's suit jacket

Altered Men’s Suit Jacket

Posted on
Follow Me on PinterestPin It

My husband bought a $30 suit jacket from Target that was too big for him, mainly in the waist. We decided it would be a good project for me to work on since I’ve never done any tailoring or altering of men’s clothing except for the hem of pants. So I attempted at creating a great altered men’s suit jacket.

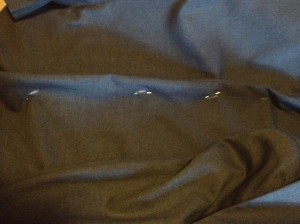
1. First thing I did was have him put it on and I pinched the fabric to fit and then pinned it. Then I unpinned it because I got his undershirt :/ and re-pinned it.

2. Then I marked the place where the pins went into and out of the fabric just in case a pin fell out with a chalk pencil. I did this on the lining of the jacket as well.

men's altered suit jacket

pinch and pin

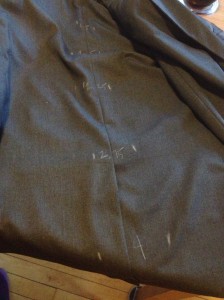
3. I measured in between the dots and marked the measurements on the jacket, with a fabric chalk pencil, and on a piece of paper. These measurements are what I needed to take the jacket in by. I did this on the lining of the jacket as well.

men's altered suit jacket

my measurements

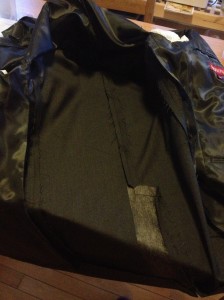
4. I then got out my handy seam ripper and separated the lining from the back of the jacket. I just did the bottom of the jacket and up the closest seam line on the side of the jacket.

altered men's suit jacket

lining pulled back

5. With the lining up and out of the way, I ironed the seam so it was no longer open. Then from the seam I measured and marked half the distance that I wrote down and because the measurements were slightly different in some locations I did this at each site of where a pin was and connected the dots. This starts with no measurements at the top because the shoulders fit so the line in a diagonal down the back of the jacket increasing as it goes to the bottom because the waist of the jacket is what was too big. I pinned the layers together and sewed down the chalk line, cut off the extra fabric and ironed the seam open. The first time I did this, I had a notch of extra fabric at the collar and had to redo it. 

men's altered suit jacket

mark and sew

6. Repeat step 5 for the lining.

The last couple of steps is figuring out the tail and reattaching the lining to the jacket.

7. For the matching the lining to the tail I just kept folding and pinning until I had what I thought looked acceptable.

altered men's suit jacket

all sewn up

8. To reattach the lining to the jacket, I am sure there is a machine stitch way, like a blind hem stitch possibly, but I decided to hand stitch it with a slip stitch, I own a book called Teach Yourself Visually Sewing and does a great job illustrating how to do it. The stitch mimicked the rest of the lining to the jacket pretty well which is another reason why I picked it. I then ironed the lining and now the jacket is a great fit!

altered men's suit jacket

finished!