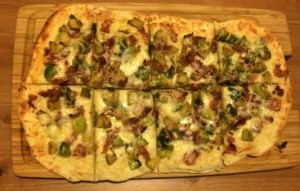
bacon and brussels sprout fladbread

Bacon and Brussels Sprout Flatbread

Posted on
Follow Me on PinterestPin It

bacon and brussels sprout fladbread

We went out to dinner one night and tried a bacon and brussels sprout flatbread. It was so good, I had to recreate it at home!

Ingredients:

  • dough, this is actually the same recipe for the BBQ Chicken flat bread, but now I make all the dough, and then separate it into two halves. Roll one half out and freeze the other half until next time. This allows the dough to be even thinner and more crispy.
  • 4 slices of bacon
  • ~ 8 frozen brussels sprouts, thawed and quartered
  • black pepper
  • 1 large garlic clove, minced
  • shredded parmesan
  • shredded mozzarella

Directions:

  1. Preheat oven to 450°
  2. Roll out the dough and place on greased baking sheet
  3. Cook the dough for about 8 minutes.
  4. While the dough is in the oven, heat a large skillet on medium.
  5. Cook the bacon until it’s how you like it. I prefer mine to be crispy. Chop or tear apart into pieces after it has cooled down.
  6. Save a little bit of the bacon grease in the pan and add the brussels sprouts, garlic and pepper to taste.
  7. Saute for about 5 minutes, and then set aside.
  8. Remove the dough from the oven and carefully flip over. Leave the oven on.
  9. Place a layer of parmesan cheese on the bread, followed by the bacon, brussels sprouts and more cheese. The amount of cheese to add is whatever your personal preference.
  10. Cook for another 8 minutes.
  11. Carefully remove and slice.
  12. Enjoy!

bacon and brussels sprout fladbread


French Tip Manicure at Home

Posted on
Follow Me on PinterestPin It

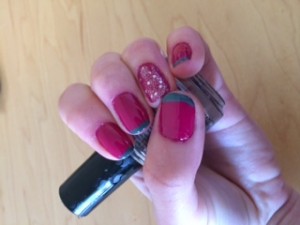
french tip manicure

I wanted to do a French tip manicure at home but I don’t have the steadiest of hands when it comes to painting. I was looking at Chloe’s Nails Blog and liked that she uses tape to get the designs she wants and was inspired to find something similar to achieve my desired effect. I decided to try band-aids. But they have to the plastic or sheer type because the polish will soak through the fabric band-aids. For my first couple of tries, I am pretty pleased with how my nails turned out and decided to share what I did.

Things you need:

  • base coat
  • main color
  • tip color
  • top coat
  • band-aid
  • time
  • maybe nail polish remover

How:

  1. Clean and prep your nails by filing, pushing back cuticles, etc
  2. Apply base coat and allow to dry.
  3. Next apply a couple of coats of the main color to get your desired color.
  4. Wait a few minutes and then apply a thick layer of top coat.
  5. Now you’ll want to wait awhile for these coats to dry, so catch up on a show or something. Also, while they are drying take out your band-aids and put the sticky side on your palm a couple times in order to take away some of the stickiness so it doesn’t pull up your polish.
  6. After your polish has dried, carefully place the band-aid towards the tip of the nail, just exposing the area you want to paint.
  7. Paint the tip. Carefully and quickly pull the band-aid off.
  8. Continue on the rest of your nails, you might need more then one band-aid to avoid a mess.
  9. Next clean up your nails. I like to use an angled craft/paint brush dipped into nail polish remover. It’s much easier for me to be more precise around my nails with a paint brush.
  10. Apply top coat and wait for it to dry.
  11. Enjoy!

My product list:

french tip manicure