ornament

Cross Stitch Advent Calendar Ornaments

Posted on
Follow Me on PinterestPin It

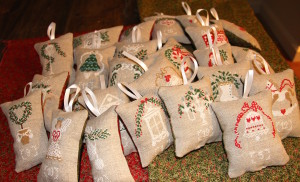
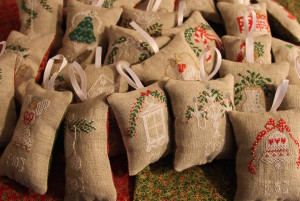
ornamentI have worked hard to complete cross stitch advent calendar ornaments. I loved how they turned out!

Materials:

What I did:

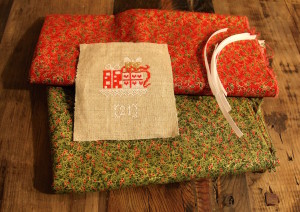
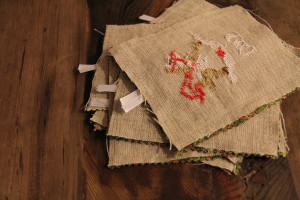
ornamentsFirst I decided how to space out the ornaments on the linen. I should have measured it but I didn’t. Then I cross stitched them all which felt like it took forever mainly because it almost did.

Next, I measured about in inch around all sides on the pattern pieces and cut. I then took out my sewing machine and found matching thread and did a zigzag stitch around the edges of all 25 pieces.

Then I decided which color of fabric would go best with each ornament. I then placed the fabric right side up on table and laid the cross stitched pieces wrong side up and pinned them to the fabric. Then I took pinking shears and cut out the fabric around the linen getting as close to it as possible without cutting the linen.
ornamentsNext, I cut 6 inch pieces of ribbon and slipped a folded in half piece between the two fabric layers and centered  and pinned it with about ½ inch of the cut sides sticking out.

Then, leaving about an 1½ inch opening (to be able to turn right side out) I straight stitched with about ½ inch seam going back and forth over the ribbon a couple of times.

Press, on the fabric side, and carefully turn ornaments right side out, pushing corners out. Press again.

Stuff to your desired fullness.
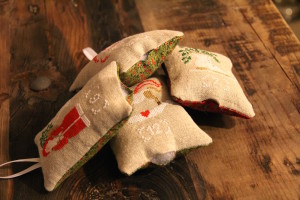
ornamentHand stitch the openings closed.

Enjoy your hard work!

ornament


knit kitchen mat

Knit Kitchen Mat

Posted on
Follow Me on PinterestPin It

knit rug

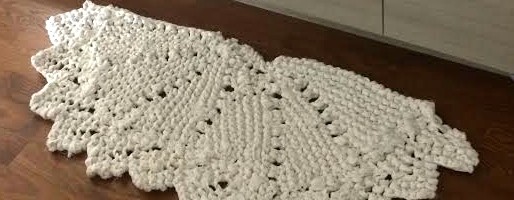
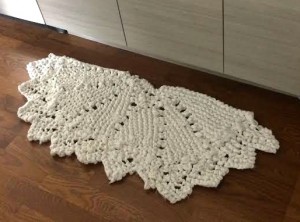
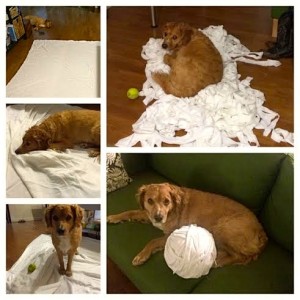
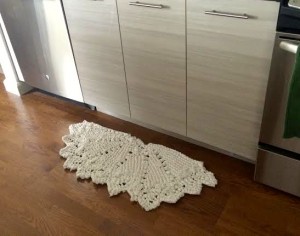
I recently moved into a new apartment and along the way my old kitchen mat got thrown away. I was trying to decide whether to buy one or make one and then I saw the Rag Doily Rug on Cocoknits.com and knew I wanted it in my kitchen. I followed her rag yarn tutorial and the only thing I did different was use an old queen sheet set because I didn’t have a king size flat sheet and I didn’t want to buy one. Rusty really enjoyed the process of making the yarn or enjoyed getting in the way at least.

knit kitchen matIt was a really quick and fun process except for the part when I was watching a show and messed up and didn’t rip out enough stitches. But now mine is unique, right? That’s what I’ll tell myself. It was my first time knitting with rag yarn and using size 19 circular needles. I enjoyed using both. I’ve actually put it in the washer and dryer twice now and it still looks good! So happy with my special kitchen accessory.
knit kitchen mat


bacon and brussels sprout fladbread

Bacon and Brussels Sprout Flatbread

Posted on
Follow Me on PinterestPin It

bacon and brussels sprout fladbread

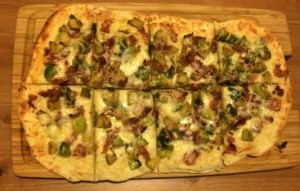
We went out to dinner one night and tried a bacon and brussels sprout flatbread. It was so good, I had to recreate it at home!

Ingredients:

  • dough, this is actually the same recipe for the BBQ Chicken flat bread, but now I make all the dough, and then separate it into two halves. Roll one half out and freeze the other half until next time. This allows the dough to be even thinner and more crispy.
  • 4 slices of bacon
  • ~ 8 frozen brussels sprouts, thawed and quartered
  • black pepper
  • 1 large garlic clove, minced
  • shredded parmesan
  • shredded mozzarella

Directions:

  1. Preheat oven to 450°
  2. Roll out the dough and place on greased baking sheet
  3. Cook the dough for about 8 minutes.
  4. While the dough is in the oven, heat a large skillet on medium.
  5. Cook the bacon until it’s how you like it. I prefer mine to be crispy. Chop or tear apart into pieces after it has cooled down.
  6. Save a little bit of the bacon grease in the pan and add the brussels sprouts, garlic and pepper to taste.
  7. Saute for about 5 minutes, and then set aside.
  8. Remove the dough from the oven and carefully flip over. Leave the oven on.
  9. Place a layer of parmesan cheese on the bread, followed by the bacon, brussels sprouts and more cheese. The amount of cheese to add is whatever your personal preference.
  10. Cook for another 8 minutes.
  11. Carefully remove and slice.
  12. Enjoy!

bacon and brussels sprout fladbread


cheesecake brownie

Cheesecake Brownies

Posted on
Follow Me on PinterestPin It

cheesecake brownie

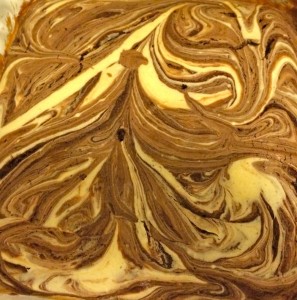
Combining two of my favorite things, cheesecake and brownies. Yum cheesecake brownies!

Cheesecake Ingredients:

  • 8 oz package of cream cheese, softened
  • 1 egg
  • 1/3 cup white sugar
  • 1/2 tsp vanilla extract

Brownie Ingredients :

  • 1/3 cup unsweetened cocoa powder
  • 1/2 cup butter
  • 1 cup sugar
  • 2 eggs
  • 2/3 cup all-purpose flour
  • 1 tsp vanilla extract
  • 1/2 tsp baking powder
  • 1/4 tsp salt

Directions:

  1. Preheat over to 350°
  2. In a bowl,  with a hand mixer, beat all of the cream cheese on medium until smooth. Next add vanilla and egg and mix. Then add the sugar and beat until smooth and well combined. Set aside.
  3. Grease and 8x8inch pan.
  4. In a small saucepan on low-medium heat, add butter cocoa powder and sugar. Place over heat stir occasionally until butter is completely melted and is well combined. Remove from heat.
  5. Whisk in eggs, one at a time, and then vanilla. Try to mix quickly because the cocoa mixture is still warm and could cook parts of the egg if you just let it sit there.
  6. Next add the rest of the ingredients. Brownie mixture will be thick.
  7. Pour into greased pan.
  8. By the spoonful, add the cream cheese mixture and use a butter knife to swirl it throughout the brownie mixture for a marbled look. I usually have a few spoonfuls of cream cheese mixture leftover.
  9. Bake for about 25 minutes or until toothpick comes out clean.
  10. Enjoy!


fried pickles

Fried Pickles Recipe

Posted on
Follow Me on PinterestPin It

fried pickles

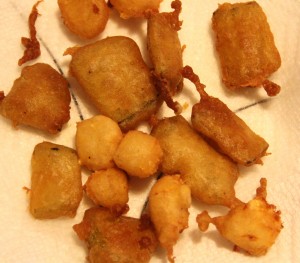
I love fried food. This is no surprise. My favorite fried food? Pickles, it is most definitely fried pickles, preferably in chip form.

Ingredients:

  • ¼ cup all purpose flour
  • ¼ cup corn starch
  • ½ tsp baking powder
  • ½ tsp baking soda
  • ¼ tsp salt
  • ½ tsp garlic powder
  • a few shakes of Tabasco, to taste
  • a little bit of red and black pepper
  • 2/3 cups of water
  • oil for frying

Directions:

  1. In a small sauce pan, heat oil on medium.
  2. In a bowl, mix all dry ingredients. Then stir in the water and Tabasco.  The batter should be thick.
  3. Coat a pickle in the batter and place it into the oil.
  4. The pickles should be fried for about 1-2 minutes. (I usually have to flip over the pickles because I don’t use a lot of oil.)
  5. Carefully remove with a slotted spoon. Sprinkle with a tiny bit of salt.
  6. Enjoy!
fried pickles

I also fried some cheese cubes with this batter.

fried pickles

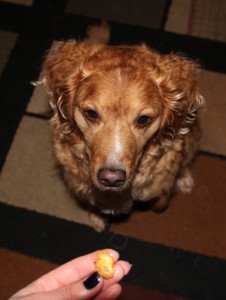
Rusty would like a bite.


reflective dog leash

How to Sew a Reflective Dog Leash, Revisited.

Posted on
Follow Me on PinterestPin It

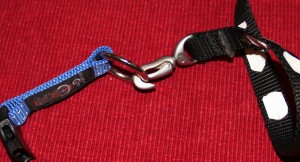
Awhile ago I made a reflective dog leash for Rusty. It served  us well but Rusty got a new collar and the buckle on the leash was too small for the ring. So it was time to redo his leash. I’m using the same leash with  nylon webbing and a clip I picked up from Ragged Mountain, a store in North Conway, NH.

reflective dog leash

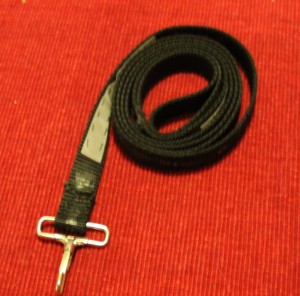
First thing I did was seam rip the old buckle off and remove the pieces of reflective tape that remained.

Next I hand stitched the new clip in place. I decided to sew by hand because the webbing is very thick and I don’t know how my machine would handle it. I don’t have a lot of needles to pick from, so I went with a crewel hand needle. I’m not even sure why I have these but they were in my sewing kit. The webbing is thick and stiff so it took awhile to sew.

I then cut 2, ½inch wide by 4 inch long reflective fabric tape to replace the old tape. I then stitched one on the bottom of the leash near the clasp and one near the handle of the leash. My stitching for the reflective tape is terrible. I’d like to say that I am a perfectionist and will redo it but I know I won’t. Feel free to judge. 🙂

reflective dog leash

Now it’s time to take Rusty out on a walk and enjoy the new leash.


knit scarf

How to Knit a Neck Warmer or Scarf for a dog

Posted on
Follow Me on PinterestPin It

knit scarf

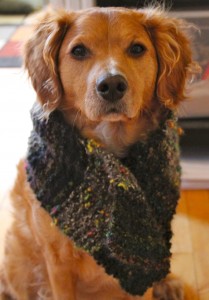
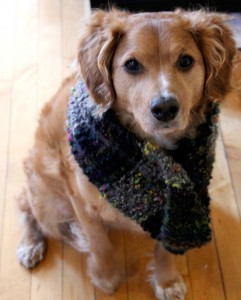
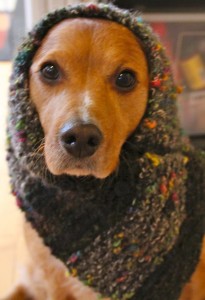
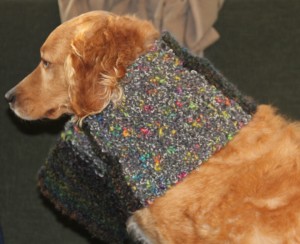
I have this extra yarn from the felted envelope I made last year and I just couldn’t decide what to do with it. So, I decided to make a knit scarf for Rusty. Or it can be called and neck warmer or ear warmer, it serves all of those purposes. This is a very wide scarf for a dog because Rusty has a giraffe neck. Adjust the amount of stitches in order to fit your dog. The yarns are Lion Brand Yarn Color Waves #353 Lava and Watercolors #352 Mist Grey.

  1. I used US size 11 needles and cast on 20 stitches.
  2. Knit stitch 15 rows with the first color
  3. Add new color,(LINK), knit 15 rows
  4. Repeat until desired length. I ended up doing it 3 times and then just completing each color. It’s a different look and I wanted it to begin and end with the same yarn.
  5. Bind off.
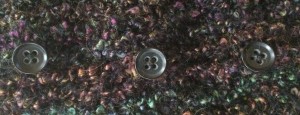
  6. Then I sewed on 3 buttons because I knew Rusty would try to shake it off. Since I used such large needles there is no need for button holes. They slip through the knitting. The key was finding the right size of buttons.

knit scarfknit scarf

The complete scarf is 28 inches long and 7 inches wide.


front knit scarfknit scarf


knit headband

Easy Knit Headbands

Posted on
Follow Me on PinterestPin It

knit headbandI’ve seen girls around Boston wearing these fantastic knit headbands instead of stocking caps and decided I needed one too. I got searching online for patterns. I’m not an advanced knitter by any means so I needed a quick easy pattern. I found a great one on the cute blog Crafting College.


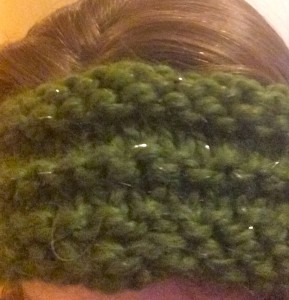
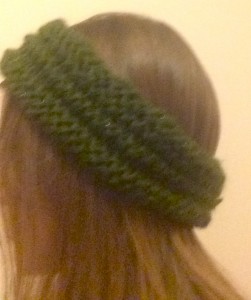
The first headband I knitted didn’t go exactly as planned. In fact the thing was kind of a hot mess. It was my first time using circular needles and I forgot to combine my first and last stitch to make it one continuous piece! Just plain silly on my part. I was knitting it straight and had to sew it together after it was completed.  I was using a bulky weight yarn, Plymouth Grande Glow Yarn. I was in a hurry and saw 10 on the needles but they were actually US size 15, I bought a set of circular needles awhile ago. Anyways as per instruction I cast on 60 stitches. It ended up being too big, but I’m going to go ahead and say that’s because of a couple of things. 1. I didn’t combine my stitches at the beginning and 2. More importantly, I have at tiny head. So I guess this will probably turn into a Christmas present. Also, because of the bulky yarn I didn’t do step 4 of the instructions, Repeat steps 2 and 3 three more times. This headband was plenty wide.

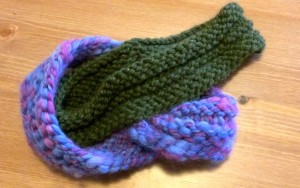
For this headband, I used US size 15 needles, bulky weight yarn. I cast on 60 stitches. Knit 4 rows, purl 2 rows, knit 3 rows purl 3 rows, and bind off. I didn’t follow the directions so it wasn’t the cute twisty one that she did on her blog but I do like the way it turned out.

knit headband

top view

knit headband

side view, crappy phone quality picture

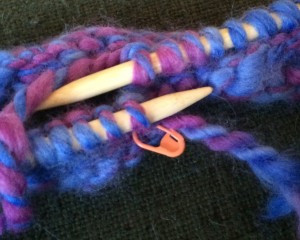
So I tried again. This time with US size 10 circular needles. I also used Rowan bulky Biggy Print yarn. It only has 33 yards in the ball. If you’re considering using this you’ll need another ball.  I cast on 50 stitches, combined my first and last stitch! I then placed a stitch marker on that stitch so I would know when a row was completed. knit headband

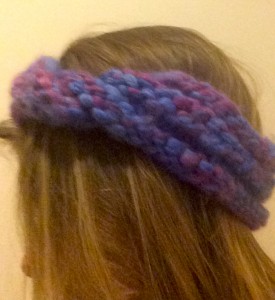
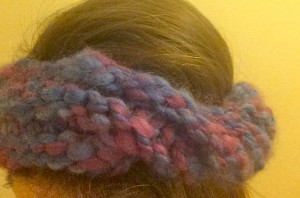
Next, I did what I did for the green one, knit 4 rows, purl 2 rows, knit 3 rows, purl 3 rows and bind off. I did it! I successfully used circular needles for the first time and it had the cute twisty effect that the original one had. I’m thinking about making another one out a lighter weight yarn too, but I wanted a nice warm wool knit headband so I used the bulky yarn I had. I am very pleased with how this turned out and now my ears can be warm without having such bad hat hair this winter!


knit headband

side view

knit headband

top view


dress into a skirt

How To Turn a Strapless Dress into a Skirt

Posted on
Follow Me on PinterestPin It

dress into a skirt

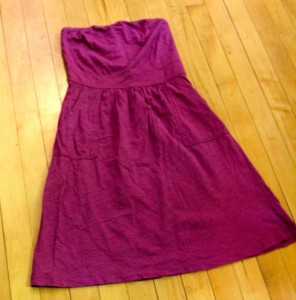
I had this strapless dress and although I like it and love the color, I hardly ever wore it. I decided it needed a make over into something I’d actually wear. I made it into a high-waisted skirt and kept the pockets.  I worked on the fit in the waist of the skirt before I moved on to the length of the skirt.

How I did it:

1. Removed the hook and eye and zipper.

dress into skirt

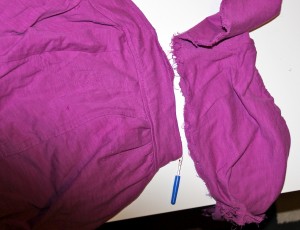
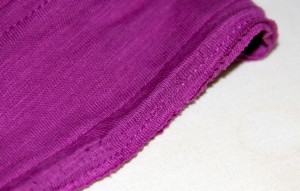
2. Next I removed the top part of the dress being careful to keep the seam stitching on the top part of the band that is in between the top part and the skirt part.

dress into skirt

Close Up of the Seam

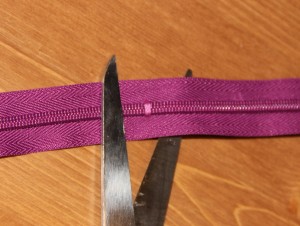
3. I shortened the zipper.

dress into a skirt

4. Next I put on the skirt to figure out how much I needed to take in on the waist because it is going to sit at a different spot on my body.

5. Seam rip the side seam.  Mark and pin it together with the new measurements. I left the seam allowance to be quite large to be cut down a bit with pinking shears later if I needed to let out the seam a bit.

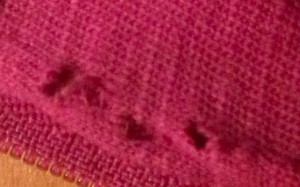
6. It’s time to sew the new seam and install the zipper! It is important to note to TEST your FABRIC and USE the CORRECT NEEDLE in your machine. I’m sure you all know that, but I had a blonde moment and didn’t test my fabric first resulting in my universal needle poking/ripping some major holes into the material.

dress into a skirt

blurry picture of the holes that need repaired

The jersey/knit needle worked much better. Mark on the skirt where the zipper will begin. At that point, you’ll back stitch a couple of stitches and then change to a longer or basting stitch on the machine. The basting stitch is where the zipper will go.

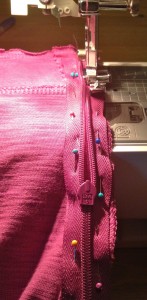
7. Press the seam open, and carefully pin the zipper onto the seam making the teeth directly over the seam line. Make sure the pins can easily be removed as you sew the zipper on and that you changed to a zipper foot on your machine.

dress into a skirt

8. After the zipper is installed, it’s time to finish the top hem. Because I cut the top to where there was stitching at on the top band, I simply folded over ¼inch pressed and pinned. I then sewed it and pressed again. The only thing I wish I had done differently with this side seam and zipper would have been to leave space for the hook and eye. Rookie mistake on my part.

9. I put it on to make sure it fit and to figure out the length I wanted. I pinned it to the desired length. I needed to remove about 3½ inches. I marked the skirt to just below the desired length, and cut with my pinking shears. Folded up ¼inch and pressed and pinned.

dress into a skirt

10. Sew that seam! Press! Try on!

11. Enjoy!

dress into a skirt

Finished skirt and bonus flip flop tan lines!


shorten a shirt dress

How to Shorten a Shirt Dress

Posted on
Follow Me on PinterestPin It

dress

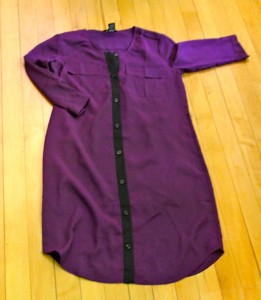
I recently bought a shirt dress to wear with boots as a fun fall work outfit but of course it is too long, about 2 inches too long. I knew I needed to shorten my shirt dress. This was going to be tricky for me because of the curves at the bottom. I usually only work with straight lines because my lack of patience usually gets the better of me when trying to work on a curve. But after a long afternoon with Rusty whining behind me from lack of attention I managed to get it to my desired length.

Here’s what I did:

Stood in front of a mirror and figured out how much fabric needed to be taken off the bottom. I pinned the length and then stood up straight to make sure that was my desired length.

shorten a shirt dress

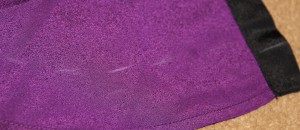
chalk marks

Next I unbuttoned the shirt and laid it out, right side down, and with my chalk pencil, I marked a lot of spots up to the desired length of the dress. Then,  I also marked about an inch below that to serve as a cutting line.

shorten a shirt dress

two rows of chalk

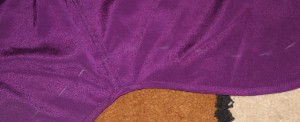
It’s now time for my most time-consuming part, the hem! I needed to clip a couple of spots on the curves in order for the fabric to lay flat. Little by little I rolled over a ¼inch of fabric and then another ¼inch of fabric and pinned. I made sure to put the pins in to where I could sew with them still in the fabric so I’d have one less thing to worry about. And after all of that work, carefully, put the dress back on to make sure it is at the desired length.

http://www.covergirl.com/collections/nfl-collection/chicago-bears

lots of pins

Sew time! Slow and steady with some patience, wins the race because it is a tiny hem and there are curves, it’s best to go slow.

Try on one last time. Good? Press. Now I have a dress that will be perfect with flat and boots this Fall!

shorten a shirt dress