bacon wrapped asparagus

Easy Bacon Wrapped Asparagus

Posted on
Follow Me on PinterestPin It

bacon wrapped asparagusBacon makes vegetables taste better. It’s just a fact. For dinner I decided to make bacon wrapped asparagus. I use my toaster oven when I make it. It’s the perfect size.

Need:

  •  2 slices of bacon
  • ~ 12 stalks of asparagus
  • olive oil
  • pepper

How to:

  1. Preheat oven to 375°
  2. snap the ends off of the stalks of asparagus
  3. coat the asparagus in olive oil, I use my Misto so I don’t put too much on them
  4. take the bacon and wrap the asparagus with it in two different spots
  5. place on broiler pan, you want something with holes because the bacon fat will be dripping down as it cooks
  6. sprinkle pepper on it to taste
  7. place it in the oven for about 15-20 minutes, or until bacon is cooked
  8. Enjoy!

breadcrumbs

How to Make Breadcrumbs

Posted on
Follow Me on PinterestPin It

One thing I like to make is breadcrumbs. We have a bread machine, and I don’t always make bread I enjoy because I try out new recipes. One recipe I tried, the bread came out too dense for me. I like my bread light and fluffy. So I decided to make breadcrumbs out of it so it wasn’t a waste.

Need:

  • bread
  • cookie sheet
  • food processor
  • seasonings

Directions:

  1. Preheat the oven to 275°

  2. cut the bread into 1-2 inch cubes

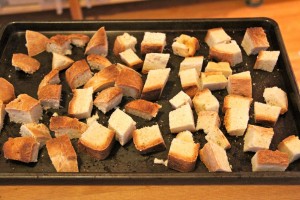
  3. place on a cookie sheet, I like to use one with a lip all the way around it to prevent cubes accidentally sliding off of the sheetbreadcrumbs

  4. place in the oven for about 20 minutes, the goal is to dry out the bread

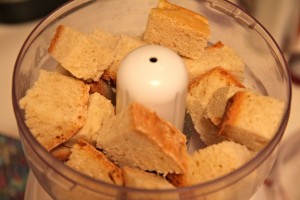
  5. after the bread is dried out, place the cubes into the food processor in small batches. This will be very loud!makecrumbs

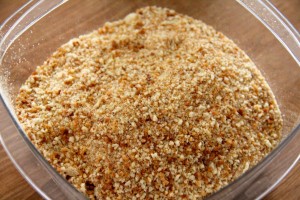
  6. Season and use immediately or freeze. They’ll go bad quickly if you don’t freeze them. I try to use my breadcrumbs within a month.breadcrumbs

I sometimes add seasoning and sometimes don’t. I add italian seasonings to the breadcrumbs if I want to make chicken parm or something similar. If I want to make chicken bites or fried pickles I season the breadcrumbs with red and black pepper, cumin, salt and garlic.


knit mug cozy

Slip Stitch Pattern for a Knit Mug Cozy

Posted on
Follow Me on PinterestPin It

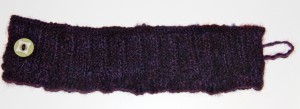
knit mug cozy

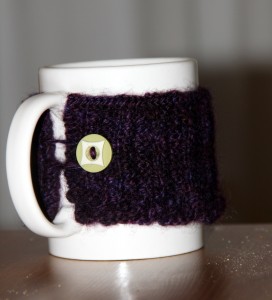
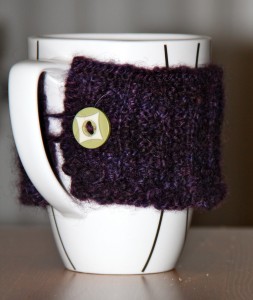
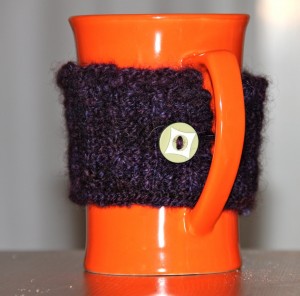
I decided to dress up my morning coffee a bit with a knit mug cozy. I was still excited about learning the slip stitch from the belt I made and wanted to create a pattern that used the slip stitch in it. I still had to do a bit of research to figure out exactly how to do it but after compiling everything and then some trial and error,  this is what I came up with:

US 2 needles (2.75mm)

2 ply lace weight yarn from Hettinger Corriedales. It’s a farm, in Illinois near my hometown that raises the sheep, and dyes the wool and spins them at their farm! You should check it out.

I’m not sure how much yarn I’m using. The skein I’m using had 214 yards but I’m using it for multiple projects. This fits a 10.5 inch circumference mug best. The yarn is a little too dark to get a great picture of the pattern but it looks great in person. Maybe I’ll make another in a different yarn to better display the pattern.

Pattern:

  • Cast on 70 stitches
  • Row 1: P3 K2 repeat until row is finished
  • Row 2: K1 S1 (P) K1 P2 repeat until row is finished
  • Repeat pattern until desired length. Mine ended up being 31 rows
  • Cast off on an odd-numbered row in the P3 K2 pattern
  • Sew loop like in the felted bag on one side and sew the button on the other
  • Attach to the mug by putting the button next to the handle and loop through the mug handle
  • Enjoy a nice cup of whatever with your cozy.

*Please note that for this pattern, unlike the belt, when you slip stitch purl style you do NOT bring the yarn forward, you simply just put the needle through the stitch like you would for a purl stitch and then push the stitch onto the needle.

knit mug cozy

What I actually did to figure that pattern out:

  • Cast on 75 stitches
  • Row 1: K2 P3 repeat
  • Row 2: P2 K1 S1 (P) K1 repeat

After 8 rows, it was looking like a hot jumbled mess, that’s the point of trial and error I guess. It’s a little difficult to see because the thread because it was hand spun isn’t the same thickness throughout. I decided to flip the pattern and test it out. To be honest, I don’t completely understand why it worked but it did so that’s awesome.

  • Row 9: P3 K2
  • Row 10: K1 S1(P) K1 P2
  • Rows 30 and 31 in a garter stitch to somewhat match the bottom of the cozy.
  • Add loop like I did with the felted bag to one end
  • Sew on button to the other end

*I marked on a piece of paper every time I did 5 stitches, and would only stop after doing five to keep my place. I also, marked them by row just incase I forgot which row I was on.

Didn’t turn out how I had envisioned in my head. But I was able to figure it out and I think it still looks cute and definitely serves its purpose. I can now create a mug cozy with the exact pattern I was hoping for. Like I said before, it’s best for a mug with a 10.5 inch circumference. I found it slipped a little on a 9.5inch and a 10 inch that decreases towards the bottom of the mug. Decrease the amount of stitches, by 5, to fit the mug you would like to use it on.

knit mug cozy

10inch and decreasing


knit mug cozy

9.5in circumference

knit mug cozy

10.5inch circumference


cream cheese frosting

Cream Cheese Frosting Recipe

Posted on
Follow Me on PinterestPin It

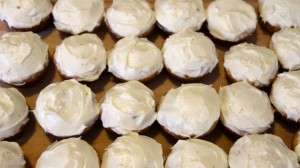
cream cheese frosting recipe

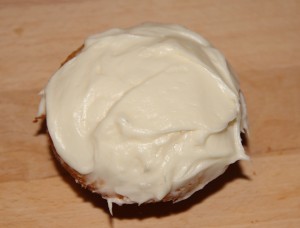
Who doesn’t love cream cheese frosting? The rich bold flavor tastes great on almost any dessert! This recipe lightly frosted 24 cupcakes with a bit leftover.

Here is the cream cheese frosting recipe that I use.

Ingredients:

  • 1, 8 oz, block of cream cheese, softened to room temperature
  • ½ cup, 1 stick, unsalted butter, softened
  • 1 tsp of vanilla extract
  • ~ 2 cups of powered sugar, more or less to suit your tastes

How to:

  1. In a small bowl, add the cream cheese, butter and the vanilla.
  2. With a hand mixer, beat on low-to-medium speed until well combined and creamy
  3. Gradually add the powered sugar to the cream cheese mixture and beat until smooth and delicious. Adding all the powered sugar at once makes it more difficult to control the taste because you can only go sweeter and it creates a powered sugar snowfall in your kitchen from the mixer.
  4. Enjoy!

cream cheese frosting recipe


cream cheese frosting

cream cheese frosting recipe


caprese salad grilled cheese

Caprese Salad Grilled Cheese Recipe

Posted on
Follow Me on PinterestPin It

caprese salad grilled cheese


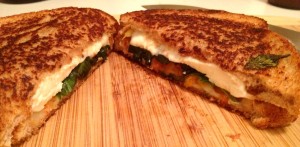
I LOVE grilled cheese! I decided to try a caprese salad grilled cheese because it sounded delicious. It’s pretty much the caprese salad on grilled bread but I did add a slice of Muenster cheese to it as well.

What I used:

  • 2 slices of bread
  • Butter
  • 1 slice of Muenster
  • Fresh Mozzarella Ball cut into slices
  • Tomato slices
  • Fresh Basil leaves
  • Balsamic Dressing I use Cindy’s Kitchen Balsamic Vinaigrette, I buy it at Whole Foods but it should be able to find it elsewhere    

What I did:

1. Fried the tomato slices a little bit in a skillet over medium heat because sometimes when I add tomatoes to my grilled cheese they get a little mushy and I’m not a fan of that.

2. Butter one side of each piece of bread

3. On the hot pan place one piece of bread butter side down

4.On the bread, place the Muenster, tomato slices, basil leaves and drizzle with a small amount of balsamic dressing, top with mozzarella and the other piece of bread butter side up

5. Grill each side until a dark golden brown and cheese is melted

6. Enjoy!


dye fabric

How to Dye Fabric in the Sink using Dylon’s Dye

Posted on
Follow Me on PinterestPin It

dye fabric

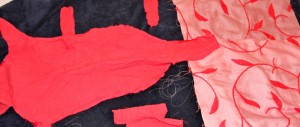
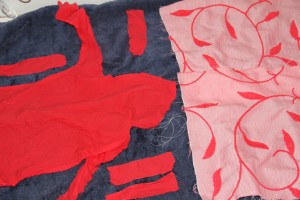
I am going to make another costume for Rusty, well at least attempt to make one. I really didn’t want to spend the money on expensive fabric because I’m going to make it up as I go, so I decided to buy muslin and dye it. I also decided to dye some of the embroidered fabric that I used for my tree skirt. I have a lot of that leftover and I was curious to see how it would take to dye.

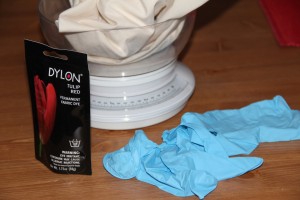
I used Dylon Dye in Tulip Red because it is a permanent fabric dye and I wanted to try something new. The dying process took a little over an hour.

Here’s basically what the package says with my advice thrown in there:

Have a plastic bag open and ready for you to toss in the dye packet and gloves for when you’re finished to avoid the risk of staining other things around your kitchen like the floor or garbage can. 

dye fabric

supplies

1, 1.75oz, packet can be used for up to ½ lbs of fabric or one large t-shirt

Cover your counter around the sink with newspaper or rags if there is a spill or splash or you’re a klutz like me.

1. Weigh and wash fabric and leave it damp.

2. With gloved hands dissolve entire packet, use scissors to open to prevent the dye from flying everywhere, into 4 cups of warm water in a bowl or something you don’t mind getting stained

3. Fill a stainless steel sink, or bowl, with enough warm water to allow the fabric to flow freely give it space to dance

4.  Add 4 Tbsp of salt to the water and add the dye Yes that IS a lot of salt

5. Put that fabric in the sink

6. Stir constantly for 15 minutes. I made the mistake of not having any music on making the 15 minutes seem like an eternity. 

dye fabric

muslin after 15 minutes

dye fabric

embroidered fabric after 15 minutes

Then stir regularly for 45 minutes. Looking for a way to make your significant other or roommate nervous? Stir the dye bath with your dominant hand while texting with your non-dominant over  the sink. 🙂 Just don’t accidentally drop it in. 

7. Rinse fabric with cold water. Then wash it in warm water. To dry, line dry inside away from direct heat and sunlight. I laid mine flat on a towel that was darker than the dye and didn’t care about if the dye happened to stain it. Let it dry over night.

dye fabric

right after washing, still soaked

dye fabric

fabric after it dried

I’m kind of pleased how it turned out. I had no idea if the embroidered fabric would take dye, because I couldn’t remember the fiber content. As for the pattern piece, it’s a little more pink than I was hoping but part of that is my fault. I did have slightly more than ½ lb of fabric which was the greatest weight recommendation. My hopes were for a richer red. But I can make it work and I would use Dylon’s Dye again. I just need to buy 2 packets instead of one to be on the safe side.

dye fabric

color I got vs color I was hoping to get


cross stitch heart

Cross Stitch Heart Pattern

Posted on
Follow Me on PinterestPin It

Cross Stitch Heart

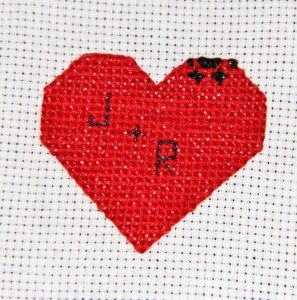
I was thinking about Valentine’s Day and realized I didn’t have a cross stitch heart pattern. I wanted it to be like something I use to draw in junior high, you know, the heart with my love’s and I’s initials in it. Then I thought about Rusty and how he is part of this family, so I put half a paw peeking out over the top of the heart.

cross stitch heart

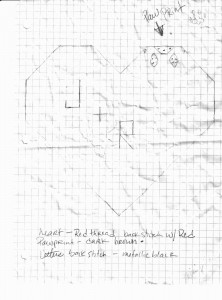
Pattern


The pattern didn’t turn out the greatest when I scanned it because I pretty much beat it to death while I was completing the stitching, taking it everywhere with me. Next time I’ll scan it before I start the stitching. Lesson learned.


cross stitch heart

Stitching the paw print was a pain in my rear. Even though I had my pattern the squares are so tiny that it would have benefited me and the pattern to make it a bit bigger if I want to stitch this heart again.


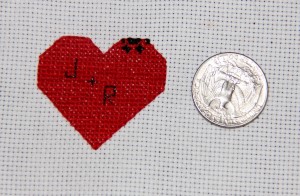
I really need graph paper with smaller squares so I can make bigger patterns. This tiny heart reminds me of a Pound Puppy patch! I don’t know what I’ll do with it now that the stitching is complete, maybe I will put it on a stuffed animal and then watch the Pound Puppies.


waffle recipe

Waffle Recipe

Posted on
Follow Me on PinterestPin It

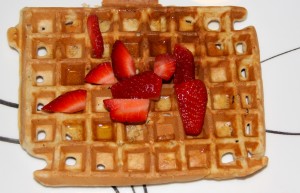
waffle recipe

Who doesn’t love waffles? My waffle recipe is pretty basic. I use applesauce and honey to make them a little sweet. This makes 6 large George Foreman waffles, I don’t have a regular waffle iron.

Ingredients:

  • 2 eggs
  • 2 cups of flour
  • 1½ cups milk
  • ¼ cup applesauce
  • ¼ cup honey
  • 1 Tbsp. sugar
  • 4 tsp baking powder
  • ¼ tsp salt
  • ¼ tsp cinnamon
  • ½ tsp vanilla extract

Directions:

  1. In a large bowl, whisk eggs.
  2. Add the remaining ingredients and combine until well mixed.
  3. Pour over preheated iron and cook
  4. Enjoy!


tie for dog

How to Make a Tie for a Dog

Posted on
Follow Me on PinterestPin It

tie for dog

I made a tie for a dog, my dog! Rusty has been going to work with me and I decided he needed an update to his office attire. I went with a tie. Now this is a very simple design. I could have gone one step farther and made it wider and then folded the sides in and tacked them down like a typical tie but the way I did it worked for me. Besides, it’s a tie for a dog, perfection is not required because any dog wearing any type of tie is going to be adorable.

1. I used one of my husband’s old ties as a basic pattern and just shortened the length. The length of my tie is 40 inches mainly because that is the length of the leftover flannel fabric I had. Also, I used an old tie just in case I accidentally clipped it with my scissors. If you don’t have a tie to use, there are many free patterns online for ties from newborn sizes to men’s.

I pressed the fabric and then folded it in half before I laid the tie on it so I could cut two equal pieces.
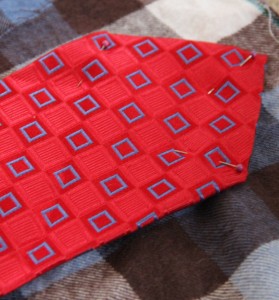
tie for dogtie for a dog


2. Next I pinned the tie onto the fabric, folding the tie to adjust the length.

3. I cut the fabric with my pinking shears because I just bought them and couldn’t wait to use them. I cut just outside the fabric. The area where the tie is folded, I just angled the scissors inward to reach the skinny part of the tie. Then I unpinned and removed the tie and adjusted the angle to make sure there was smooth line for the length of the tie.

4. I decided to apply fusible interfacing to both points of the tie because I wasn’t doing the traditional tie where, on the back of the tie, both sides fold in towards the middle, and wanted to create a little bit of heft to the fabric.

– For interfacing, cut it just on the inside of the seam line so you don’t have to sew through the extra bulk. Next, lay the fabric wrong side up on the ironing board. Then place the interfacing on the desired part of the fabric shiny side down. Place a pressing cloth over the fabric and interfacing. With a steam setting, use the spray button on the iron and wet down area of interfacing and iron over it, constantly moving for about 30 seconds. Allow the fabric to cool and then check to see if it is fused. If not, repeat the ironing.

5. Pin both layers together, right sides facing each other.

6. Press, just in case wrinkles have formed.

7. Sew around the edges with a 1/2 inch seam, start in the middle of the tie, in order to machine stitch each point, and leave an inch wide opening. Backstitch at the start and finish.

8. Press.

9. Pull fabric through so the right side of the fabric is now on the outside and press.
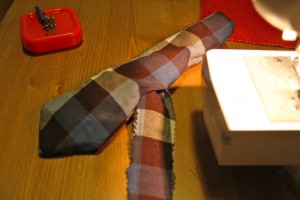
tie for dog


10. Slip stitch the hole closed, pressing it in the step before should have folded the fabric giving a nice area to stitch the hole closed.
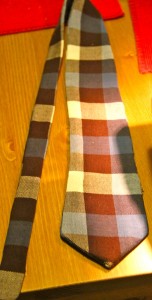
tie for dog


I used this Youtube video to learn how to actually tie it.

Now Rusty is ready for work!

tie for dogtie for dog


stuffed shells recipe

Stuffed Shells Recipe

Posted on
Follow Me on PinterestPin It

Here is my stuffed shells recipe. I sometimes make it was ground Italian sausage and sometimes I omit it. It just depends on what sort of mood I am in.
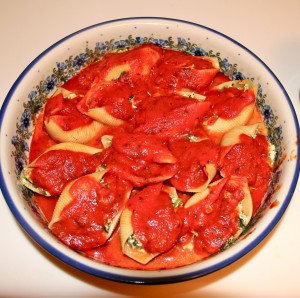
This amount should serve around 4 people. The measurements are only guidelines and things should be adjusted to your own taste. I’ve made this so many times that I usually don’t measure anymore and just throw it all in and stir.

Ingredients:

  • 16 Jumbo Shells
  • 3/4 cup Ricotta Cheese
  • 1/2 cup Mozzarella Cheese
  • 1/4 cup Parmesan Cheese
  • 2 cups uncooked Spinach, fresh or frozen,
  • 1 Egg
  • 4 shredded Fresh leaves or Dried Basil to taste
  • Italian Seasoning to taste
  • 2 small Garlic cloves
  • Pasta Sauce
  • 1/2 lbs ground Italian Sausage (optional)

Directions:

  1. Preheat Oven to 350°
  2. Cook shells according to packaging directions
  3. In a medium size bowl, put all cheeses, egg and seasonings including garlic in it.
  4. Saute spinach, in a medium skillet, until wilted, then remove it, chop it and place in bowl with the cheese.
  5. If adding sausage, brown the sausage in a skillet until cooked through, and put into bowl with the cheese.
  6. Mix everything until well combined.
  7. In a oven safe dish big enough to hold the shells in one layer, spread some pasta sauce covering the entire bottom and place the shells in the pan opening side up.
  8. Fill each shell with a scoop, large spoonful, of the cheese mixture.
  9. Cover the shells with a thin layer of pasta sauce and then cover them with a sprinkle of parmesan cheese.
  10. Cover the dish with foil and cook for 15 minutes.
  11. Then remove the foil and bake for 10 more minutes.
  12. Serve with a side salad and biscuits!


stuffed shells recipe