pico de gallo

Pico De Gallo Recipe

Posted on
Follow Me on PinterestPin It

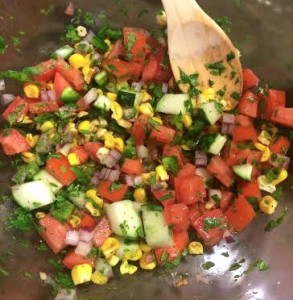
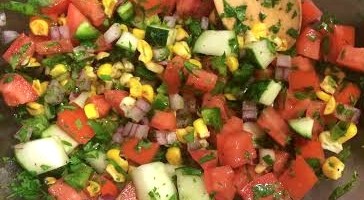
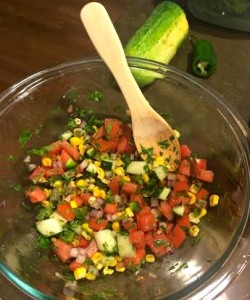
pico de galloI came up with this recipe because I was making shredded chicken tacos (just add some taco seasoning into a pan with a little bit of water and you have shredded taco ready chicken) and needed either a salsa or a pico de gallo to put on them. I decided on making a pico de gallo with the veggies I had in my fridge. One thing added, that was a nice addition, was roasted corn from an ear I didn’t end up needing from dinner the night before. I simply cut the corn off the ear and roasted in a pan to cook the corn. I also added diced cucumber which provided a refreshing crunch to the pico. It was a success in my kitchen that night, it tasted great on tacos and would be perfect with tortilla chips.

Ingredients:

  • roasted corn
  • chopped cucumber
  • chopped tomatoes
  • diced red onion
  • chopped green onion
  • seeded and chopped jalapeño pepper
  • some jalapeño seeds
  • cilantro
  • lime juice
  • salt

Directions:

Combine all the ingredients and stir! The amount of each ingredient is a matter of what taste is preferred. I personally like equal amounts of the veggies, only a few jalapeño seeds so it’s not too spicy for me, A LOT of cilantro, minimal salt, and enough lime juice to coat all the veggies in the bowl.

Enjoy!

pico de gallo


tie onesie

Tie Onesie

Posted on
Follow Me on PinterestPin It

tie onesie

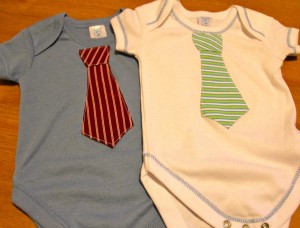
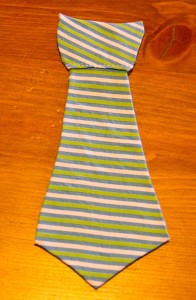
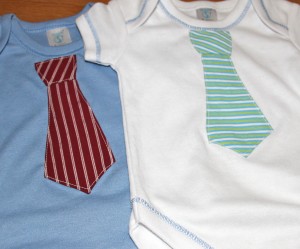
My friend is about to have a baby boy and I wanted to make him something special. I saw this DIY Necktie Onesie tutorial from HauteApplePie.com  and thought that would be the perfect gift. I ended up using the pattern from CrapIveMade.com. Both are great tutorials but I did a few things differently for my tie onesie.

What I used:

  • muslin scraps
  • cotton fabric scraps
  • water-soluble fabric glue stick
  • matching or coordinating thread

What I did:

First I cut out the pattern pieces, I angled the knot part to make it look more like a real tie.

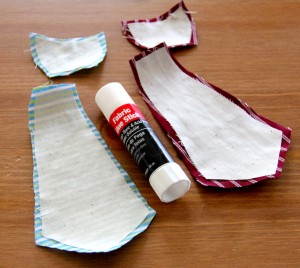
I wanted the tie to be a bit sturdier and I didn’t have interfacing on hand so I used muslin. I cut one of each pattern piece. I then trimmed ¼” off of the muslin piece.

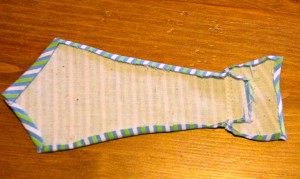
Next, glue the muslin pieces to the wrong side of the patterned fabric pieces, positioning them so there’s a ¼” edge around the muslin.

tie onesie

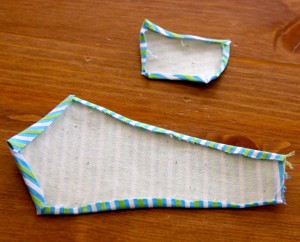
Iron the ¼” fabric over towards the muslin, being careful of the points. Use the glue to help keep the fabric down. I didn’t iron the top part of the tie because the know will be covering it.

tie onesie

Position the knot over the un-ironed part of the tie, sew a line across the bottom of the knot, connecting the two pieces.

tie onesietie onesie

I trimmed the thread and ironed again.

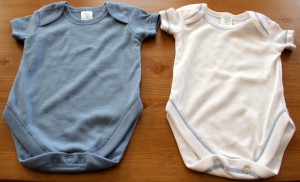
I then took out the universal needle and replaced it with a knit needle because the onesie is a nice stretchy knit cotton. I then positioned and pinned the tie onto the onesie. I did it in a way to where I didn’t have to move the needles as I sewed so I could concentrate on the lines of the tie.

I sewed along all edges of the tie and close to the edge of the fabric as possible, pivoting at the points. Be careful as you sew, go slow. It’s very easy to catch some of the onesie as you sew .

Iron and wash.

Enjoy!

tie onesietie onesie


bacon and brussels sprout fladbread

Bacon and Brussels Sprout Flatbread

Posted on
Follow Me on PinterestPin It

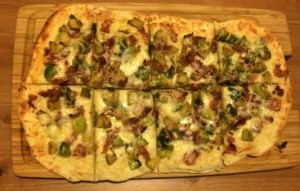
bacon and brussels sprout fladbread

We went out to dinner one night and tried a bacon and brussels sprout flatbread. It was so good, I had to recreate it at home!

Ingredients:

  • dough, this is actually the same recipe for the BBQ Chicken flat bread, but now I make all the dough, and then separate it into two halves. Roll one half out and freeze the other half until next time. This allows the dough to be even thinner and more crispy.
  • 4 slices of bacon
  • ~ 8 frozen brussels sprouts, thawed and quartered
  • black pepper
  • 1 large garlic clove, minced
  • shredded parmesan
  • shredded mozzarella

Directions:

  1. Preheat oven to 450°
  2. Roll out the dough and place on greased baking sheet
  3. Cook the dough for about 8 minutes.
  4. While the dough is in the oven, heat a large skillet on medium.
  5. Cook the bacon until it’s how you like it. I prefer mine to be crispy. Chop or tear apart into pieces after it has cooled down.
  6. Save a little bit of the bacon grease in the pan and add the brussels sprouts, garlic and pepper to taste.
  7. Saute for about 5 minutes, and then set aside.
  8. Remove the dough from the oven and carefully flip over. Leave the oven on.
  9. Place a layer of parmesan cheese on the bread, followed by the bacon, brussels sprouts and more cheese. The amount of cheese to add is whatever your personal preference.
  10. Cook for another 8 minutes.
  11. Carefully remove and slice.
  12. Enjoy!

bacon and brussels sprout fladbread


cheesecake brownie

Cheesecake Brownies

Posted on
Follow Me on PinterestPin It

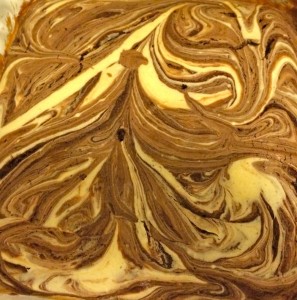
cheesecake brownie

Combining two of my favorite things, cheesecake and brownies. Yum cheesecake brownies!

Cheesecake Ingredients:

  • 8 oz package of cream cheese, softened
  • 1 egg
  • 1/3 cup white sugar
  • 1/2 tsp vanilla extract

Brownie Ingredients :

  • 1/3 cup unsweetened cocoa powder
  • 1/2 cup butter
  • 1 cup sugar
  • 2 eggs
  • 2/3 cup all-purpose flour
  • 1 tsp vanilla extract
  • 1/2 tsp baking powder
  • 1/4 tsp salt

Directions:

  1. Preheat over to 350°
  2. In a bowl,  with a hand mixer, beat all of the cream cheese on medium until smooth. Next add vanilla and egg and mix. Then add the sugar and beat until smooth and well combined. Set aside.
  3. Grease and 8x8inch pan.
  4. In a small saucepan on low-medium heat, add butter cocoa powder and sugar. Place over heat stir occasionally until butter is completely melted and is well combined. Remove from heat.
  5. Whisk in eggs, one at a time, and then vanilla. Try to mix quickly because the cocoa mixture is still warm and could cook parts of the egg if you just let it sit there.
  6. Next add the rest of the ingredients. Brownie mixture will be thick.
  7. Pour into greased pan.
  8. By the spoonful, add the cream cheese mixture and use a butter knife to swirl it throughout the brownie mixture for a marbled look. I usually have a few spoonfuls of cream cheese mixture leftover.
  9. Bake for about 25 minutes or until toothpick comes out clean.
  10. Enjoy!


reflective dog leash

How to Sew a Reflective Dog Leash, Revisited.

Posted on
Follow Me on PinterestPin It

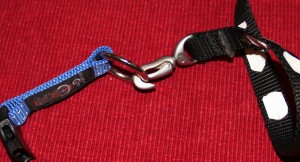
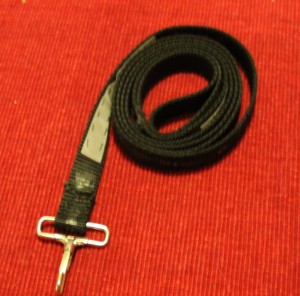
Awhile ago I made a reflective dog leash for Rusty. It served  us well but Rusty got a new collar and the buckle on the leash was too small for the ring. So it was time to redo his leash. I’m using the same leash with  nylon webbing and a clip I picked up from Ragged Mountain, a store in North Conway, NH.

reflective dog leash

First thing I did was seam rip the old buckle off and remove the pieces of reflective tape that remained.

Next I hand stitched the new clip in place. I decided to sew by hand because the webbing is very thick and I don’t know how my machine would handle it. I don’t have a lot of needles to pick from, so I went with a crewel hand needle. I’m not even sure why I have these but they were in my sewing kit. The webbing is thick and stiff so it took awhile to sew.

I then cut 2, ½inch wide by 4 inch long reflective fabric tape to replace the old tape. I then stitched one on the bottom of the leash near the clasp and one near the handle of the leash. My stitching for the reflective tape is terrible. I’d like to say that I am a perfectionist and will redo it but I know I won’t. Feel free to judge. 🙂

reflective dog leash

Now it’s time to take Rusty out on a walk and enjoy the new leash.


knit scarf

How to Knit a Neck Warmer or Scarf for a dog

Posted on
Follow Me on PinterestPin It

knit scarf

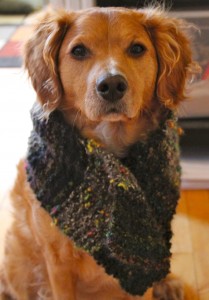
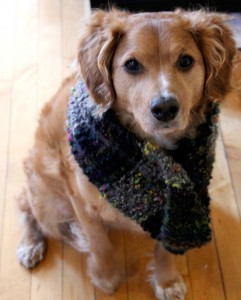
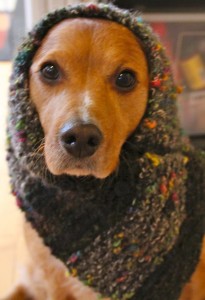
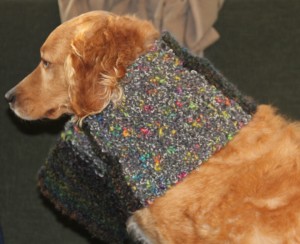
I have this extra yarn from the felted envelope I made last year and I just couldn’t decide what to do with it. So, I decided to make a knit scarf for Rusty. Or it can be called and neck warmer or ear warmer, it serves all of those purposes. This is a very wide scarf for a dog because Rusty has a giraffe neck. Adjust the amount of stitches in order to fit your dog. The yarns are Lion Brand Yarn Color Waves #353 Lava and Watercolors #352 Mist Grey.

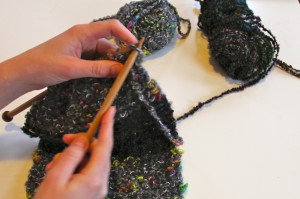
  1. I used US size 11 needles and cast on 20 stitches.
  2. Knit stitch 15 rows with the first color
  3. Add new color,(LINK), knit 15 rows
  4. Repeat until desired length. I ended up doing it 3 times and then just completing each color. It’s a different look and I wanted it to begin and end with the same yarn.
  5. Bind off.
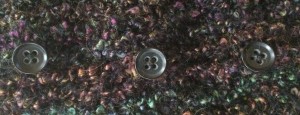
  6. Then I sewed on 3 buttons because I knew Rusty would try to shake it off. Since I used such large needles there is no need for button holes. They slip through the knitting. The key was finding the right size of buttons.

knit scarfknit scarf

The complete scarf is 28 inches long and 7 inches wide.


front knit scarfknit scarf


How to Add New Yarn to a Knitting Project

Posted on
Follow Me on PinterestPin It

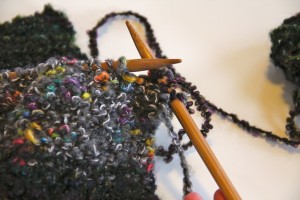
It is not difficult to add a new yarn ball to a knitting project.

add new yarn

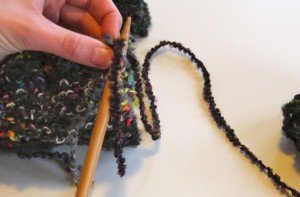
Finish row, slip needle into first stitch like for a knit stitch.

add new yarn

Take the new yarn and wrap around the needle you want to knit stitch with, leaving enough of a tail to weave in later.

add new yarn

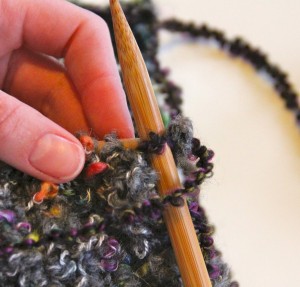
Hold the tail to make sure it doesn’t slip and finish the knit stitch.

add new yarn

Continue to knit stitch using the new color until row is completed.

add new yarn

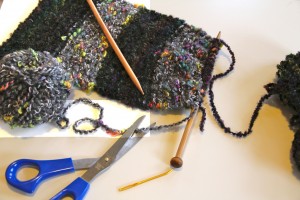
After row is complete, cut the old color, leaving enough yarn to weave it in.

Weave in all tails and continue to knit with your new color.


rit dye

How to use RIT dye in the Sink

Posted on
Follow Me on PinterestPin It

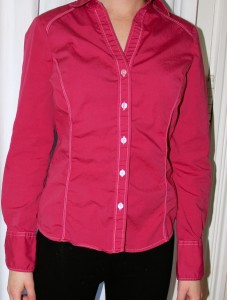
I have this shirt that I love the way it fits but I managed to get a stain on the sleeve. I have a couple of RIT dye just sitting in a drawer begging to be used. I decided to go with the wine color. It’s a pretty color for a button up shirt. I have to use the sink to dye because my apartment upright machines are plastic and I’m slightly terrified I’d stain them. My stainless steel kitchen sink works out perfectly, it won’t stain and I don’t have to be in the basement of my building.

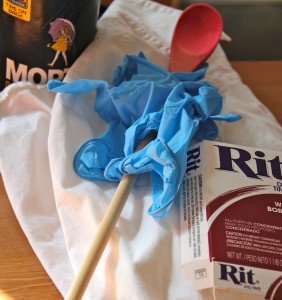
Things I used:

  • Hair tie – always need to pull your hair back
  • Throw away clothes –  chore clothes, clothes you don’t care if they get stained
  • Towel – again one you don’t care if it gets dyed
  • Gloves
  • RIT dye
  • Clothes to dye
  • Something to stir the dye bath
  • Approximately 1 cup of salt
  • Measuring cup with something to stir that will get dye on it like stainless steel spoon

rit dye

Notes:

  • Wear gloves the entire time! Yes, they’re uncomfortable and probably don’t fit right but it’s better than stained hands.
  • I don’t care what the package says. I always do one packet of dye per article of clothing. I feel it gets the best color that way.
  • Put some music song to get you from getting bored while stirring the dye bath.

Directions:

  1. Put your gloves on and mix 2 cups hot water and one packet of dye.
  2. Put stopper in and fill sink with hot water so there’s enough water for the clothes to freely move around in the sink. Add the 1 cup of salt. I didn’t measure it, I just guessed.
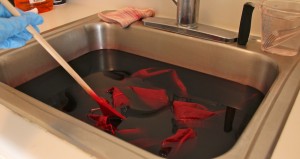
  3. Add the dye to the sink and stir.
  4. Start your microwave or kitchen timer to 30 minutes. I actually did 20 minutes but you’re going to leave the clothe in the dye bath until the desired color is achieved.
  5. Add clothes, make sure it is completely soaked and start stirring. Stir the entire time.rit dye
  6. When time is up, let the water out (yay for gloved hands) of the sink and rinse the clothes. You want to rinse in warm water and gradually going to cold until the bleeding stops.
  7. Wash separately in warm water and dry as usual. Also, rinse and wash separately the towel used to clean up.
  8. Clean the counter and sink with bleach.
  9. Enjoy your newly dyed clothes!

rit dye


knit headband

Easy Knit Headbands

Posted on
Follow Me on PinterestPin It

knit headbandI’ve seen girls around Boston wearing these fantastic knit headbands instead of stocking caps and decided I needed one too. I got searching online for patterns. I’m not an advanced knitter by any means so I needed a quick easy pattern. I found a great one on the cute blog Crafting College.


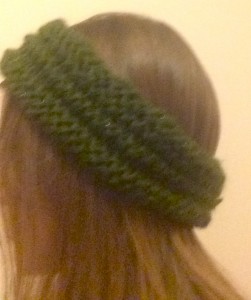
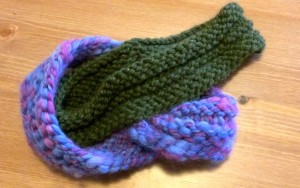
The first headband I knitted didn’t go exactly as planned. In fact the thing was kind of a hot mess. It was my first time using circular needles and I forgot to combine my first and last stitch to make it one continuous piece! Just plain silly on my part. I was knitting it straight and had to sew it together after it was completed.  I was using a bulky weight yarn, Plymouth Grande Glow Yarn. I was in a hurry and saw 10 on the needles but they were actually US size 15, I bought a set of circular needles awhile ago. Anyways as per instruction I cast on 60 stitches. It ended up being too big, but I’m going to go ahead and say that’s because of a couple of things. 1. I didn’t combine my stitches at the beginning and 2. More importantly, I have at tiny head. So I guess this will probably turn into a Christmas present. Also, because of the bulky yarn I didn’t do step 4 of the instructions, Repeat steps 2 and 3 three more times. This headband was plenty wide.

For this headband, I used US size 15 needles, bulky weight yarn. I cast on 60 stitches. Knit 4 rows, purl 2 rows, knit 3 rows purl 3 rows, and bind off. I didn’t follow the directions so it wasn’t the cute twisty one that she did on her blog but I do like the way it turned out.
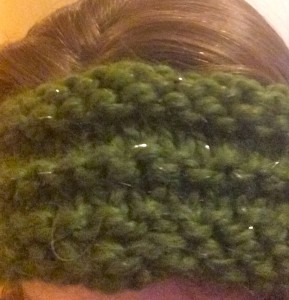
knit headband

top view

knit headband

side view, crappy phone quality picture

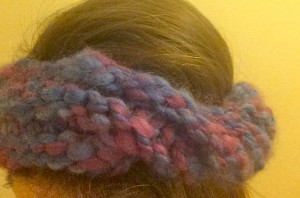
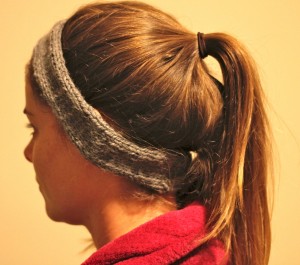
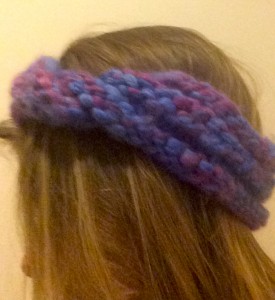
So I tried again. This time with US size 10 circular needles. I also used Rowan bulky Biggy Print yarn. It only has 33 yards in the ball. If you’re considering using this you’ll need another ball.  I cast on 50 stitches, combined my first and last stitch! I then placed a stitch marker on that stitch so I would know when a row was completed. knit headband
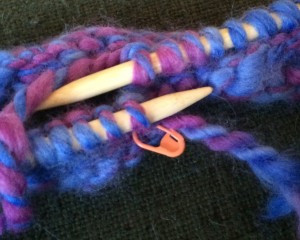
Next, I did what I did for the green one, knit 4 rows, purl 2 rows, knit 3 rows, purl 3 rows and bind off. I did it! I successfully used circular needles for the first time and it had the cute twisty effect that the original one had. I’m thinking about making another one out a lighter weight yarn too, but I wanted a nice warm wool knit headband so I used the bulky yarn I had. I am very pleased with how this turned out and now my ears can be warm without having such bad hat hair this winter!
 

knit headband

side view

knit headband

top view


knit headband

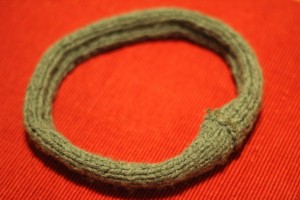
Knit Headband for Running

Posted on
Follow Me on PinterestPin It

knit headband

I wanted to a knit headband I could wear while running in the late fall early spring that would cover my ears. I decided on Lion Brand pattern #60760, which is available for free if you sign up for an account with them. I did not check my gauge in this like it says to do in all capital letters. But it turned out well in the end, it was supposed to be 3.5 inches wide and mine turned out to be 2.5 inches which was perfect because I only wanted my ears covered. I used an acrylic instead of wool because I want to be able to throw it in the wash after each run.

The pattern is super simple, US size 10 needles, cast on 10 stitches and stockinette stitch until desired length, bind off. Sew ends together, weave in tails.

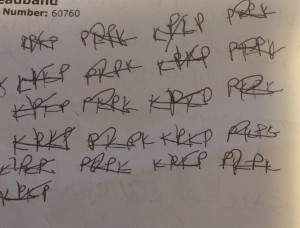
To make the stockinette stitch you knit one row and purl the next, and repeat. I wrote down a K or P after I completed each row to help me keep track.

knit headband

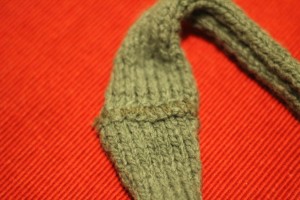
It started to curl around row 20 but that’s ok, it just hugs my ears that way. I whip stitched the ends together with a fingerling weight yarn in a similar color. I did this because I wanted to be able to go over it twice for extra strength but not add a lot of bulk.

knit headband So different colors but I’m going running, I don’t really care that it’s not perfectly blended. But, if I make another one to wear just out and about I’ll be more careful with my yarn choices.

knit headbandNow I can’t use “my ears are cold” as an excuse to not run. I don’t know if I’m happy or sad about that.