tie onesie

Tie Onesie

Posted on
Follow Me on PinterestPin It

tie onesie

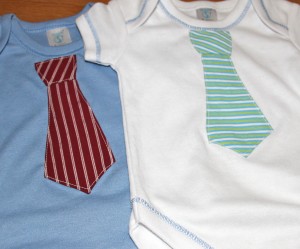
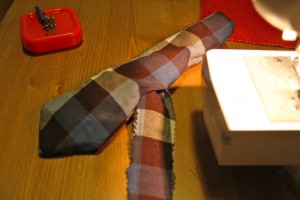
My friend is about to have a baby boy and I wanted to make him something special. I saw this DIY Necktie Onesie tutorial from HauteApplePie.com  and thought that would be the perfect gift. I ended up using the pattern from CrapIveMade.com. Both are great tutorials but I did a few things differently for my tie onesie.

What I used:

  • muslin scraps
  • cotton fabric scraps
  • water-soluble fabric glue stick
  • matching or coordinating thread

What I did:

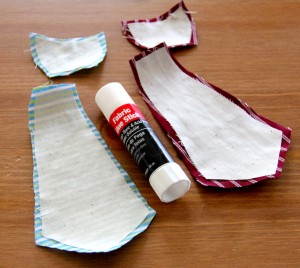
First I cut out the pattern pieces, I angled the knot part to make it look more like a real tie.

I wanted the tie to be a bit sturdier and I didn’t have interfacing on hand so I used muslin. I cut one of each pattern piece. I then trimmed ¼” off of the muslin piece.

Next, glue the muslin pieces to the wrong side of the patterned fabric pieces, positioning them so there’s a ¼” edge around the muslin.

tie onesie

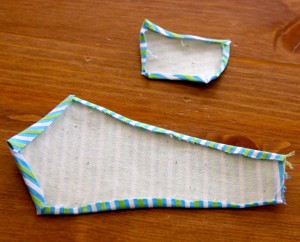
Iron the ¼” fabric over towards the muslin, being careful of the points. Use the glue to help keep the fabric down. I didn’t iron the top part of the tie because the know will be covering it.

tie onesie

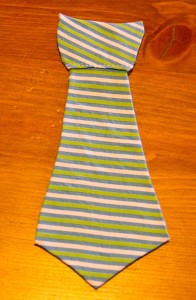
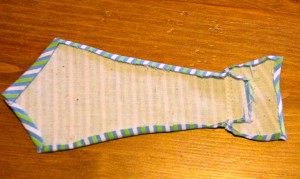
Position the knot over the un-ironed part of the tie, sew a line across the bottom of the knot, connecting the two pieces.

tie onesietie onesie

I trimmed the thread and ironed again.

I then took out the universal needle and replaced it with a knit needle because the onesie is a nice stretchy knit cotton. I then positioned and pinned the tie onto the onesie. I did it in a way to where I didn’t have to move the needles as I sewed so I could concentrate on the lines of the tie.

I sewed along all edges of the tie and close to the edge of the fabric as possible, pivoting at the points. Be careful as you sew, go slow. It’s very easy to catch some of the onesie as you sew .

Iron and wash.

Enjoy!

tie onesietie onesie


How to Add a New Ball of Yarn to a Project

Posted on
Follow Me on PinterestPin It

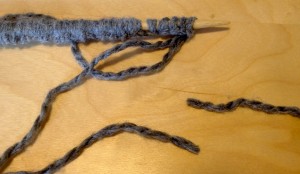
 I am starting a new knitting project. I cast on 80 stitches and then realized that the tail was way too long and decided to trim it. Only, I didn’t just trim the tail. I also cut the thread attached to the yarn ball. You know it is time for a nap when that happens.add a new ball of yarn

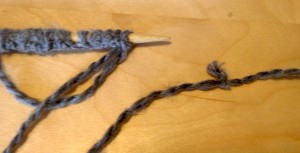
I freaked out a little bit thinking I was going to redo it and then I realized that I can just tie the ends together! Like I needed to add a new ball of yarn to a project. So that’s what I did. I tied a little knot and now I go back to my project and knit away.

add a new ball of yarn


tie for dog

How to Make a Tie for a Dog

Posted on
Follow Me on PinterestPin It

tie for dog

I made a tie for a dog, my dog! Rusty has been going to work with me and I decided he needed an update to his office attire. I went with a tie. Now this is a very simple design. I could have gone one step farther and made it wider and then folded the sides in and tacked them down like a typical tie but the way I did it worked for me. Besides, it’s a tie for a dog, perfection is not required because any dog wearing any type of tie is going to be adorable.

1. I used one of my husband’s old ties as a basic pattern and just shortened the length. The length of my tie is 40 inches mainly because that is the length of the leftover flannel fabric I had. Also, I used an old tie just in case I accidentally clipped it with my scissors. If you don’t have a tie to use, there are many free patterns online for ties from newborn sizes to men’s.

I pressed the fabric and then folded it in half before I laid the tie on it so I could cut two equal pieces.

tie for dogtie for a dog


2. Next I pinned the tie onto the fabric, folding the tie to adjust the length.

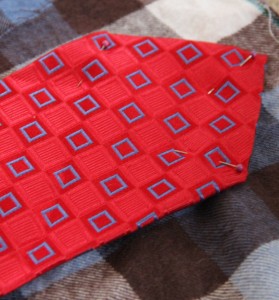
3. I cut the fabric with my pinking shears because I just bought them and couldn’t wait to use them. I cut just outside the fabric. The area where the tie is folded, I just angled the scissors inward to reach the skinny part of the tie. Then I unpinned and removed the tie and adjusted the angle to make sure there was smooth line for the length of the tie.

4. I decided to apply fusible interfacing to both points of the tie because I wasn’t doing the traditional tie where, on the back of the tie, both sides fold in towards the middle, and wanted to create a little bit of heft to the fabric.

– For interfacing, cut it just on the inside of the seam line so you don’t have to sew through the extra bulk. Next, lay the fabric wrong side up on the ironing board. Then place the interfacing on the desired part of the fabric shiny side down. Place a pressing cloth over the fabric and interfacing. With a steam setting, use the spray button on the iron and wet down area of interfacing and iron over it, constantly moving for about 30 seconds. Allow the fabric to cool and then check to see if it is fused. If not, repeat the ironing.

5. Pin both layers together, right sides facing each other.

6. Press, just in case wrinkles have formed.

7. Sew around the edges with a 1/2 inch seam, start in the middle of the tie, in order to machine stitch each point, and leave an inch wide opening. Backstitch at the start and finish.

8. Press.

9. Pull fabric through so the right side of the fabric is now on the outside and press.

tie for dog


10. Slip stitch the hole closed, pressing it in the step before should have folded the fabric giving a nice area to stitch the hole closed.

tie for dog


I used this Youtube video to learn how to actually tie it.

Now Rusty is ready for work!

tie for dogtie for dog