rit dye

How to use RIT dye in the Sink

Posted on
Follow Me on PinterestPin It

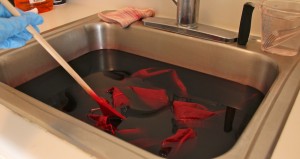
I have this shirt that I love the way it fits but I managed to get a stain on the sleeve. I have a couple of RIT dye just sitting in a drawer begging to be used. I decided to go with the wine color. It’s a pretty color for a button up shirt. I have to use the sink to dye because my apartment upright machines are plastic and I’m slightly terrified I’d stain them. My stainless steel kitchen sink works out perfectly, it won’t stain and I don’t have to be in the basement of my building.

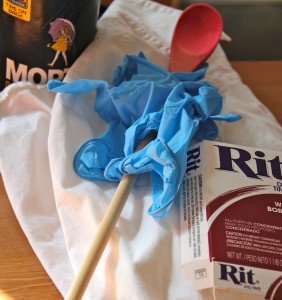
Things I used:

  • Hair tie – always need to pull your hair back
  • Throw away clothes –  chore clothes, clothes you don’t care if they get stained
  • Towel – again one you don’t care if it gets dyed
  • Gloves
  • RIT dye
  • Clothes to dye
  • Something to stir the dye bath
  • Approximately 1 cup of salt
  • Measuring cup with something to stir that will get dye on it like stainless steel spoon

rit dye

Notes:

  • Wear gloves the entire time! Yes, they’re uncomfortable and probably don’t fit right but it’s better than stained hands.
  • I don’t care what the package says. I always do one packet of dye per article of clothing. I feel it gets the best color that way.
  • Put some music song to get you from getting bored while stirring the dye bath.

Directions:

  1. Put your gloves on and mix 2 cups hot water and one packet of dye.
  2. Put stopper in and fill sink with hot water so there’s enough water for the clothes to freely move around in the sink. Add the 1 cup of salt. I didn’t measure it, I just guessed.
  3. Add the dye to the sink and stir.
  4. Start your microwave or kitchen timer to 30 minutes. I actually did 20 minutes but you’re going to leave the clothe in the dye bath until the desired color is achieved.
  5. Add clothes, make sure it is completely soaked and start stirring. Stir the entire time.rit dye
  6. When time is up, let the water out (yay for gloved hands) of the sink and rinse the clothes. You want to rinse in warm water and gradually going to cold until the bleeding stops.
  7. Wash separately in warm water and dry as usual. Also, rinse and wash separately the towel used to clean up.
  8. Clean the counter and sink with bleach.
  9. Enjoy your newly dyed clothes!
rit dye


dog tank top

How to Make a Tank Top for a Dog

Posted on
Follow Me on PinterestPin It

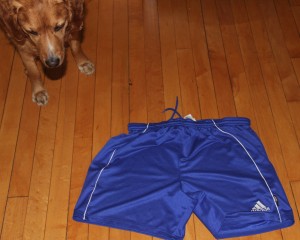
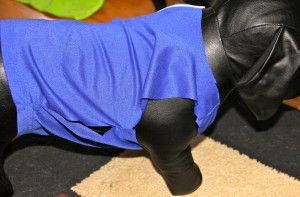
dog tank topMy husband was getting rid of an old pair of athletic shorts and I saw them and thought that would be a cute dog tank top. Let’s face it, I have a difficult time coming up with things that aren’t costumes for Rusty. But this tank top is the perfect summer athletic shirt for him. Even if he didn’t seem too impressed with it, I like it.

dog tank top

Rusty checking out the shorts.

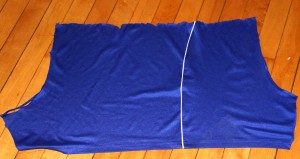
First thing I did was cut off the top of the shorts right below where the tired elastic and draw string are. Next thing I did was seam rip the two legs apart.

dog tank top

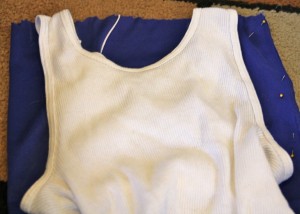
Next, I folded the fabric in half and pinned it closed. Then I took a tank top I had with large arm holes and measured Rusty and it to make sure it would work as a pattern for him and traced the lines for the arm holes and neck.

dog tank topThen I cut out the pattern and placed the fabric inside out. I pinned and sewed the shoulder seams together. I used a jersey needle in my sewing machine because I found the universal needle was too rough on the nylon fabric. I then tried it on Manne to check fit and how I wanted to velcro it shut.

dog tank top

Manne the model

It might not be very noticeable in the picture, but I made this tank top to where one of Rusty’s leg has to go through a hole and then his head goes through the neck hole and it velcro to make the other leg hole and close the shirt. I did it this way so couldn’t shake it off.

Next I folded over and pressed all unfinished edges, and then folded them over again to encase the raw edges and sewed the seam.

To finish I took some fusible velcro, cut to the right size, and ironed them on to correct spots. I used a pressing cloth for this because the iron needed to be set to a steam setting. All that there was left for me to do was to have Rusty model it.


dog tank top

Model shot

dog tank top

He’s about had it.

dog tank top

He’s over it.


bleach a shirt

How to Bleach a Shirt

Posted on
Follow Me on PinterestPin It

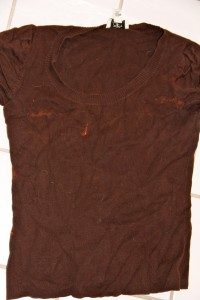
I have this sweater style t-shirt that I accidentally got some bleach on. It’s disappointing but not surprising that I managed this. I didn’t want to go around with a dark brown shirt with a few random orange spots and I also didn’t want to throw the shirt away. So, I decided to bleach my shirt in trying to make the entire shirt orange.

bleach a shirt

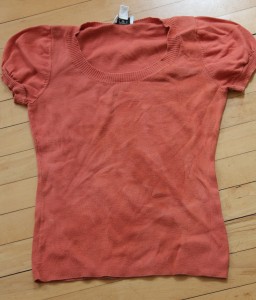
This to ———->bleach a shirt


Here’s what I did.

Materials:

  • bleach
  • water
  • shirt/item you want bleached
  • rubber gloves
  • clothing you’d be ok if bleach accidentally got on
  • hair tie, bobby pins to keep hair out of your face

Instructions:

  1. Make sure the item you want bleach is clean
  2. In a stainless steel sink or something white, I used a small white trash can, do a mixture of ¼ cup bleach to 2 quarts warm water, the warmer the water the more bleach the item will absorb. I also did this in my tub if some of the bleach water splashed around.
  3. Add your item and let it soak for about 20 minutes. I let it soak for 30 minutes because I went and watched TV while I waited and checked/stirred it on commercial breaks.
  4. In the tub or sink completely rinse out item and wash in your machine separately,  following tag instructions. 

Now I have a new shirt and I didn’t have to pay for it! I feel like the picture doesn’t do the pretty pumpkin shade of orange justice.