 Pin It
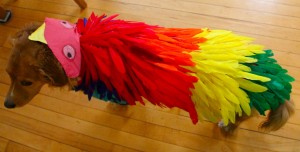
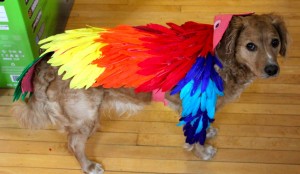
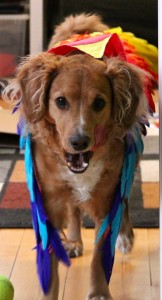
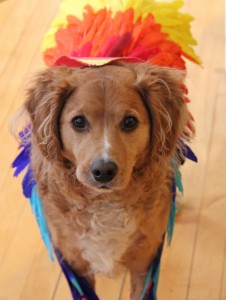
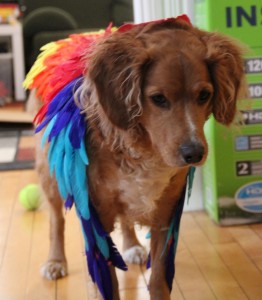
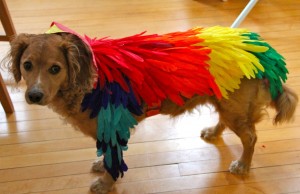
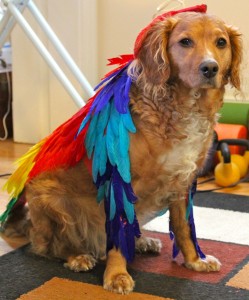
I wanted to make a fun bird costume for Rusty for a while now. I just had no clue how. I decided to make it up as I went a long.
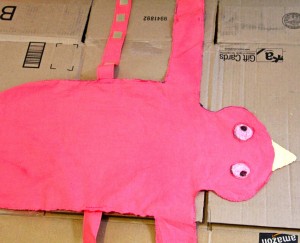
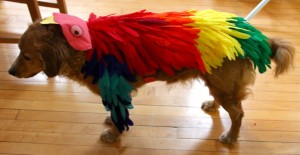
First I scribbled all over a few pieces of paper trying to work out in my head how to do this. I went with a red dyed body, which turned out pink, made of muslin with paint, and fabric pastels to color the face and glued the feathers to the muslin.
Here’s the Pattern for the body. It’s my very first time creating a pattern! Well all I did was draw half of the pattern on the fold of the muslin. I didn’t think I could make it exact on both sides. Then I went over it in a dark marker and traced it onto paper. Hopefully it can be easily followed.
Rusty’s measurements for this were:
- top of the head to base of the tail: 29 inches
- middle top of head down to mid neck (for head of parrot): 7 inches
- middle of back down to top of front paw: 17½ inches
- length I wanted tail feathers that would start as base of tail: 7 inches
I made the head of the bird to sit more on Rusty’s neck instead of on top of his head because he hates wearing clothes but hates it even more to have things on his head, so I decided to be nice.
Materials:
- 1 1/3 yards of dyed muslin, 45″ wide or red cotton fabric
- matching thread
- fabric dye sticks
- fabric paint
- feathers
- fabric glue, such as Scotch Maximum Strength Adhesive or E-6000
- 1/4″ elastic
- velcro
- sewing machine
- iron and board
Directions:
1. Wash and press fabric
2. Cut out pattern, Pin to fabric and cut
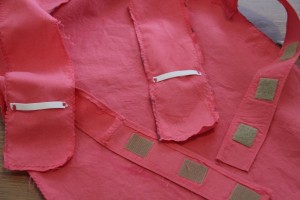
3. Cut out 4 ~ 14″L x 2″W strips, length may very depending on size of your dog, these are for the velcro straps to go on their belly.
4. On 2 of the 4 pieces, plan out and attach velcro according the package directions, I used Fabric Fusion velcro, I ended up using 4 pieces of velcro because my first measurements were a bit off. Guess the saying is true, “measure twice, cut once” or something like that
5. Pin right sides together and sew three sides of the pieces together, (2 long sides and 1 short side). Turn inside out, so velcro is on the outside.
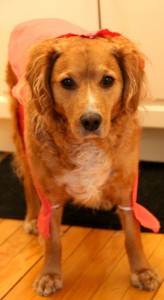
6. Sew the velcro pieces onto the body piece and then try it on your puppy to make sure it fits.
7. Next do a zig zag stitch around the edge of the body piece.
8. Cut 2, 1 3/4 inch long pieces of elastic. With a tight zig zag stitch, attach to wing/arms parts of the body piece. You want to place them so they are above where the legs bend so it doesn’t affect how they walk.
9. With Dye Sticks, draw on eyes and follow package directions to set it. Sewing on felt eyes would also be a cute idea, giving the costume more texture.
10.Lay the bird on some cardboard or newspaper and carefully paint on beak.
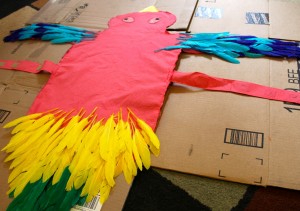
11. While the paint is drying, lay out the feathers on the pattern piece before you attach them to make sure you have enough and to allow you to figure out how you’d like your feathers to be arranged. Take a picture so you remember your pattern.
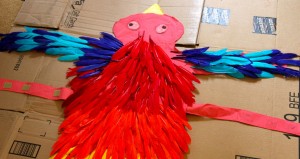
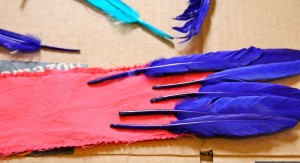
12. Next thing I did was put a tiny piece of cardboard between the elastic straps and the fabric just in case my glue bled through the fabric. I then started gluing my feathers onto the fabric starting with the bottom and working my way up. I started a new row by lining up the end of the feathers to the end of the quills so the quills wouldn’t show. I also let the feathers hang over the edge of the fabric. At the top row, I cut off the quill and applied the glue to the base of the feather. Then I let the glue sit over night before trying it on Rusty to make sure adhesion to the fabric.
– Alternatively, you can sew the feathers on by pinning the rows, starting with the bottom row first like if you were gluing, to the fabric with a piece of tissue paper between the fabric and feathers and tearing away the tissue after they have been sewed on. This is probably the best choice to make sure the feathers don’t fall off but I decided to re-watch Glee season 1 and my sewing machine is not in my living room. 🙂
13. After the glue has dried, try it on and enjoy your adorable bird dog!

![make a bird costume dog]](http://www.needlesandknowhow.com/wp-content/uploads/2013/02/birdrustysit-300x199.jpg)
