cross stitch heart

Cross Stitch Heart Pattern

Posted on
Follow Me on PinterestPin It

Cross Stitch Heart

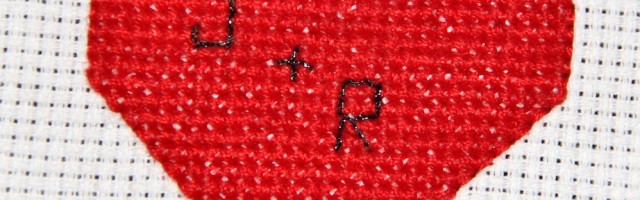
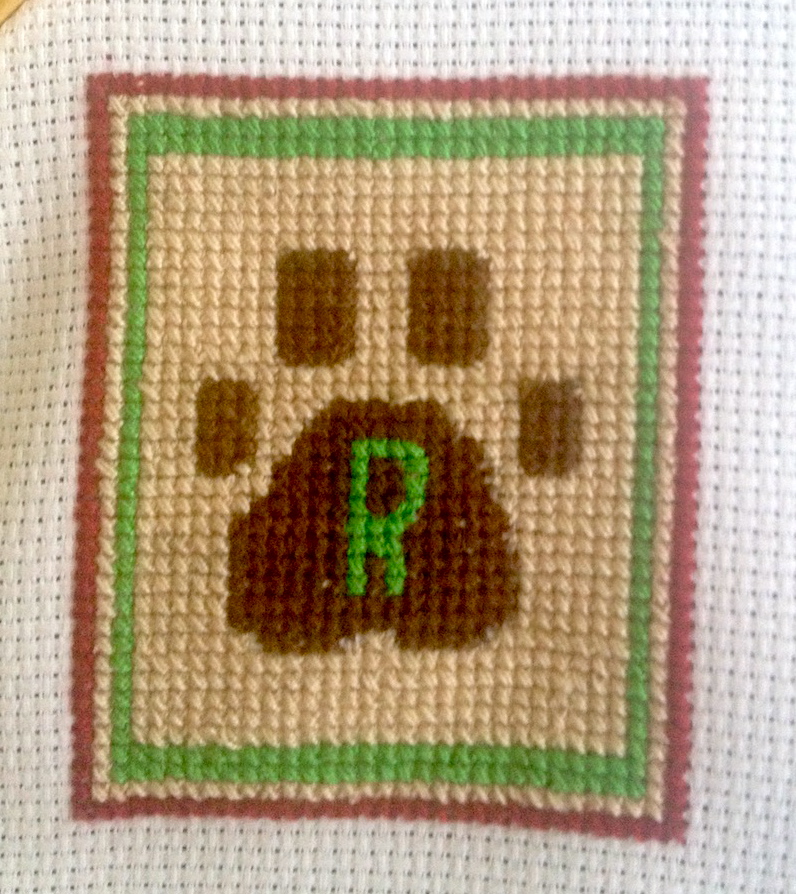
I was thinking about Valentine’s Day and realized I didn’t have a cross stitch heart pattern. I wanted it to be like something I use to draw in junior high, you know, the heart with my love’s and I’s initials in it. Then I thought about Rusty and how he is part of this family, so I put half a paw peeking out over the top of the heart.

cross stitch heart

Pattern


The pattern didn’t turn out the greatest when I scanned it because I pretty much beat it to death while I was completing the stitching, taking it everywhere with me. Next time I’ll scan it before I start the stitching. Lesson learned.


cross stitch heart

Stitching the paw print was a pain in my rear. Even though I had my pattern the squares are so tiny that it would have benefited me and the pattern to make it a bit bigger if I want to stitch this heart again.


I really need graph paper with smaller squares so I can make bigger patterns. This tiny heart reminds me of a Pound Puppy patch! I don’t know what I’ll do with it now that the stitching is complete, maybe I will put it on a stuffed animal and then watch the Pound Puppies.


background complete

Paw Print, How to Cross Stitch

Posted on
Follow Me on PinterestPin It

After I drew my paw print pattern I got to stitching! Here’s how to cross stitch. First I’ll go a little backwards with photos of doing the cross stitch with a border I’m putting around it. But a starting note, remember, is that there is no knot at the end of the thread, you simply leave about an inch on the back side of the fabric.

step 1

take the needle through to the front side of the canvas from the bottom hole

step 2

pull through and go to the next row over, up and to the right diagonally, pull needle all the way through to the back of the canvas

step 3

next go to the hole directly underneath the hole in the previous step and pull the needle through to the right side of the fabric

step 4

after you’ve done another diagonal stitch, go to the hole underneath the one previously used and pull needle through to the right side of the fabric

step 5

now go up and diagonal to the left

step 5

now go up and diagonal to the left

step 6

the first X is complete and now repeat

step 7

go diagonal again to complete the second X

In my pattern I have a lot of half squares which could be confusing. But really it either means a half of stitch, literally a half of a stitch where the needle goes through the center of the square making the diagonal half of it’s usual length.

with green

Pattern Complete

This is the pattern complete! But I needed a way to finish it, make it actually look complete. So I decided to make a border around it.

green

It still quite wasn’t what I hoped so I added another border.

red and green

almost complete

That looks much better to me, so now I’m going to fill it in with a cream colored thread to leave no square unstitched.

background complete

background is filled in

To finish the stitching part of this I decided to backstitch around the paw print to highlight it. This is easier, I think, than back stitching in sewing because it has the holes to put your needles in to make your stitches the same length and it is often used as a finishing stitch in cross stitch.

Stitching is Finished!

I put a pencil next to it to give a size reference. Now I need to figure out how to turn this into an ornament.