knit mug cozy

Slip Stitch Knit Mug Cozy Revisited

Posted on
Follow Me on PinterestPin It

I decided to attempt my slip stitch knit mug cozy pattern again because I had so many problems the first time. Well, this one didn’t go according to plan either. My impatience got the better of me, resulting in this:

mug cozy

The pattern is slightly off. Using the yarn left over from my slip stitch belt, 100 % wool Crystal Palace Yarn, with size US 3 (3.25mm) needles, I decided to cast on 70 stitches and do the pattern

Row 1: P3 K2

Row 2: K1 S1 K1 P2

Repeat till desired length, I did 33 rows.

Cast off like it was an odd row so P3 K2.

Sew on button and loop.

But somewhere on Row 17 I noticed I combined two stitches leaving me with only 69 stitches on my needle and instead of  doing the smart thing and undoing my stitches until I found the problem, fix it, and move on, I decided I was too impatient and it was an amazing idea to just cast on another stitch at the end of the row. Wow I was wrong but I  knew I was wrong and did it anyways which makes it even worse. But that’s why my pattern is off. I do like the pattern and I do like my dressed up coffee mug in the morning. I also believe that this could be a great pattern for a cuff/bracelet.

The 70 stitches compared to the 75 in the first one I did it working out a lot better. It fits more of my coffee mugs!

knit mug cozyknit mug cozy


knit mug cozyknit mug cozy


make a bird costume dog

How to Make a Bird Costume for a Dog

Posted on
Follow Me on PinterestPin It

make a bird costume dog

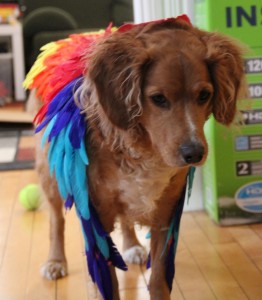
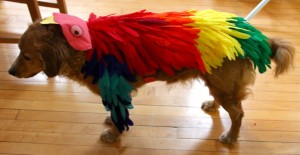
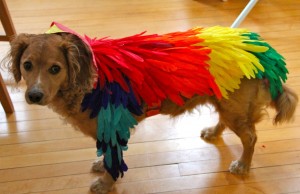
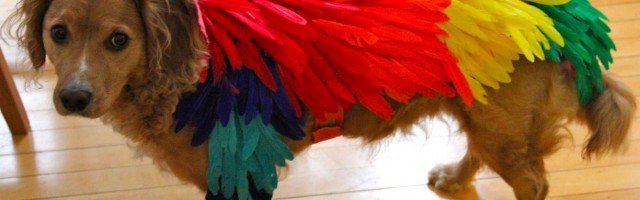
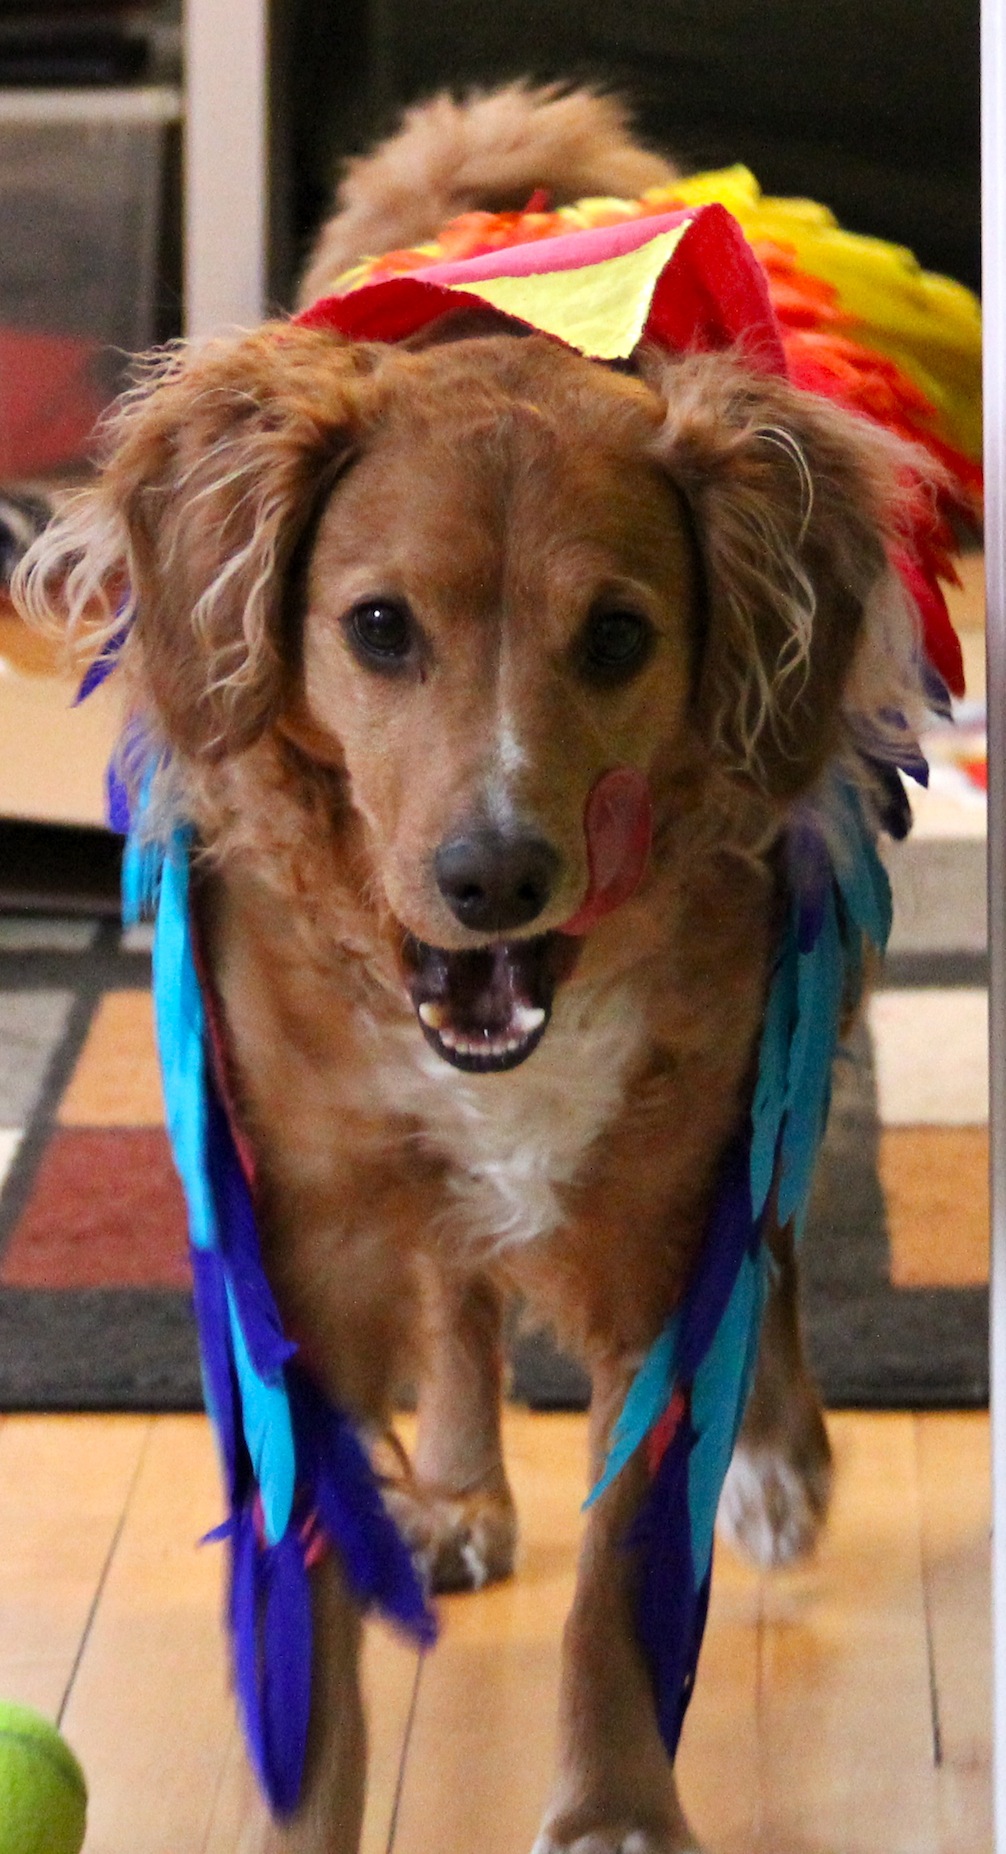
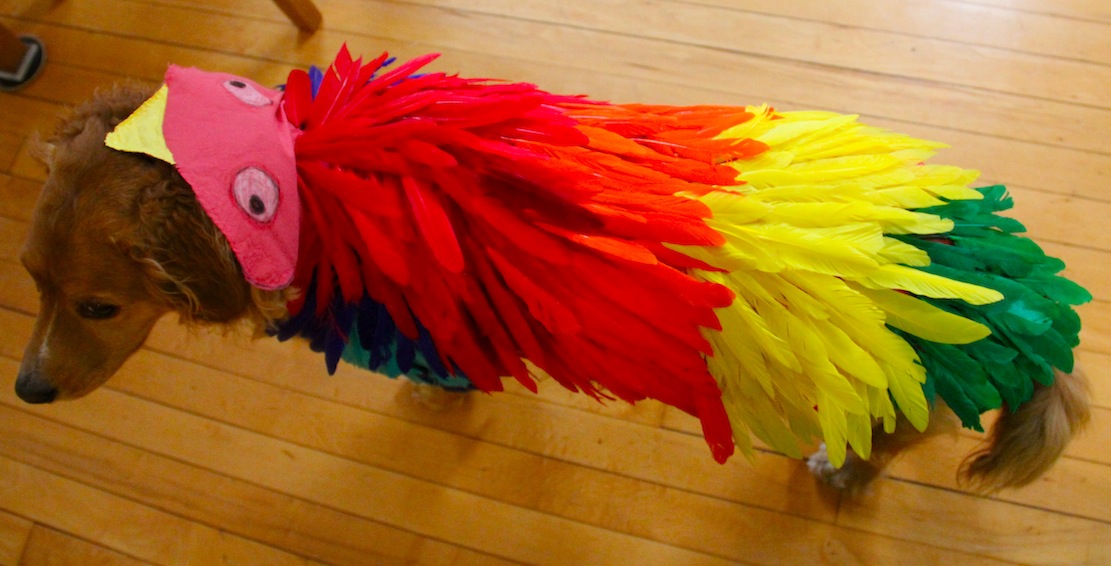
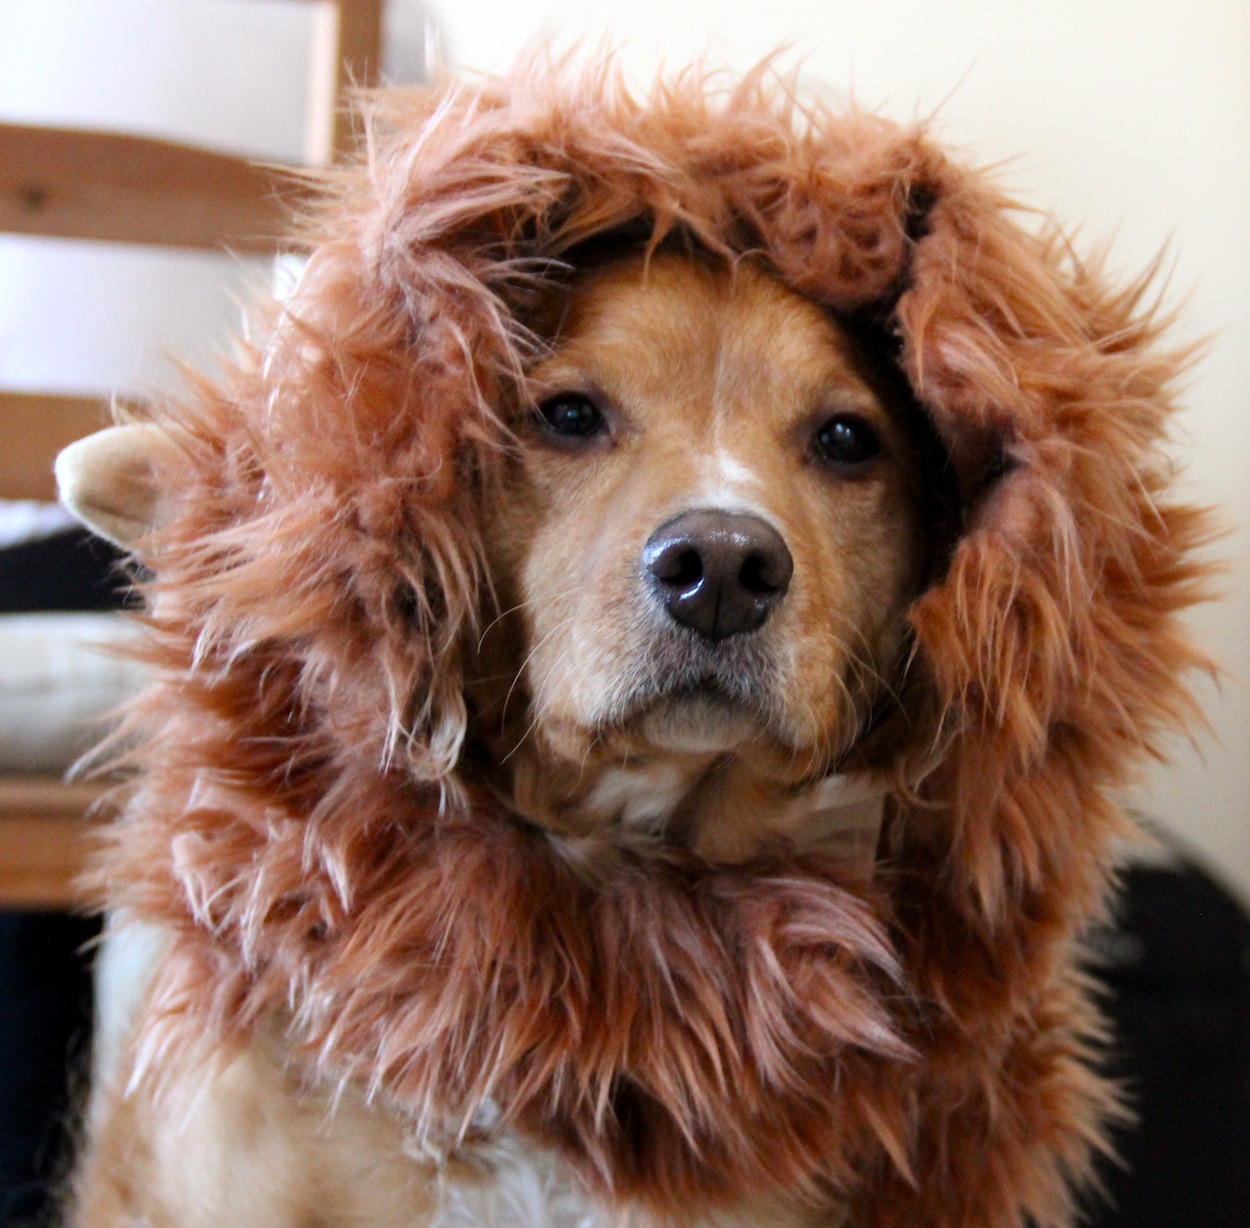
I wanted to make a fun bird costume for Rusty for a while now. I just had no clue how. I decided to make it up as I went a long.

First I scribbled all over a few pieces of paper trying to work out in my head how to do this. I went with a red dyed body, which turned out pink, made of muslin with paint, and fabric pastels to color the face and glued the feathers to the muslin.

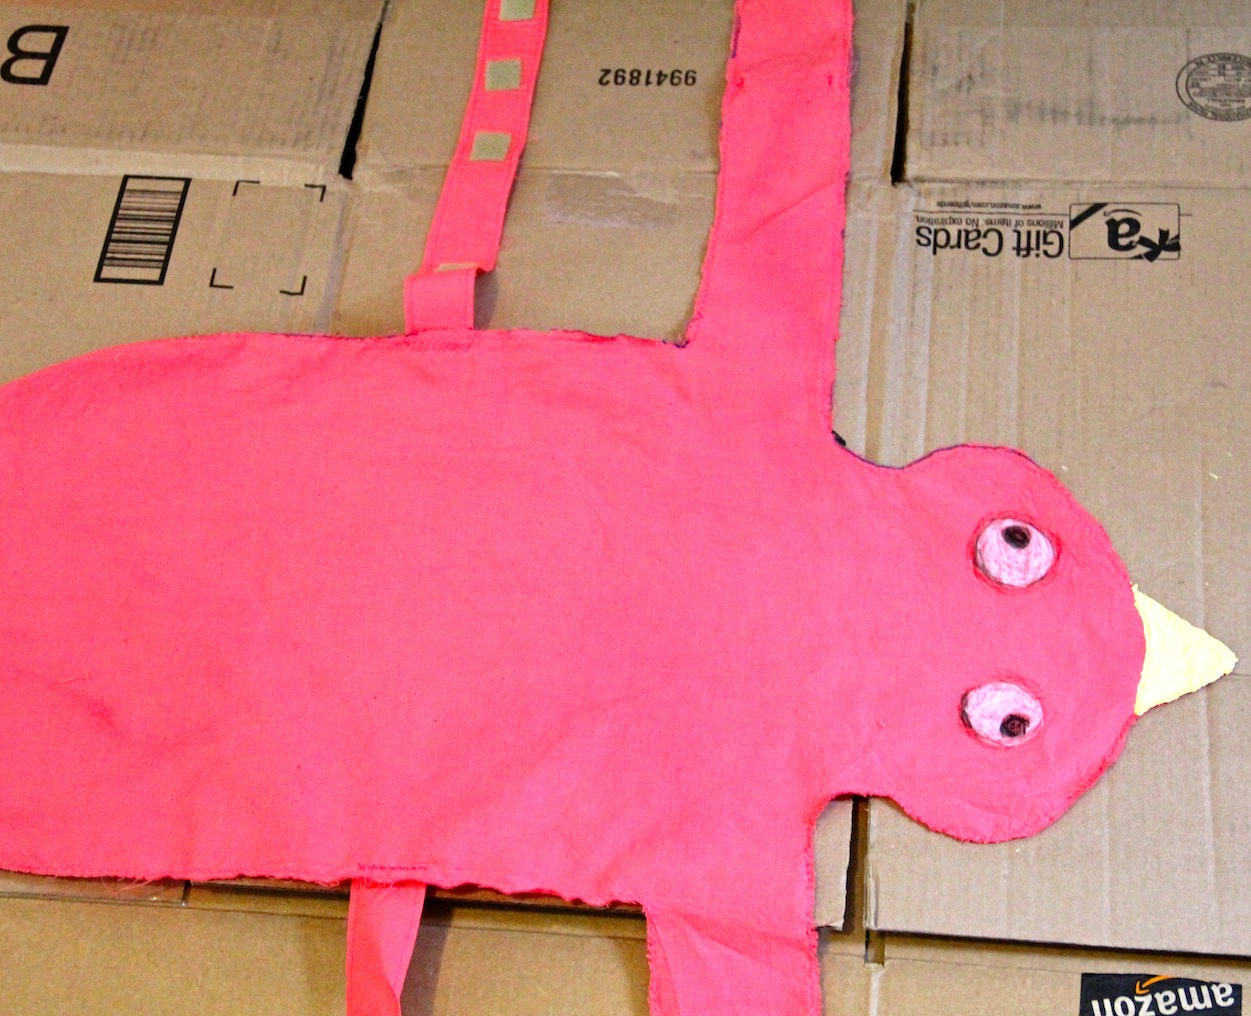
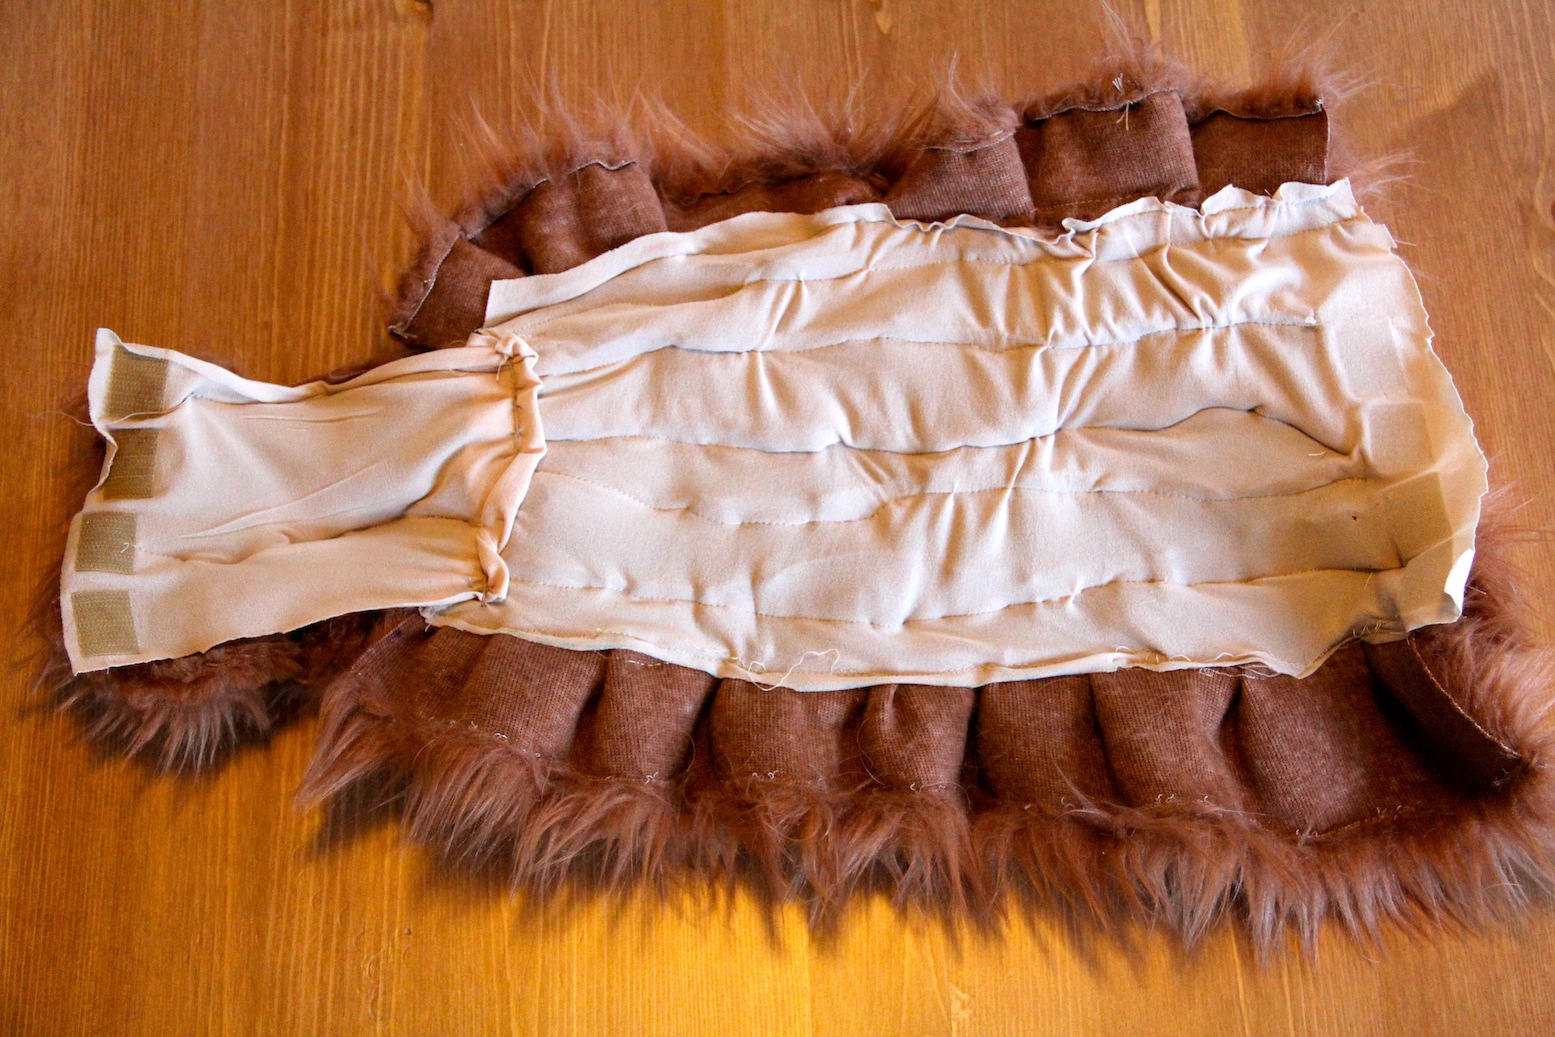
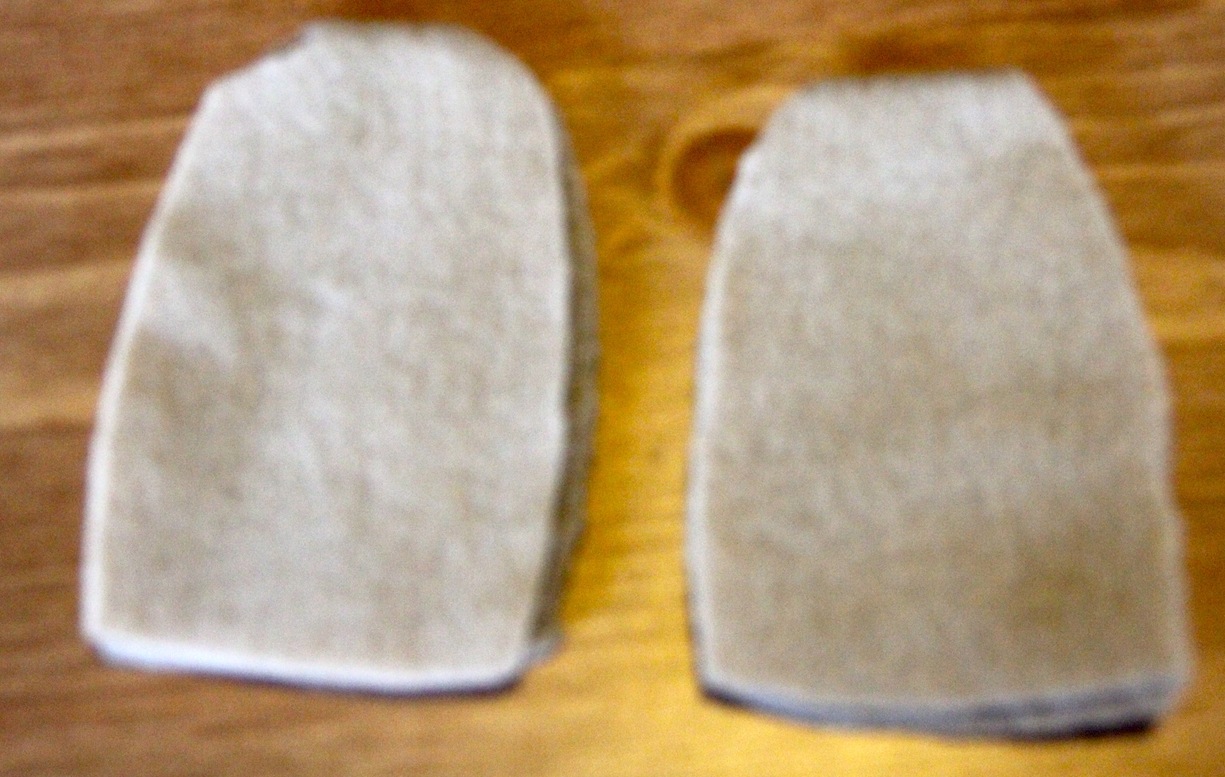
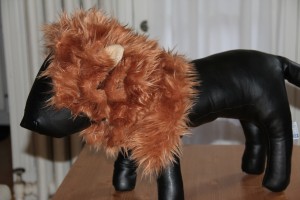
Here’s the Pattern for the body. It’s my very first time creating a pattern!  Well all I did was draw  half of the pattern on the fold of the muslin. I didn’t think I could make it exact on both sides. Then I went over it in a dark marker and traced it onto paper. Hopefully it can be easily followed.

Rusty’s measurements for this were:

  • top of the head to base of the tail: 29 inches
  • middle top of head down to mid neck (for head of parrot): 7 inches
  • middle of back down to top of front paw: 17½ inches
  • length I wanted tail feathers that would start as base of tail: 7 inches

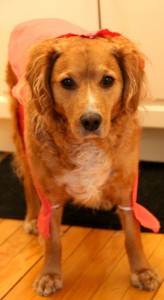
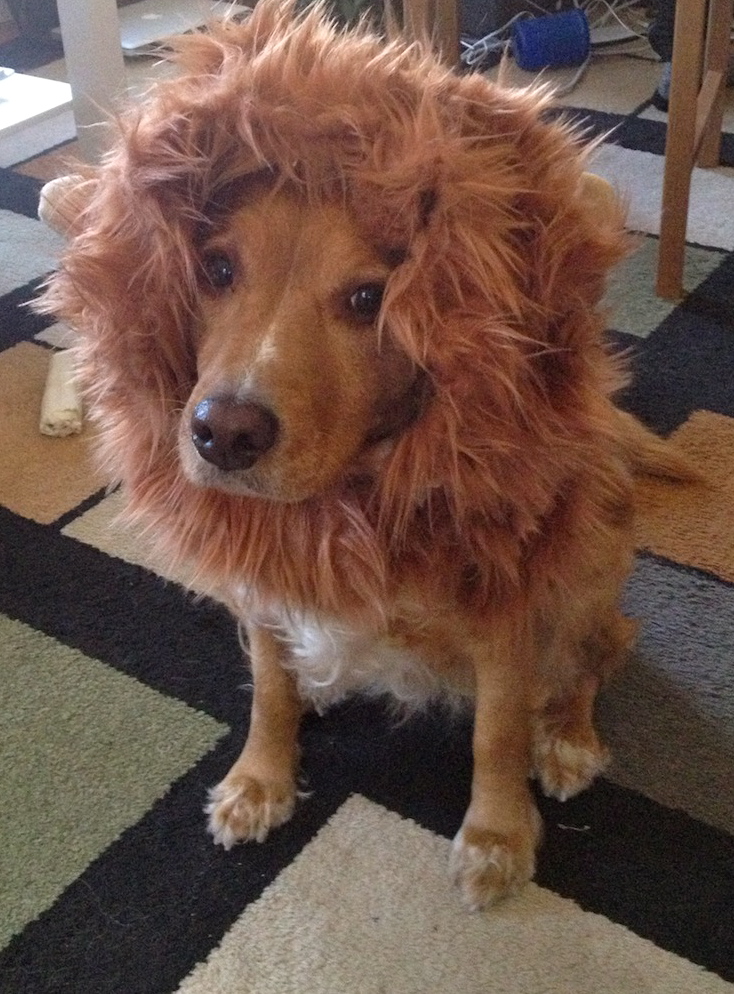
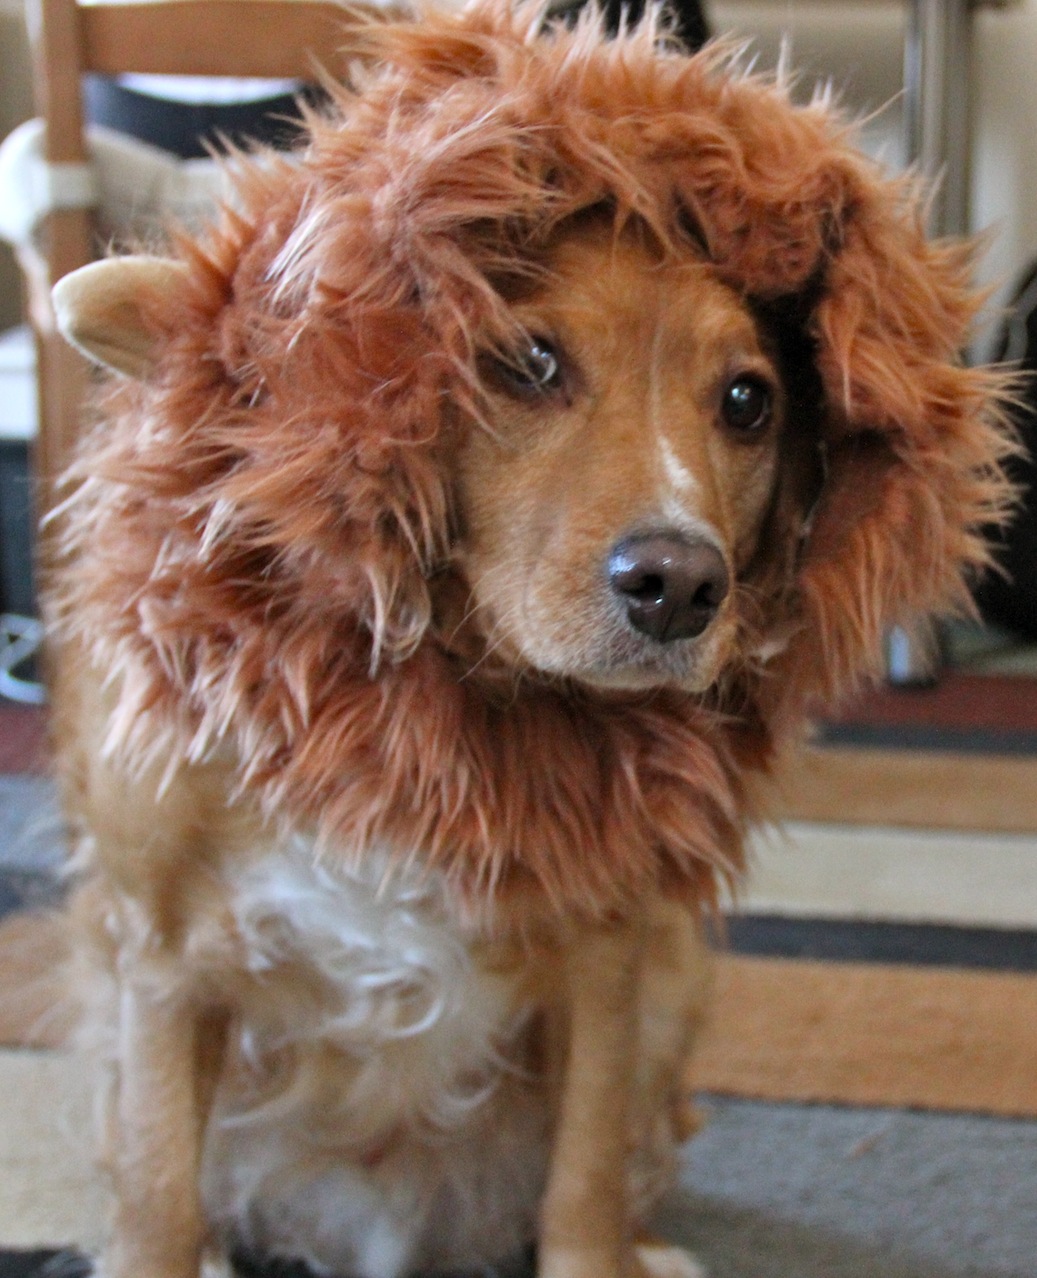
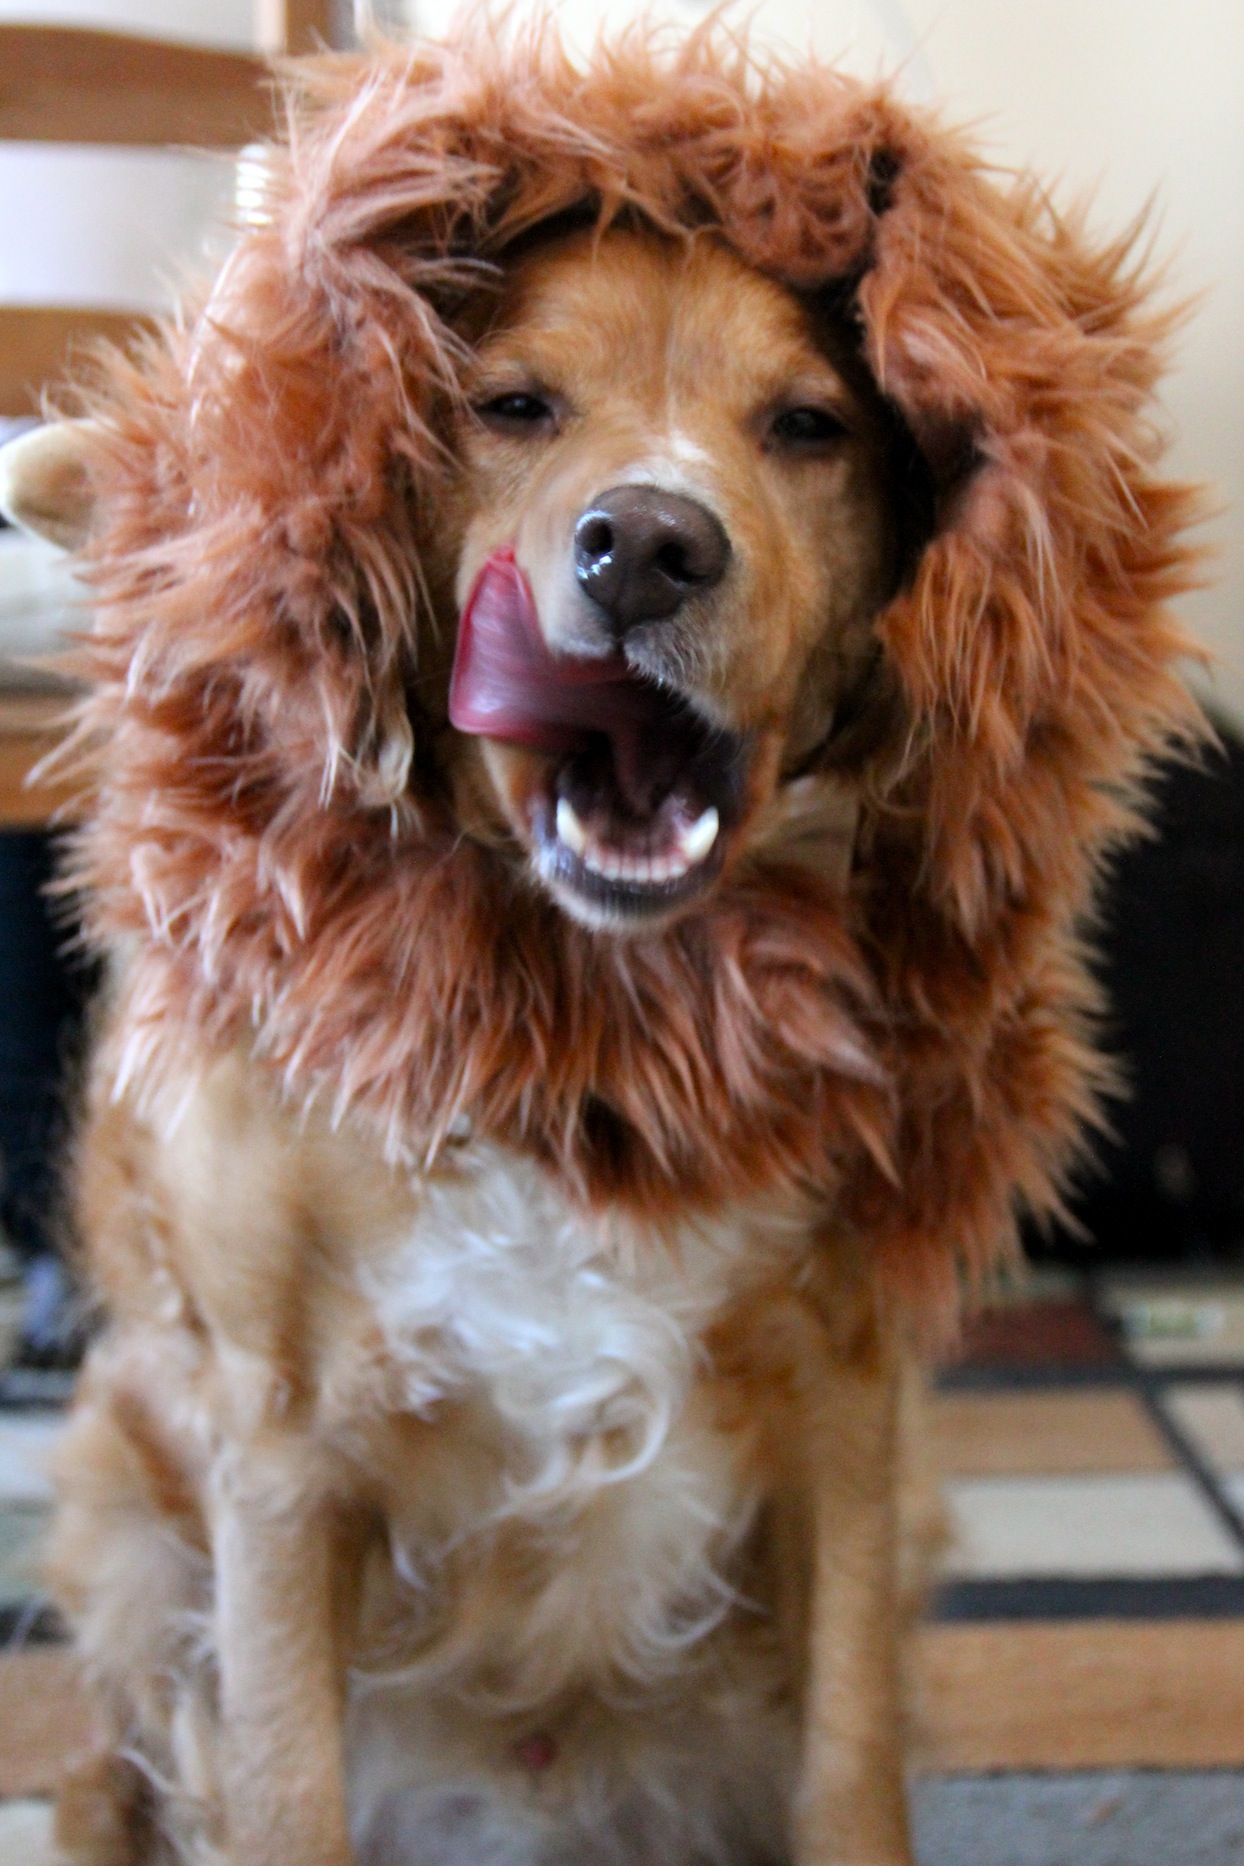
I made the head of the bird to sit more on Rusty’s neck instead of on top of his head because he hates wearing clothes but hates it even more to have things on his head, so I decided to be nice.

Materials:

  • 1 1/3 yards of dyed muslin, 45″ wide or red cotton fabric
  • matching thread
  • fabric dye sticks
  • fabric paint
  • feathers
  • fabric glue, such as Scotch Maximum Strength Adhesive or E-6000
  • 1/4″ elastic
  • velcro
  • sewing machine
  • iron and board

Directions:

1. Wash and press fabric

2.  Cut out pattern, Pin to fabric and cut

3. Cut out 4 ~ 14″L x 2″W strips, length may very depending on size of your dog, these are for the velcro straps to go on their belly.

4.  On 2 of the 4 pieces, plan out and attach velcro according the package directions, I used Fabric Fusion velcro, I ended up using 4 pieces of velcro because my first measurements were a bit off. Guess the saying is true, “measure twice, cut once” or something like that

5. Pin right sides together and sew three sides of the pieces together, (2 long sides and 1 short side). Turn inside out, so velcro is on the outside.

6. Sew the velcro pieces onto the body piece and then try it on your puppy to make sure it fits.

7. Next do a zig zag stitch around the edge of the body piece.
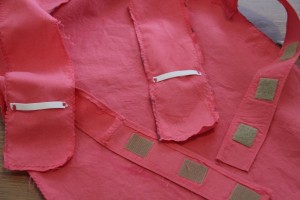
make a bird costume dog

Velcro and Elastic

8. Cut 2, 1 3/4 inch long pieces of elastic. With a tight zig zag stitch, attach to wing/arms parts of the body piece. You want to place them so they are above where the legs bend so it doesn’t affect how they walk.

make a bird costume

trying it on

9. With Dye Sticks, draw on eyes and follow package directions to set it. Sewing on felt eyes would also be a cute idea, giving the costume more texture.

10.Lay the bird on some cardboard or newspaper and carefully paint on beak.

make a bird costume dog

eyes and beak

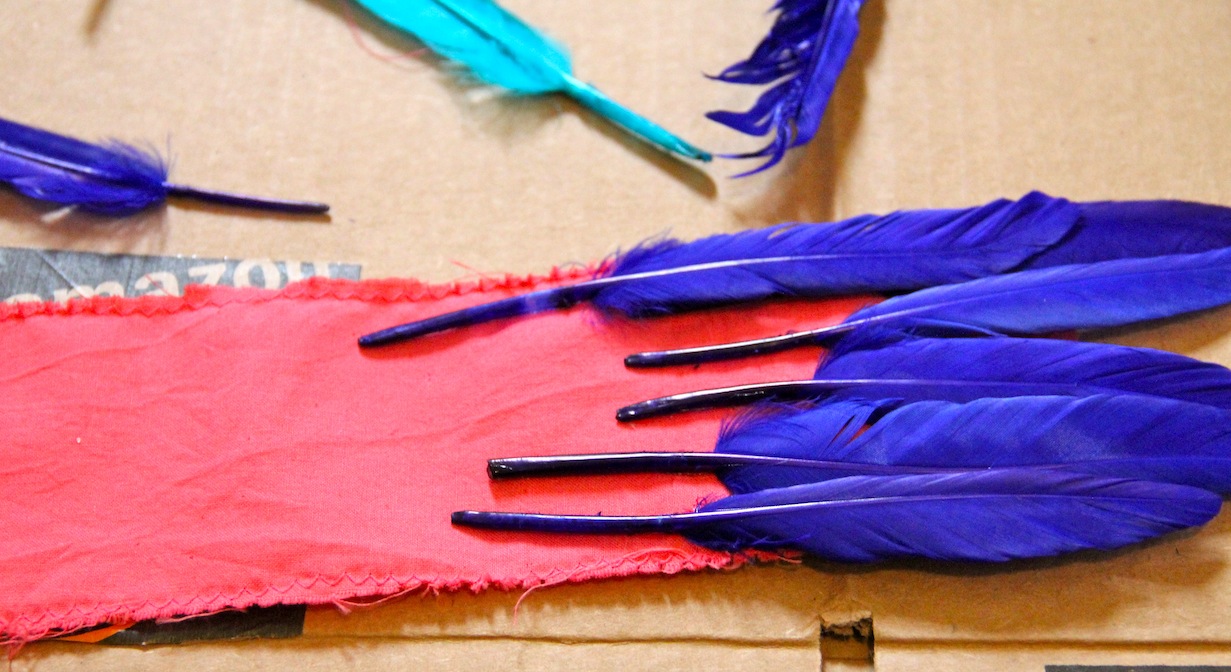
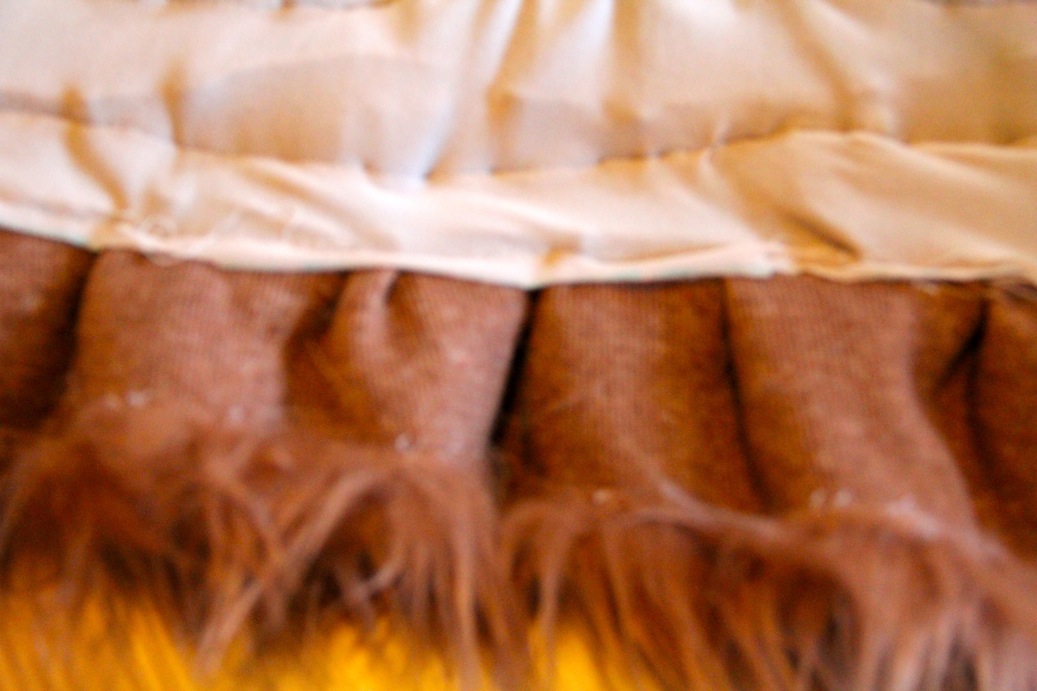
11. While the paint is drying, lay out the feathers on the pattern piece before you attach them to make sure you have enough and to allow you to figure out how you’d like your feathers to be arranged. Take a picture so you remember your pattern.

make a bird costume dogmake a bird costume dog


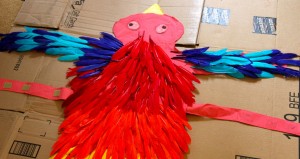
12. Next thing I did was put a tiny piece of cardboard between the elastic straps and the fabric just in case my glue bled through the fabric. I then started gluing my feathers onto the fabric starting with the bottom and working my way up. I started a new row by lining up the end of the feathers to the end of the quills so the quills wouldn’t show. I also let the feathers hang over the edge of the fabric. At the top row, I cut off the quill and applied the glue to the base of the feather. Then I let the glue sit over night before trying it on Rusty to make sure adhesion to the fabric.

make a bird costume dog

starting to glue

– Alternatively, you can sew the feathers on by pinning the rows, starting with the bottom row first like if you were gluing, to the fabric with a piece of tissue paper between the fabric and feathers and tearing away the tissue after they have been sewed on. This is probably the best choice to make sure the feathers don’t fall off but I decided to re-watch Glee season 1 and my sewing machine is not in my living room. 🙂

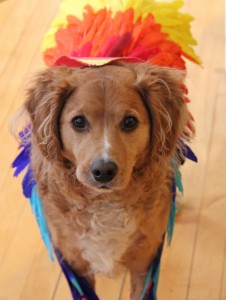
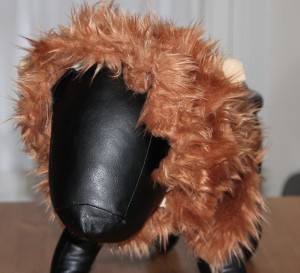
13. After the glue has dried, try it on and enjoy your adorable bird dog!

make a bird costumemake a bird costumemake a bird costume dog


make a bird costume dogmake a bird costume dog

make a bird costume dogmake a bird costume dog]make a bird costume dog


knit mug cozy

Slip Stitch Pattern for a Knit Mug Cozy

Posted on
Follow Me on PinterestPin It

knit mug cozy

I decided to dress up my morning coffee a bit with a knit mug cozy. I was still excited about learning the slip stitch from the belt I made and wanted to create a pattern that used the slip stitch in it. I still had to do a bit of research to figure out exactly how to do it but after compiling everything and then some trial and error,  this is what I came up with:

US 2 needles (2.75mm)

2 ply lace weight yarn from Hettinger Corriedales. It’s a farm, in Illinois near my hometown that raises the sheep, and dyes the wool and spins them at their farm! You should check it out.

I’m not sure how much yarn I’m using. The skein I’m using had 214 yards but I’m using it for multiple projects. This fits a 10.5 inch circumference mug best. The yarn is a little too dark to get a great picture of the pattern but it looks great in person. Maybe I’ll make another in a different yarn to better display the pattern.

Pattern:

  • Cast on 70 stitches
  • Row 1: P3 K2 repeat until row is finished
  • Row 2: K1 S1 (P) K1 P2 repeat until row is finished
  • Repeat pattern until desired length. Mine ended up being 31 rows
  • Cast off on an odd-numbered row in the P3 K2 pattern
  • Sew loop like in the felted bag on one side and sew the button on the other
  • Attach to the mug by putting the button next to the handle and loop through the mug handle
  • Enjoy a nice cup of whatever with your cozy.

*Please note that for this pattern, unlike the belt, when you slip stitch purl style you do NOT bring the yarn forward, you simply just put the needle through the stitch like you would for a purl stitch and then push the stitch onto the needle.

knit mug cozy

What I actually did to figure that pattern out:

  • Cast on 75 stitches
  • Row 1: K2 P3 repeat
  • Row 2: P2 K1 S1 (P) K1 repeat

After 8 rows, it was looking like a hot jumbled mess, that’s the point of trial and error I guess. It’s a little difficult to see because the thread because it was hand spun isn’t the same thickness throughout. I decided to flip the pattern and test it out. To be honest, I don’t completely understand why it worked but it did so that’s awesome.

  • Row 9: P3 K2
  • Row 10: K1 S1(P) K1 P2
  • Rows 30 and 31 in a garter stitch to somewhat match the bottom of the cozy.
  • Add loop like I did with the felted bag to one end
  • Sew on button to the other end

*I marked on a piece of paper every time I did 5 stitches, and would only stop after doing five to keep my place. I also, marked them by row just incase I forgot which row I was on.

Didn’t turn out how I had envisioned in my head. But I was able to figure it out and I think it still looks cute and definitely serves its purpose. I can now create a mug cozy with the exact pattern I was hoping for. Like I said before, it’s best for a mug with a 10.5 inch circumference. I found it slipped a little on a 9.5inch and a 10 inch that decreases towards the bottom of the mug. Decrease the amount of stitches, by 5, to fit the mug you would like to use it on.

knit mug cozy

10inch and decreasing


knit mug cozy

9.5in circumference

knit mug cozy

10.5inch circumference


knitted belt

Knit Belt, How to Slip Stitch

Posted on
Follow Me on PinterestPin It

knit belt

I decided to make the Artisan Belt in the Chick with Sticks knitting book. I’ve never had a knit belt before. It was my first time slipping stitches. I was a little nervous about it because although there was a picture of it I wasn’t sure how it would work. But it gave it a nice almost braided looking border, using Crystal Palace Yarn. I used attach 1” D rings as my belt closure.

– To slip stitch all you do it put the needle through the loop, in either knit or purl stitch fashion whatever the directions say, without wrapping yarn around the needle first. So you’re literally slipping the stitch onto the needle.

knit belt

Start by pulling the thread to the front of the project

knit belt

Then take the needle through the front of the stitch like you’re going to do a purl stitch.

knit belt

Push stitch on to needle WITHOUT actually doing the purl stitch

– To attach the D rings, simply fold fabric over the straight part of the D ring and stitch closed. The package the rings come in should also have instructions on it.

knitted beltOverall I’m really happy with my knit belt. It’s really just an accessory, not for actually holding up pants. But that is just fine with me. I think it’s a nice addition to my wardrobe and it was a fun, easy and quick project to complete.


cross stitch heart

Cross Stitch Heart Pattern

Posted on
Follow Me on PinterestPin It

Cross Stitch Heart

I was thinking about Valentine’s Day and realized I didn’t have a cross stitch heart pattern. I wanted it to be like something I use to draw in junior high, you know, the heart with my love’s and I’s initials in it. Then I thought about Rusty and how he is part of this family, so I put half a paw peeking out over the top of the heart.

cross stitch heart

Pattern


The pattern didn’t turn out the greatest when I scanned it because I pretty much beat it to death while I was completing the stitching, taking it everywhere with me. Next time I’ll scan it before I start the stitching. Lesson learned.


cross stitch heart

Stitching the paw print was a pain in my rear. Even though I had my pattern the squares are so tiny that it would have benefited me and the pattern to make it a bit bigger if I want to stitch this heart again.


I really need graph paper with smaller squares so I can make bigger patterns. This tiny heart reminds me of a Pound Puppy patch! I don’t know what I’ll do with it now that the stitching is complete, maybe I will put it on a stuffed animal and then watch the Pound Puppies.


tie for dog

How to Make a Tie for a Dog

Posted on
Follow Me on PinterestPin It

tie for dog

I made a tie for a dog, my dog! Rusty has been going to work with me and I decided he needed an update to his office attire. I went with a tie. Now this is a very simple design. I could have gone one step farther and made it wider and then folded the sides in and tacked them down like a typical tie but the way I did it worked for me. Besides, it’s a tie for a dog, perfection is not required because any dog wearing any type of tie is going to be adorable.

1. I used one of my husband’s old ties as a basic pattern and just shortened the length. The length of my tie is 40 inches mainly because that is the length of the leftover flannel fabric I had. Also, I used an old tie just in case I accidentally clipped it with my scissors. If you don’t have a tie to use, there are many free patterns online for ties from newborn sizes to men’s.

I pressed the fabric and then folded it in half before I laid the tie on it so I could cut two equal pieces.

tie for dogtie for a dog


2. Next I pinned the tie onto the fabric, folding the tie to adjust the length.

3. I cut the fabric with my pinking shears because I just bought them and couldn’t wait to use them. I cut just outside the fabric. The area where the tie is folded, I just angled the scissors inward to reach the skinny part of the tie. Then I unpinned and removed the tie and adjusted the angle to make sure there was smooth line for the length of the tie.

4. I decided to apply fusible interfacing to both points of the tie because I wasn’t doing the traditional tie where, on the back of the tie, both sides fold in towards the middle, and wanted to create a little bit of heft to the fabric.

– For interfacing, cut it just on the inside of the seam line so you don’t have to sew through the extra bulk. Next, lay the fabric wrong side up on the ironing board. Then place the interfacing on the desired part of the fabric shiny side down. Place a pressing cloth over the fabric and interfacing. With a steam setting, use the spray button on the iron and wet down area of interfacing and iron over it, constantly moving for about 30 seconds. Allow the fabric to cool and then check to see if it is fused. If not, repeat the ironing.

5. Pin both layers together, right sides facing each other.

6. Press, just in case wrinkles have formed.

7. Sew around the edges with a 1/2 inch seam, start in the middle of the tie, in order to machine stitch each point, and leave an inch wide opening. Backstitch at the start and finish.

8. Press.

9. Pull fabric through so the right side of the fabric is now on the outside and press.

tie for dog


10. Slip stitch the hole closed, pressing it in the step before should have folded the fabric giving a nice area to stitch the hole closed.

tie for dog


I used this Youtube video to learn how to actually tie it.

Now Rusty is ready for work!

tie for dogtie for dog


lion mane dog costume

How to Make a Lion Mane Dog Costume Version 2

Posted on
Follow Me on PinterestPin It

lion mane dog costume

I made another version of my lion mane dog costume for Rusty because I had bought way too much fake fur and I didn’t know what to do with it. I decided to be a little more adventurous with it this time. I actually used my sewing machine on the fake fur and I sewed fleece. Two things I have never done before. I basically made a doggy ski mask and then sewed layers of pleated fake fur onto it.

I lost all of my pictures of each step :/   But I took some other pictures that will hopefully help out.

Things I used:

How I did it:

1. Take a LOT of measurements the dog’s head and neck. If all else fails drape the fabric around the dog and mark the fabric.

2. Cut a ski mask out of a base material, I choose lycra. I did this in two pieces one to go around the head and one to go around the neck. I then sewed the neck piece to the head piece using a tight zig-zag stitch, since lycra is a bit stretchy. If your fabric snags, try adding tissue paper under the fabric and then tear it away after the seam is created. Also, I didn’t finish the edges of the lycra, mainly because I can be lazy.

lion dog costume

inside of the mane

3. Fuse the velcro into the correct positions. Hopefully you can see what I did in the picture.

4. Next, cut 1 inch to 2 inch wide strips of fur (it depends on the amount of volume and work you want to do, my strips were 2 inches wide) that are about 4 inches longer than the mask.

To cut the fur mark on the back where you want to cut and then use a straight blade like a box cutter or a razor blade to prevent trimming the fur and creating a huge mess. I, unfortunately, didn’t have either one of those and used scissors. BIG MISTAKE fur everywhere! and because the scissors trimmed the fur and created a weird raw edge I needed to fold over the edge and sew it down. Something I wouldn’t have had to do if I had just went out and bought a box cutter.

5. Next step is to pleat and pin the fur to fit the mask. If you don’t know how to pleat, here is a drawing I did that might help. Pleat whichever way is most comfortable to you, I find the knife pleat to be the easiest.

box, inverted, knife pleat

Drawing of different pleats for sewing

lion mane dog costume

pleats

Sew the layers, fur side down on the machine,  onto the lycra mask, starting with the bottom layer first working your way up so the layers don’t get in the way. I did the layer that goes around Rusty’s face going in the opposite direction to create more volume around his face.

6. Repeat for around the neck, I only did 2 layers for that part.

7. Fold fleece into fours, to where there are 4 layers of fleece and draw out an open bottom oval and then cut along your lines.

Lion Mane Dog Costume

lion ears

8. Next, combine two of the pieces and sew as close to the edge as possible, turn inside out and repeat for other ear. Pin onto mask for placement and hand stitch the ears to the mask.

Finally you have a lion mane dog costume!

lion mane dog costume

Manne modeling it

lion dog costume

Manne model shot

lion mane dog costume
lion mane dog costumelion mane dog costume

lion mane dog costume

lion mane dog costume


fingerless gloves

Simple Knit Men’s Fingerless Gloves Pattern

Posted on
Follow Me on PinterestPin It

Homemade presents are the best presents in my opinion because you know the person really thought about the gift and put some time into it. Also, I enjoy making gifts for people too so it’s a win win.

I needed to get a gift for a friend and decided on fingerless gloves. I have a pair and love them.  I have also decided to make a pair of fingerless gloves for my dad because he uses a cane and these will allow him to keep his hands warm and still have the ability to grip the cane. For my friend’s gloves, I decided on a 100% baby alpaca chunky yarn in gray because it’s so soft and warm. It’s also just my favorite yarn to knit and gray goes with everything.

easy pattern/ how I did it:

  1. cast on 32
  2. k2 p2
  3. continue pattern until it reaches desired length  I made mine about 8 inches because I wanted the glove to go all the way under the coat sleeve so no skin was exposed
  4. cast off in the k2 p2 pattern
  5. fold in half lengthwise and whip stitch up the side leaving an opening for your thumb about an inch down from the top

Then you have great fingerless gloves for the late fall and winter!

This pattern can easily be adjusted for men and women. Just reduce or increase the stitches by the pattern of 4 stitches (k2p2)

fingerless gloves

action shot


mushroom

Simple Cross Stitch Patterns made from an App

Posted on
Follow Me on PinterestPin It

I mentioned previously that I found an app for iPhone and iPad. It’s basically pixel art transferred to cross stitch patterns. I did make some simple cross stitch patterns. But, the app doesn’t allow for half stitch, back stitch or knots. It is fun to play with and see just how difficult it is to create a pattern. I’m posting pictures of the ones I made. They are very basic and the graph space doesn’t expand to be a very large canvas. For some reason, some of the patterns I could save with the graph behind it, as a .pdf.  Other patterns, the program had issues with and had me save as an image file resulting in no chart. All in all the program is fun to play with and to get a basic idea of pattern making but it’s not for serious pattern makers. Now I know what I’ll be doing to pass the time when I ride the T.

simple cross stitch pattern


simple cross stitch pattern

Key

background in Mario Brothers

background in Mario Brothers


mushroom