shredded chicken

Shredded Chicken Recipe

Posted on
Follow Me on PinterestPin It

shredded chicken

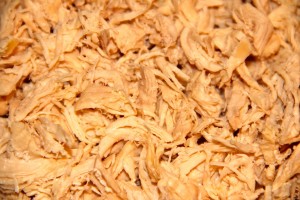
Shredded chicken is a very versatile food. You can cover it in barbecue sauce, taco seasoning or anything else you can think of; there are endless possibilities. This makes it a great meal starter and it’s super easy to make!

How I make shredded chicken:

Serves 1-2

Ingredients:

  • 2-4 chicken tenders or 1-2 chicken breasts, boneless and skinless
  • 1 cup chicken broth

Directions:

  1. Pour broth into a skillet that has a lid, bring to a boil.
  2. Reduce to a simmer and carefully place chicken into the skillet. Cover with the lid.
  3. After 4 minutes, carefully flip the chicken and cook another 3-4 minutes. *I found using tongs much easier than using a turner.
  4. Remove the chicken from skillet and place onto a cutting board. Discard the broth.
  5. With two forks, shred the chicken.
  6. Season as you wish.
  7. Enjoy!

shredded chicken


pancake

Pancake Recipe with Applesauce

Posted on
Follow Me on PinterestPin It

pancake

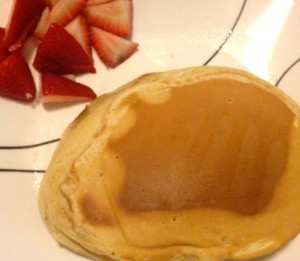
Good morning! Pancakes are delicious and not particularly healthy with the butter and syrup added to it which is why I decided to make mine with applesauce and only a tiny bit of oil instead of a lot of oil.

Makes 6-8 largish pancakes.

Wet Ingredients:

  • 2 eggs
  • 1¼ cup milk
  • 3 Tbsp of applesauce
  • ¼ tsp of vegetable oil

Dry Ingredients:

  • 1½ cups all-purpose flour
  • ½ tsp salt
  • 2 Tbsp sugar
  • 2 tsp baking powder
  • large pinch of cinnamon

Directions:

  1. Whisk all the wet ingredients together
  2. In a separate bowl mix all the dry ingredients together.
  3. Add dry ingredients to wet and whisk until well combined.
  4. On a griddle or a skillet on medium heat, place a couple spoonfuls of batter.pancake
  5. Flip when the top of the pancake starts to bubble.
  6. Leave on for a couple of minutes to cook the other side.
  7. Enjoy!

pancake


bacon tomato grilled cheese

Bacon Tomato Grilled Cheese

Posted on
Follow Me on PinterestPin It

bacon tomato grilled cheeseIt’s no secret by now that I LOVE grilled cheese sandwiches. I probably should have a category just for all the grilled cheeses I have made. I made a bacon, tomato grilled cheese and ate with tomato soup and it was delicious. But how can you go wrong with melted cheese and bacon?

Ingredients:

  • 2 slices of bread
  • 1 slice Muenster cheese
  • 1 slice Colby Jack cheese
  • 2 pieces of bacon cut in half
  • 2 slices of tomato
  • butter

Directions:

  1. Fry up the bacon, I like to get it out of the pan something between limp but still cooked and so crispy that it crumbles easily. 
  2. Heat up the pan to medium heat
  3. Butter one side of each piece of bread
  4. Place one slice of bread butter side down onto the hot pan
  5. Put one slice of cheese followed by the bacon, then the tomatoes and then the other slice of cheese on the bread
  6. Put the other piece of bread on your sandwich, butter side up
  7. Flip the sandwich over, after the bread is a nice brown color on the bottom and the cheese closest to the pan is melted
  8. Remove the sandwich from the pan after the other side is brown and cheese is melted
  9. Enjoy!
*If it seems like your bread is browning before the cheese has melted, try turning down the heat and placing a lid over the pan for a minute to help the cheese melt faster. 

hem shorts

How to Hem Shorts and Pants

Posted on
Follow Me on PinterestPin It

My husband needed his shorts hemmed. They were about an inch too long and it’s almost summer, well it’s May we just aren’t having summer weather yet, his shorts needed to be completed. The measuring and pressing part of hemming them is the most important part of this process. It is with most but usually I don’t pay too close attention but with it I needed to be precise.

Step 1. I needed to figure out what the desired length was and then turn the shorts right side in.

hem shorts

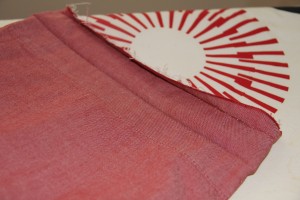
Step 2. Seam rip the bottom of both legs

Step 3. Press the bottom of the shorts and measure and mark desired length.

Step 4. Measure about an inch and a half below your desired finished length and cut off excess fabric.

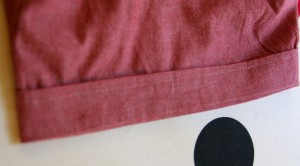
Step 5. Fold over about 1/4 of an inch and press

hem shorts

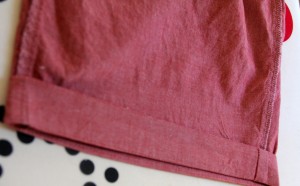
Step 6. Fold over about 1.5 inches and press

shorts, pants, hem, shorten

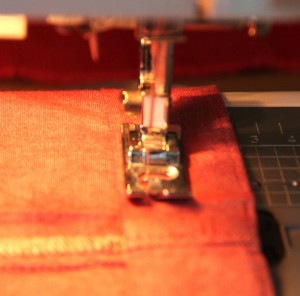
Step 7. Sew your new seam as close to the edge as possible, I moved my needle over to the left and used the foot edge as my guide.

Step 8. Press again, flip right side out and press again.

Step 9. Repeat for the other leg.

hem shorts

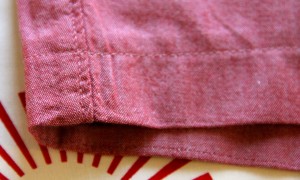
inside finished seam

hem shorts

ready to wear close up

hem shorts

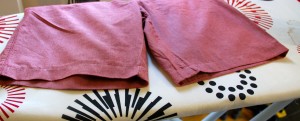
ready to wear


dog tank top

How to Make a Tank Top for a Dog

Posted on
Follow Me on PinterestPin It

dog tank topMy husband was getting rid of an old pair of athletic shorts and I saw them and thought that would be a cute dog tank top. Let’s face it, I have a difficult time coming up with things that aren’t costumes for Rusty. But this tank top is the perfect summer athletic shirt for him. Even if he didn’t seem too impressed with it, I like it.
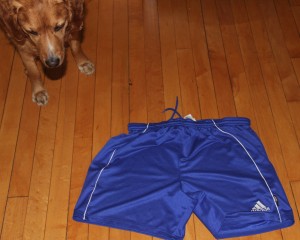
dog tank top

Rusty checking out the shorts.

First thing I did was cut off the top of the shorts right below where the tired elastic and draw string are. Next thing I did was seam rip the two legs apart.
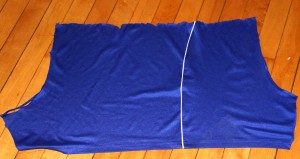
dog tank top

Next, I folded the fabric in half and pinned it closed. Then I took a tank top I had with large arm holes and measured Rusty and it to make sure it would work as a pattern for him and traced the lines for the arm holes and neck.
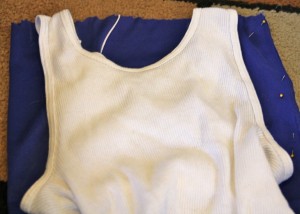
dog tank topThen I cut out the pattern and placed the fabric inside out. I pinned and sewed the shoulder seams together. I used a jersey needle in my sewing machine because I found the universal needle was too rough on the nylon fabric. I then tried it on Manne to check fit and how I wanted to velcro it shut.

dog tank top

Manne the model

It might not be very noticeable in the picture, but I made this tank top to where one of Rusty’s leg has to go through a hole and then his head goes through the neck hole and it velcro to make the other leg hole and close the shirt. I did it this way so couldn’t shake it off.

Next I folded over and pressed all unfinished edges, and then folded them over again to encase the raw edges and sewed the seam.

To finish I took some fusible velcro, cut to the right size, and ironed them on to correct spots. I used a pressing cloth for this because the iron needed to be set to a steam setting. All that there was left for me to do was to have Rusty model it.


dog tank top

Model shot

dog tank top

He’s about had it.

dog tank top

He’s over it.


Margarita Recipe

Posted on
Follow Me on PinterestPin It
Happy Cinco De Mayo!

I hope everyone is having a great Sunday. Enjoy a cucumber margarita or if you prefer a regular one try this margarita recipe, it’s for an individual drink:

Ingredients:

  • 2oz tequila
  • 2oz simple syrup, the recipe for this can be found on my cucumber margarita page
  • 2oz lime juice
  • ice
  • lime wedge for garnish

Frozen:

1. Combine all ingredients plus around 4 ice cubes and blend.

2. Pour into salted rim cup and garnish with lime wedge

On the rocks:

1. Pour all ingredients over 3 ice cubes in a salted rim glass

2. Stir to mixture

3. Enjoy!


bleach a shirt

How to Bleach a Shirt

Posted on
Follow Me on PinterestPin It

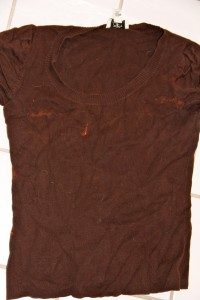
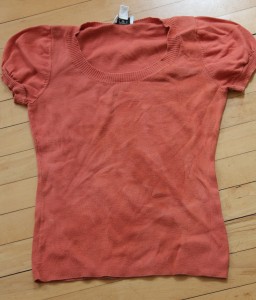
I have this sweater style t-shirt that I accidentally got some bleach on. It’s disappointing but not surprising that I managed this. I didn’t want to go around with a dark brown shirt with a few random orange spots and I also didn’t want to throw the shirt away. So, I decided to bleach my shirt in trying to make the entire shirt orange.

bleach a shirt

This to ———->bleach a shirt


Here’s what I did.

Materials:

  • bleach
  • water
  • shirt/item you want bleached
  • rubber gloves
  • clothing you’d be ok if bleach accidentally got on
  • hair tie, bobby pins to keep hair out of your face

Instructions:

  1. Make sure the item you want bleach is clean
  2. In a stainless steel sink or something white, I used a small white trash can, do a mixture of ¼ cup bleach to 2 quarts warm water, the warmer the water the more bleach the item will absorb. I also did this in my tub if some of the bleach water splashed around.
  3. Add your item and let it soak for about 20 minutes. I let it soak for 30 minutes because I went and watched TV while I waited and checked/stirred it on commercial breaks.
  4. In the tub or sink completely rinse out item and wash in your machine separately,  following tag instructions. 

Now I have a new shirt and I didn’t have to pay for it! I feel like the picture doesn’t do the pretty pumpkin shade of orange justice.


Twice Baked Potato Recipe

Posted on
Follow Me on PinterestPin It

twice baked potato


Twice baked potatoes are amazing. Enough said, here’s how I make mine.

Ingredients:

  • 4 potatoes, the ones that are good for baking not the red ones
  • olive oil to taste
  • salt to taste
  • black pepper to taste
  • 3-4 cloves of garlic, minced
  • 1/2 cup mixed herbs
  • 1 cup cheese of your choice, I do mozzarella
  • sour cream to taste
  • butter to taste

OR

  • 4 potatoes
  • salt and pepper to taste
  • 3-4 cloves of garlic minced
  • 1 cup cheese of your choice, I use cheddar
  • A lot of ranch dressing, to taste

Directions:

  1. Pre-heat oven to 400 degrees
  2. Scrub potatoes well, you need clean skins
  3. Pat dry with a paper towel
  4. Pierce with sharp object several times,  I use a fork
  5. Place in roasting tin or cookie sheet with a lip and drizzle with olive oil until potatoes are well coated, salt to taste
  6. Place tin on an upper shelf and roast for about 1 hour or until cooked, if you’re using a convection oven the time is about 40 minutes because it has a smaller small to heat up.
  7. While potatoes are in the oven, combine the rest of the ingredients to taste, set aside until the potatoes are done
  8. Carefully remove and cut each potato in half, lengthwise
  9. With a spoon, remove the potato flesh but be careful not to rip the skin and put into the bowl with the rest of the ingredients and mash until well combined
  10. Pile flesh back into the skins and return the potato halves to the roasting tin, sprinkle with cheese
  11. Return the tin to the oven for 10-15 or until the tops of the potatoes are light golden brown and cheese has melted
  12. Remove from the oven and serve immediately.
  13. Enjoy!

twice baked potato


ceviche

Ceviche Recipe

Posted on
Follow Me on PinterestPin It

ceviche

I love ceviche! It’s one of those fish dishes that got me on the road to liking fish and seafood. This is one of those recipes however where you don’t have leftovers because the acidity in the juices will continue to cook the fish turning it into mush. Whatever isn’t eaten should be thrown away which is why you serve it with other things like guacamole.

Prep time: How fast can you chop?

Cook time: ~ 40 minutes

Ingredients:

  • 1 tilapia fillet, chopped into small cubes
  • 1/2 cup of fresh squeezed lime juice
  • 1/2 cup of fresh squeezed lemon juice
  • 1/2 red onion, finely diced
  • 1-2 chopped fresh seeded vine tomatoes
  • 1 chopped bell pepper, no color preference
  • 1/2 jalapeño pepper, chopped and 1/4 of the seeds (to taste, want heat? add more seeds! don’t like things hot? add only a couple of seeds)
  • Salt to taste
  • Cilantro to taste, stem removed and chopped

Will be served with:

Directions:

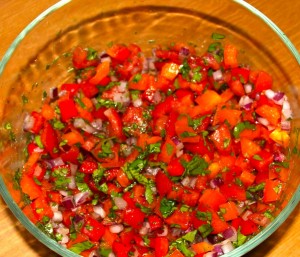
1. In a glass bowl with lid, like a Pyrex, combine equal parts tomatoes, onion, and bell pepper. Next add the jalapeño. Mix well with a spoon.

ceviche

2.  Add cilantro and mix. Then add the salt to taste. The salt is to take some of the sweetness away from the lemon and lime juice.

3. Add the tilapia and mix well.

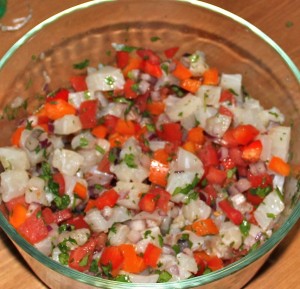
4. Add the lime and lemon juices making sure to throughly coat the fish. The acidity in the juice is what cooks the fish. Stir and cover with lid.

ceviche

5. Place the bowl in the fridge for about 40 minutes, stirring halfway between. The fish should go from clearish to white.

6. Enjoy! I like to eat my ceviche by scooping onto tortilla chips with guacamole on the side.

ceviche


Oven Baked Salmon Recipe

Posted on
Follow Me on PinterestPin It

As a kid I use to hate all types of fish. I’m still not a huge fan of it but I do like oven baked salmon. Here’s how I do it:

Ingredients:

  • salmon fillet
  • olive oil
  • lemon juice
  • salt and pepper
  • dill

Directions:

1. Pre-heat the oven to 450°

2. Lightly coat the bottom of the baking dish in olive oil, I like to use my Misto

3. Place the salmon in the dish, scale side down

4. Squirt a couple of lemon wedges or pour a couple of tablespoons of lemon juice over the salmon

5. Salt and pepper the salmon to taste

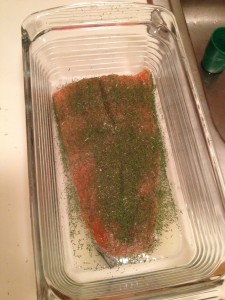
6. Put a heavy coating of dill on the salmon

oven baked salmon

7. Place in oven and bake for 9-15 minutes. You always want to make sure it’s cooked all the way, should flake easily, but at around 9 minutes it’s done and tastes more like fish but at around 13-15 minutes it’s more of a steak consistency for me which I prefer.

8. Enjoy!

– If using a convection oven, it will cook a little faster.

– If using a regular oven, the salmon should be baked on the top rack! Otherwise, it will take a lot longer to bake.