Favorite May Day Crafts

Posted on
Follow Me on PinterestPin It

Growing up we celebrated May Day, which is May 1st, and we put a lot of effort into our baskets we would create. If you don’t know what May Day is click here. Basically, it is where a person creates a little basket with flowers or candy inside and they put it on the door steps of their sweetie, ring the bell and run! If the person answering the door catches the basket giver, the give them a kiss and send them on their way. I think it is a cute tradition, even if you feel a little silly doing it.

Crafts:

 DLTK’s Crafts for Kids has a lot of cute May Day craft ideas to do with children

TLC also has a list of kid friendly craft ideas.

Martha Stewartmay day
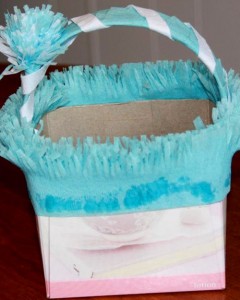
, of course, has a cute and easy take on a May Day Basket.


Here are a couple non-traditional crafts for May Day:

tiny_baskets_1_mediumThese are adorable knit baskets that would be perfect.The pattern is by Vicki Mikulak and can be found on Ravelry.


May Day


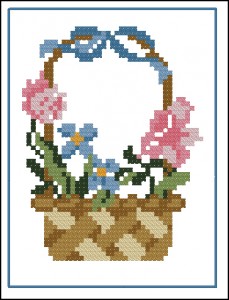
This is a cute and easy cross stitch basket pattern for May Day.


Here are a couple of options if you’d like to buy instead of create:

may day


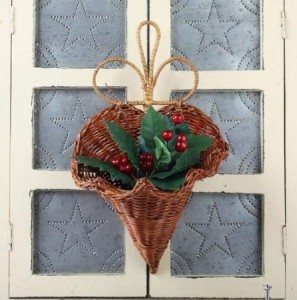
The Etsy store Heartmade Treasures is selling this beautiful and traditional May Day Basket.


il_570xN.372182922_sebw


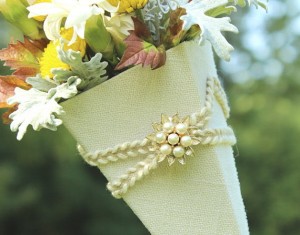
The Etsy Store ElsieAStyle has this elegant basket for sale.


may day


This basket sold at Amazon would be a cute May Day Basket, just add flowers.


cucumber margarita

Cucumber Margarita Recipe

Posted on
Follow Me on PinterestPin It

cucumber margarita Cucumber margaritas are delicious and refreshing. I had my first one last summer on vacation and decided I needed to figure out how to make them at home.

Makes 2 large cucumber margaritas.

Ingredients:

  • 1 large cucumber, peeled and cut into small pieces, plus more for garnish
  • ½ cup fresh lime juice, I use this juicer
  • ½ cup 100% Agave tequila blanco
  • ½ cup agave or simple syrup (recipe at bottom of the page)

Directions:

cucumber margarita

1. Place all ingredients into a blender. If you’d like it frozen like I do, add about 10-12 ice cubes.

2. Blend until smooth, if frozen pour into cups and serve, if serving on the rocks, pour over ice through a strainer.

3. Garnish with a cucumber slice.

4. Enjoy!

cucumber margarita

Simple Syrup:

  • 1 cup sugar
  • 1 cup water
  • 1½ tsp fresh lime juice

1. Place all ingredients in a small sauce pan on medium to high heat

2. Stir constantly until the sugar is completely dissolved.

3. Remove from heat and allow to cool

4. Store in the fridge


ceviche

Ceviche Recipe

Posted on
Follow Me on PinterestPin It

ceviche

I love ceviche! It’s one of those fish dishes that got me on the road to liking fish and seafood. This is one of those recipes however where you don’t have leftovers because the acidity in the juices will continue to cook the fish turning it into mush. Whatever isn’t eaten should be thrown away which is why you serve it with other things like guacamole.

Prep time: How fast can you chop?

Cook time: ~ 40 minutes

Ingredients:

  • 1 tilapia fillet, chopped into small cubes
  • 1/2 cup of fresh squeezed lime juice
  • 1/2 cup of fresh squeezed lemon juice
  • 1/2 red onion, finely diced
  • 1-2 chopped fresh seeded vine tomatoes
  • 1 chopped bell pepper, no color preference
  • 1/2 jalapeño pepper, chopped and 1/4 of the seeds (to taste, want heat? add more seeds! don’t like things hot? add only a couple of seeds)
  • Salt to taste
  • Cilantro to taste, stem removed and chopped

Will be served with:

Directions:

1. In a glass bowl with lid, like a Pyrex, combine equal parts tomatoes, onion, and bell pepper. Next add the jalapeño. Mix well with a spoon.

ceviche

2.  Add cilantro and mix. Then add the salt to taste. The salt is to take some of the sweetness away from the lemon and lime juice.

3. Add the tilapia and mix well.

4. Add the lime and lemon juices making sure to throughly coat the fish. The acidity in the juice is what cooks the fish. Stir and cover with lid.

ceviche

5. Place the bowl in the fridge for about 40 minutes, stirring halfway between. The fish should go from clearish to white.

6. Enjoy! I like to eat my ceviche by scooping onto tortilla chips with guacamole on the side.

ceviche


Oven Baked Salmon Recipe

Posted on
Follow Me on PinterestPin It

As a kid I use to hate all types of fish. I’m still not a huge fan of it but I do like oven baked salmon. Here’s how I do it:

Ingredients:

  • salmon fillet
  • olive oil
  • lemon juice
  • salt and pepper
  • dill

Directions:

1. Pre-heat the oven to 450°

2. Lightly coat the bottom of the baking dish in olive oil, I like to use my Misto

3. Place the salmon in the dish, scale side down

4. Squirt a couple of lemon wedges or pour a couple of tablespoons of lemon juice over the salmon

5. Salt and pepper the salmon to taste

6. Put a heavy coating of dill on the salmon

oven baked salmon

7. Place in oven and bake for 9-15 minutes. You always want to make sure it’s cooked all the way, should flake easily, but at around 9 minutes it’s done and tastes more like fish but at around 13-15 minutes it’s more of a steak consistency for me which I prefer.

8. Enjoy!

– If using a convection oven, it will cook a little faster.

– If using a regular oven, the salmon should be baked on the top rack! Otherwise, it will take a lot longer to bake.


Fried Caprese Salad Recipe

Posted on
Follow Me on PinterestPin It

fried caprese salad

Oh yes, this is another fried recipe and another caprese salad recipe combined into one, fried caprese salad. I wanted something fried and greasy but I also wanted to feel like I was attempting to be healthy. :/ So I made caprese salad and fried it. It was pretty good and satisfied my cravings but it’s not something I would make very often, just when I’m feeling the need for healthy and fattening at the same time. Does that make sense to anyone but me?

Ingredients:

  • tomato slices
  • mozzarella slices
  • fresh basil leaves
  • balsamic dressing
  • olive oil
  • bread crumbs
  • egg wash (1 egg 1/2  milk, whisked together)

Directions:

  1. In a small skillet, heat up about a tablespoon of olive oil on medium heat.
  2.  Stack the basil then mozzarella on top of a tomato slice.
  3.  Carefully pick the stack up and dunk in the egg wash.
  4. Coat in breadcrumbs.
  5.  Place in heated skillet, fry until bottom side is a golden to dark brown and flip to other side and fry.
  6. Place on plate and drizzle with balsamic dressing.
  7. Enjoy!


How to Make a T-Shirt into a Tote Bag

Posted on
Follow Me on PinterestPin It

tote bag

totebagI had this old University of Illinois shirt that I got on Ebay when I was a sophomore there. I wore it a few times and it was a fantastic and soft shirt. But it was old and didn’t fit me quite right. I first tried to make it a more fitted shirt and that was a fail. The weird seam line above the chest just made it look like a ruined sports jersey or something. So, I decided to turn it into a tote bag. Now I just need to decide what to do with the sleeves. I’m thinking Rusty might need some leg warmers or a hat.

Materials Needed:

  • Shirt with design you love but don’t really want to wear
  • Nylon Webbing or durable Ribbon for the straps, I used this ribbon.
  • Sewing Machine
  • Matching thread

Directions:

tote bag

Measure and Mark


1. Measure and mark where on your shirt you’d like to cut on the top and bottom of the shirt. I decided to make it a little easier on myself and re-use the side seams of the shirt. My finished bag was 15″x 14″

To cut, I used regular fabric scissors for the top and pinking shears at the bottom. If you don’t have pinking shears, cut with your fabric scissors and finish the raw edge with a zigzag stitch.

2. With right sides together, pin the bottom and sew with 5/8″ seam. Press. Now, if you kept the side seams intact, you should have a pillow case with three sides sewn.

3. To finish the opening of the bag, roll the hem about 1/4″ all the way around and press to keep it in place. Repeat, to incase the raw edge. Sew to finish the edge.

4. Cut 2 pieces of ribbon or webbing to your desired length, I cut mine to be 36″ long.

5. Place and pin where you’d like your straps being careful not to twist them as you’re placing them. I put mine on the inside of the bag a couple of inches down.

tote bag

kind of difficult to see, but it’s a rectangle

6. Sew the straps on, if you’re using webbing make sure you have the correct needle, in a rectangle, this is a little bit of added strength to the straps and bag. Press.

7. Enjoy! I think I’ll take mine to work and light grocery shopping , maybe one I’ll add a zipper to it. And it’s washable!


tote bag


pin cushion lid

Decorating a Glass Jar with Pin Cushion Lid

Posted on
Follow Me on PinterestPin It

pin cushion lid

I decided I needed something new to hold my buttons. So I took a jelly jar and removed the label. It took a lot of soaking and scrubbing that thing was really stuck on there. Then I got out my rainbow of permanent markers, beads and hot glue and decided to get to work, free hand style. FAIL this is how it started to turn out and I was not impressed. My lack of patience got the better me, again.


pin cushion lid

FAIL :(

So I removed the beads and got out some rubbing alcohol and cotton balls and removed the marker. The silver was a bit stubborn but it eventually came off. Now, it was time for some planning.

First I decided to create a design on my computer of what I wanted my jar to look like. But Photoshop kept crashing when I went to print the design so I said the heck with it, and hand drew the design on. It’s not perfect but I like it.

For the pin cushion lid. I just took a scrap piece of thick fabric and some Fiber Fill  stuffing and used Mod Podge to glue the fabric over the fill to the lid. I did have to fold over the fabric a bit along the edges but some better planning and correct cutting would fix this issue. The fabric was a little to long, so I cut off the excess from the bottom of the lid after the glue had dried and I now have my button jar with a pin cushion top!

pin cushion top


drawstring backpack

How to Make a DrawString Backpack

Posted on
Follow Me on PinterestPin It

drawstring backpack

I needed something lightweight and easy to carry on my long walks with Rusty. I decided to go with a drawstring backpack. It’s big enough to hold everything I need and keeps my hands free. I am using leftover material from my tree skirt and had dyed awhile ago.

Materials:

  • (2) 17″ X 15″ rectangles of fabric
  • (2) 60″ pieces of ribbon, or cording would work great as well
  • safety-pin
  • sewing machine
  • matching thread
  • iron and board

drawstring backpack

Instructions:

1. After you have measured and cut your fabric, I think mine is a cotton/polyester blend, figure out which end of each piece you want to be the top or opening of your bag. Fold over and press a tiny bit of fabric, ~¼”, and sew. Repeat with the other piece. This is to take care of the raw edge at the opening of your bag.

drawstring backpack

2. Next, take what you have just sewn and fold over about an 1½” and press. Then sew on top of the stitch line in Step 1. This will create a tube for your ribbon to go through.

3. With right sides together, pin the rectangles and stitch with a 5/8″ seam all along the three unstitched sides, starting and stopping where the tube begins. Back stitch at the beginning and end.

4. Attach a safety-pin to an end of your ribbon, and thread the ribbon through the tube on one side of the bag. Repeat for the other side. The safety-pin just makes this process easier.

drawstring backpack

5. Make sure that both pieces of ribbon are of equal length on each side of the bag. With right sides still together, seam rip up the bottom corners of the bag about an inch. Place the ribbon, inside the bag and through the hole you just ripped open. Stitch the hole closed, securing the ribbon to the bag.drawstring backpack

6. Next to take care of the raw edges, zigzag stitch all along the three stitched sides to the bag as close the stitch line as possible. This also double secures your ribbon at the bottom of the bag. Trim the excess fabric close to the zigzag stitch.


Now I have the perfect and unique bag for our walks to work! So excited to use it.


7 Layer Dip Recipe

Posted on
Follow Me on PinterestPin It

A party favorite of mine is 7 Layer Dip. Granted mine has eight layers, sometimes nine but 7 layer dip sounds better than nine layer dip to me.

Here is what is needed, but amount depends upon how big of a plate you’re putting it on.

  1. Refried Beans
  2. Guacamole 
  3. Sour Cream
  4. Salsa, I like to use mild
  5. Tomatoes, chopped
  6. Green Onions chopped
  7. Ground beef with taco seasoning (sometimes I omit this)
  8. Shredded Cheese, I prefer cheddar and more specifically a blend of mild and sharp cheddar
  9. Cilantro, chopped

On a plate spread and layer each ingredient in order as it is listed above. Serve with a bag of tortilla chips.

Enjoy!


knit mug cozy

Slip Stitch Knit Mug Cozy Revisited

Posted on
Follow Me on PinterestPin It

I decided to attempt my slip stitch knit mug cozy pattern again because I had so many problems the first time. Well, this one didn’t go according to plan either. My impatience got the better of me, resulting in this:

mug cozy

The pattern is slightly off. Using the yarn left over from my slip stitch belt, 100 % wool Crystal Palace Yarn, with size US 3 (3.25mm) needles, I decided to cast on 70 stitches and do the pattern

Row 1: P3 K2

Row 2: K1 S1 K1 P2

Repeat till desired length, I did 33 rows.

Cast off like it was an odd row so P3 K2.

Sew on button and loop.

But somewhere on Row 17 I noticed I combined two stitches leaving me with only 69 stitches on my needle and instead of  doing the smart thing and undoing my stitches until I found the problem, fix it, and move on, I decided I was too impatient and it was an amazing idea to just cast on another stitch at the end of the row. Wow I was wrong but I  knew I was wrong and did it anyways which makes it even worse. But that’s why my pattern is off. I do like the pattern and I do like my dressed up coffee mug in the morning. I also believe that this could be a great pattern for a cuff/bracelet.

The 70 stitches compared to the 75 in the first one I did it working out a lot better. It fits more of my coffee mugs!

knit mug cozyknit mug cozy


knit mug cozyknit mug cozy