French Tip Manicure at Home

Posted on
Follow Me on PinterestPin It

french tip manicure

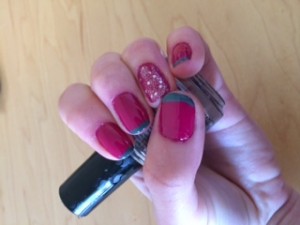
I wanted to do a French tip manicure at home but I don’t have the steadiest of hands when it comes to painting. I was looking at Chloe’s Nails Blog and liked that she uses tape to get the designs she wants and was inspired to find something similar to achieve my desired effect. I decided to try band-aids. But they have to the plastic or sheer type because the polish will soak through the fabric band-aids. For my first couple of tries, I am pretty pleased with how my nails turned out and decided to share what I did.

Things you need:

  • base coat
  • main color
  • tip color
  • top coat
  • band-aid
  • time
  • maybe nail polish remover

How:

  1. Clean and prep your nails by filing, pushing back cuticles, etc
  2. Apply base coat and allow to dry.
  3. Next apply a couple of coats of the main color to get your desired color.
  4. Wait a few minutes and then apply a thick layer of top coat.
  5. Now you’ll want to wait awhile for these coats to dry, so catch up on a show or something. Also, while they are drying take out your band-aids and put the sticky side on your palm a couple times in order to take away some of the stickiness so it doesn’t pull up your polish.
  6. After your polish has dried, carefully place the band-aid towards the tip of the nail, just exposing the area you want to paint.
  7. Paint the tip. Carefully and quickly pull the band-aid off.
  8. Continue on the rest of your nails, you might need more then one band-aid to avoid a mess.
  9. Next clean up your nails. I like to use an angled craft/paint brush dipped into nail polish remover. It’s much easier for me to be more precise around my nails with a paint brush.
  10. Apply top coat and wait for it to dry.
  11. Enjoy!

My product list:

french tip manicure


reflective dog leash

How to Sew a Reflective Dog Leash, Revisited.

Posted on
Follow Me on PinterestPin It

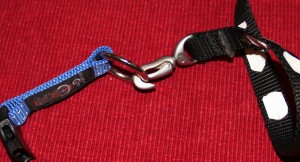
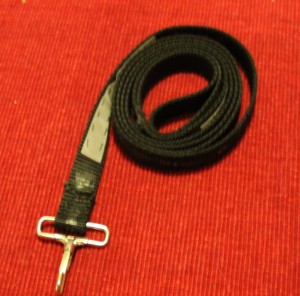
Awhile ago I made a reflective dog leash for Rusty. It served  us well but Rusty got a new collar and the buckle on the leash was too small for the ring. So it was time to redo his leash. I’m using the same leash with  nylon webbing and a clip I picked up from Ragged Mountain, a store in North Conway, NH.

reflective dog leash

First thing I did was seam rip the old buckle off and remove the pieces of reflective tape that remained.

Next I hand stitched the new clip in place. I decided to sew by hand because the webbing is very thick and I don’t know how my machine would handle it. I don’t have a lot of needles to pick from, so I went with a crewel hand needle. I’m not even sure why I have these but they were in my sewing kit. The webbing is thick and stiff so it took awhile to sew.

I then cut 2, ½inch wide by 4 inch long reflective fabric tape to replace the old tape. I then stitched one on the bottom of the leash near the clasp and one near the handle of the leash. My stitching for the reflective tape is terrible. I’d like to say that I am a perfectionist and will redo it but I know I won’t. Feel free to judge. 🙂

reflective dog leash

Now it’s time to take Rusty out on a walk and enjoy the new leash.


rit dye

How to use RIT dye in the Sink

Posted on
Follow Me on PinterestPin It

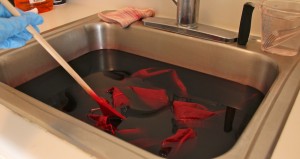
I have this shirt that I love the way it fits but I managed to get a stain on the sleeve. I have a couple of RIT dye just sitting in a drawer begging to be used. I decided to go with the wine color. It’s a pretty color for a button up shirt. I have to use the sink to dye because my apartment upright machines are plastic and I’m slightly terrified I’d stain them. My stainless steel kitchen sink works out perfectly, it won’t stain and I don’t have to be in the basement of my building.

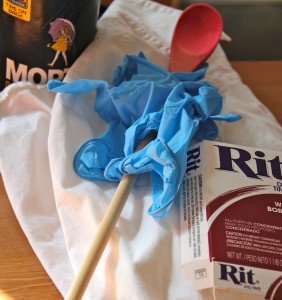
Things I used:

  • Hair tie – always need to pull your hair back
  • Throw away clothes –  chore clothes, clothes you don’t care if they get stained
  • Towel – again one you don’t care if it gets dyed
  • Gloves
  • RIT dye
  • Clothes to dye
  • Something to stir the dye bath
  • Approximately 1 cup of salt
  • Measuring cup with something to stir that will get dye on it like stainless steel spoon

rit dye

Notes:

  • Wear gloves the entire time! Yes, they’re uncomfortable and probably don’t fit right but it’s better than stained hands.
  • I don’t care what the package says. I always do one packet of dye per article of clothing. I feel it gets the best color that way.
  • Put some music song to get you from getting bored while stirring the dye bath.

Directions:

  1. Put your gloves on and mix 2 cups hot water and one packet of dye.
  2. Put stopper in and fill sink with hot water so there’s enough water for the clothes to freely move around in the sink. Add the 1 cup of salt. I didn’t measure it, I just guessed.
  3. Add the dye to the sink and stir.
  4. Start your microwave or kitchen timer to 30 minutes. I actually did 20 minutes but you’re going to leave the clothe in the dye bath until the desired color is achieved.
  5. Add clothes, make sure it is completely soaked and start stirring. Stir the entire time.rit dye
  6. When time is up, let the water out (yay for gloved hands) of the sink and rinse the clothes. You want to rinse in warm water and gradually going to cold until the bleeding stops.
  7. Wash separately in warm water and dry as usual. Also, rinse and wash separately the towel used to clean up.
  8. Clean the counter and sink with bleach.
  9. Enjoy your newly dyed clothes!

rit dye